16.2 Setting Up Workflows to Start Automatically
Workflows are automatically started when a user starts a provisioning request by requesting a resource. In addition, the Identity Manager User Application driver listens for events in the Identity Vault and, when configured to do so, responds to events by starting the appropriate provisioning workflows. For example, you can configure the User Application driver to automatically start a provisioning workflow if a new user is added to the Identity Vault. You configure the User Application driver to automatically start workflows using Identity Manager policies and rules.
16.2.1 About Policies
You can use filters and policies with the User Application driver in the same way that you can with other Identity Manager drivers. When an event occurs in the Identity Vault, Identity Manager creates an XML document that describes the event. The XML document is passed along the channel to the connected system (in this case, the connected system is the User Application). Filters and policies associated with a driver allow you to define how to respond to the event, and in the process transform that XML document to the format that is expected by the connected system. Identity Manager provides several categories of policies (for example, Event Transformation, Command Transformation, Schema Mapping, Output Transformation) that you can apply, in a prescribed order, to transform the XML document.
This section provides an example of starting a workflow based on events in the Identity Vault. Although any of the policies can be used to trigger a workflow, the example presented in this section demonstrates the easiest and most useful method.
When you create a User Application driver, an Event Transformation Policy is created for use by the driver. The Event Transformation Policy is responsible for creating the XML document that is processed by the remaining Subscriber channel policies.
NOTE:Do not change the Event Transformation policy that was created when the User Application driver was created. The DN of this policy begins with Manage.Modify.Subscriber. Changing this policy might cause the workflow process to fail.
An empty Schema Mapping Policy is also created. You can use this policy as a starting point for triggering a workflow, based on events in the Identity Vault.
16.2.2 Using the Policy Builder
The easiest way to automatically start a workflow based on an Identity Vault event is to use the Policy Builder. The Policy Builder provides a Start Workflow action that simplifies the process of setting up a workflow to start automatically.
-
In iManager, expand the Role, then click .
-
Specify a driver set.
-
Click the driver for which you want to manage policies. The opens.
-
Click the policy that you want to edit.
-
Click to open the Policy Builder.
-
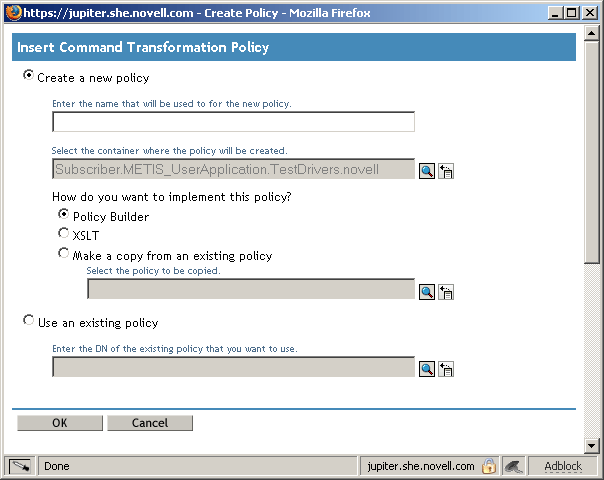
Click .
-
Type a name for the policy.
-
Click .
-
Click .
iManager displays a screen that lists defined policy rules.
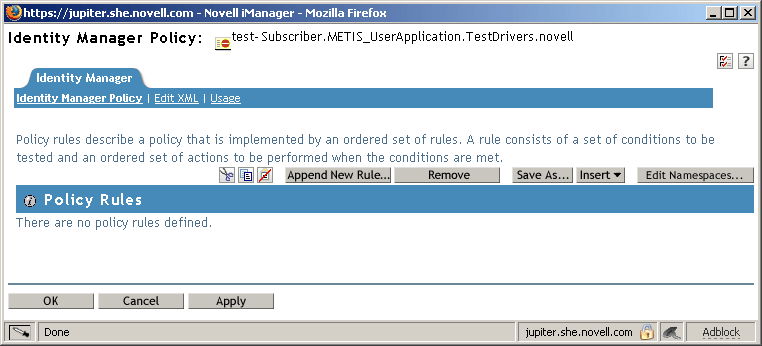
-
Click .
iManager displays the .
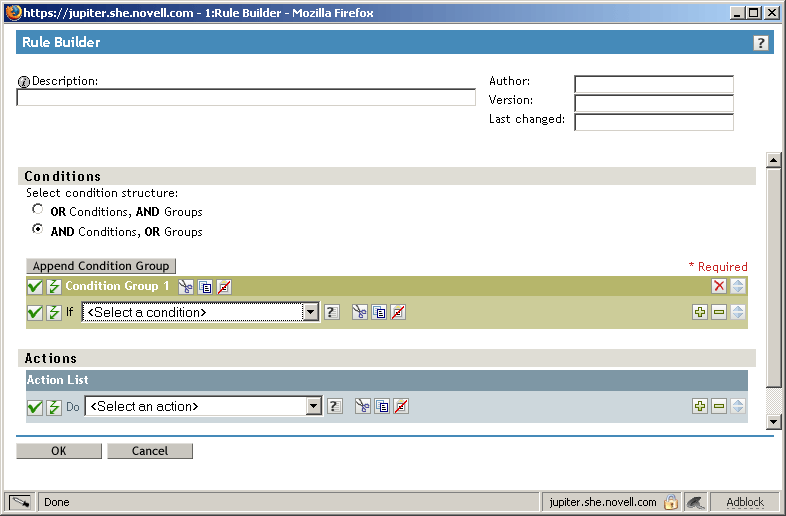
-
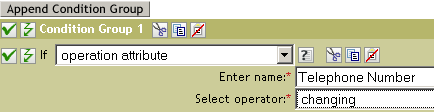
Type a for the rule.
-
Select for the condition in

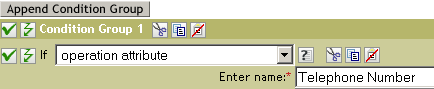
-
Use the button for the field to specify the Identity Vault attribute that you want to use to start the workflow.
For example, to start a workflow when a telephone number changes, select the attribute.
-
Use the list to select the operator to use to test the specified attribute.
For example, to start a workflow when a telephone number changes, select .
-
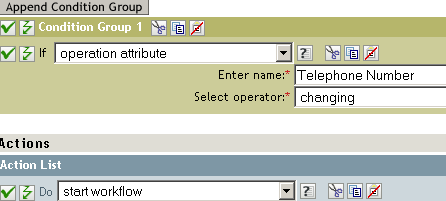
Select from the list.
-
Use the Object Selector in the field to select the provisioning request definition that you want to be executed when the condition is true.
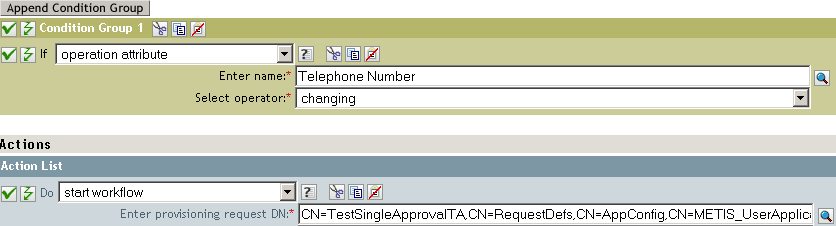
The and are filled in automatically.
-
Type the password for the User Application administrator in the field.
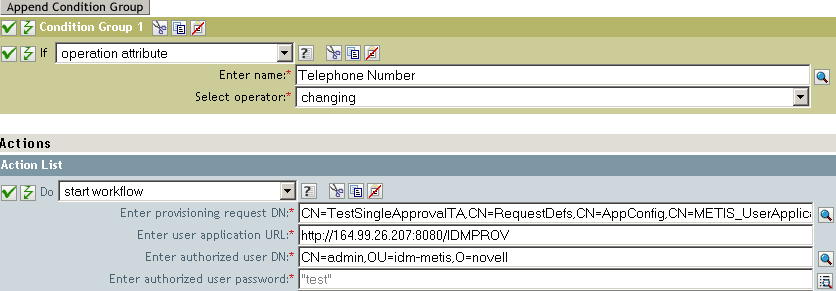
We recommend using a named password, because typing a password in clear text is a security risk. See “Named Password” in the Policies in iManager in Identity Manager 3.5 guide.
-
In the field, specify the DN of the recipient of the workflow in LDAP format.
The expression for the recipient DN must evaluate to a DN that conforms to RFC 2253 format (in other words, cn=user,ou=organizational unit,o=organization). For example, you can click the button in the field to create the following expression to pass the recipient’s DN to the workflow:
Parse DN("qualified-slash","ldap",XPath("@qualified-src-dn"))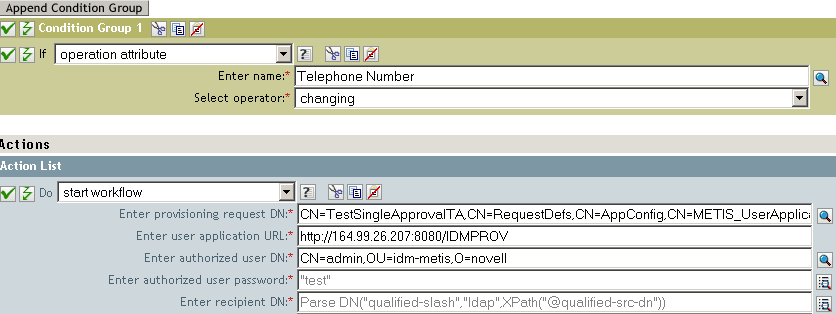
-
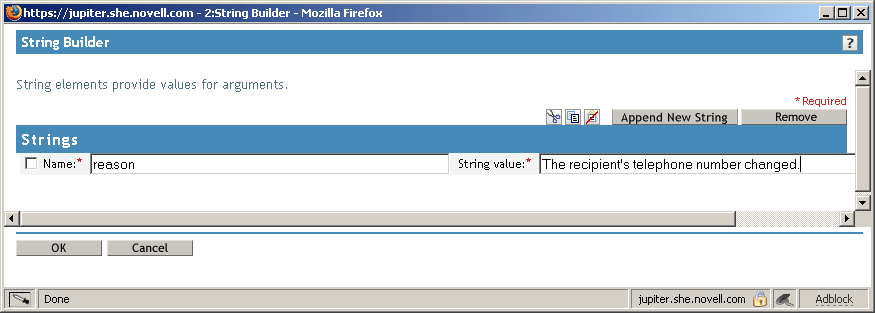
Specify the arguments for the workflow in the field.
You must use this field to specify the attribute, which is required by the workflow. You can click the button in the field to specify the attribute and create a value for the attribute (for example, “the recipient’s telephone number has changed”).
-
Click to close the Rule Builder.
-
Click to close the Policy Builder.
-
Click to close the Policies screen.
-
Make sure that you add any attributes needed by the workflow to the filter.
In the example described in this procedure, you would need to add and to the filter. For information about adding objects to the filter, see “Controlling the Flow of Objects with the Filter” in the Policies in iManager in Identity Manager 3.5 guide.
16.2.3 Using the Schema Mapping Policy Editor
The Schema Mapping Policy Editor provides an alternative method of starting a workflow automatically, by mapping Identity Vault attributes to workflow runtime data. To get you started, the User Application driver provides an empty policy to edit. Workflow runtime data is available from the workflow definition template described in Section 17.0, Configuring Provisioning Request Definitions.
When a workflow is created, the following global attributes are created in the Identity Vault:
-
<workflowName> _StartWorkflow. This attribute starts a workflow.
-
<workflowName> _recipient. This attribute accepts runtime data needed by the workflow from the Identity Vault.
-
<workflowName> _reason. This attribute accepts runtime data needed by the workflow from the Identity Vault.
Two other attributes always exist and accept runtime data needed by the workflow from the Identity Vault:
-
AllWorkflows:reason
-
AllWorkflows:recipient
Ensure you have the following information before you set up a workflow to start based on an event in the Identity Vault:
-
The name of the Identity Vault attribute that you want to use as a trigger for the workflow
-
The name of the workflow that you want to start. All workflows include a special attribute named <workflowName>_StartApprovalFlow. You configure a workflow to start automatically based on an event in the Identity Vault by mapping the desired eDirectory attribute to the <workflowName>_StartApprovalFlow attribute for the workflow.
To set up a workflow to start based on an event in the Identity Vault:
-
In iManager, click the link under Identity Manager in the iManager navigation tree.
The Identity Manager Overview page displays. This page prompts you to select a driver set.
-
Click ; then click . The Identity Manager Overview page displays, with a graphic that depicts the drivers in the currently selected driver set.
-
Click the large driver icon for the User Application driver:
The Identity Manager Driver Overview displays:
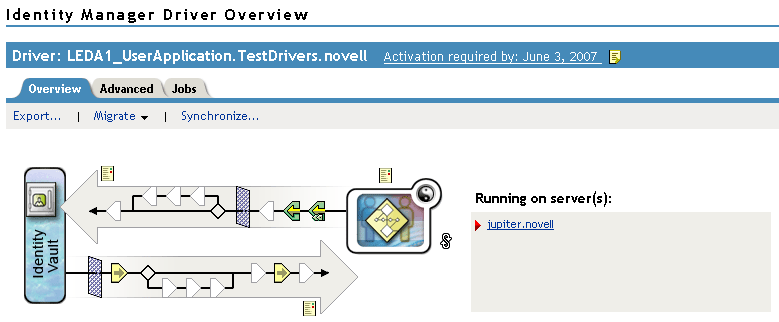
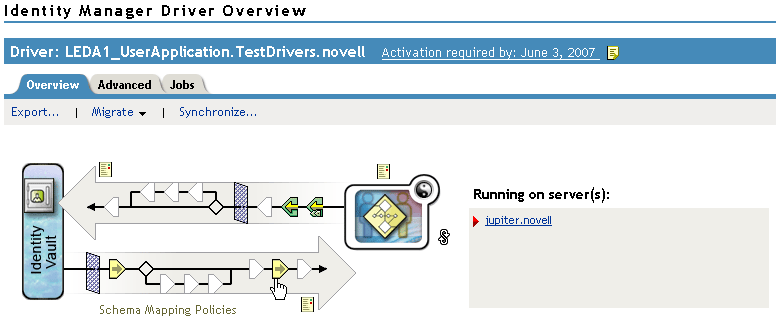
The top horizontal arrow represents the Publisher channel (which is not used in the User Application driver) and the bottom horizontal arrow represents the Subscriber channel. As you pass the mouse pointer over an object in the graphic, a description of the object displays:
-
Click the icon. The dialog box displays:
-
Click . The Identity Manager Policy dialog box displays. (This dialog box maps Identity Vault classes to application classes, but this procedure uses it to map eDirectory attributes to global User Application attributes.)
-
Click . A message displays informing you that the driver must be stopped in order to read the schema, then restarted. It might take about 60 seconds to refresh the schema. This step reads the latest set of workflow information in preparation for the following step, which specifies the information to move from the Identity Vault to the workflow that will be started.
-
Click to refresh the schema. A message displays when the schema refresh is completed.
-
Click to close the schema refresh message. You are returned to the Identity Manager Policy dialog box.
-
Click . The Identity Manager Schema Mapping Policy Editor displays.
The drop-down list contains all eDirectory attributes.
The drop-down list contains the attributes in all active Workflows. Attributes in the list are prefaced with either AllWorkflows (meaning that the attribute applies to all workflows) or the name of a specific workflow. If you want the same eDirectory attribute (for example manager) to be mapped to the manager attribute for all workflows, map manager to Allworkflows:manager. If you want a different eDirectory attribute (for example, HRmanager) to be used for a specific workflow, map the eDirectory attribute to the specific workflow attribute (for example BusinessCardChange:manager).
Attributes that have been mapped are displayed side-by-side in the and columns.
In the following steps, map the eDirectory attribute that you want to use to start the workflow to the _StartWorkflow attribute for that workflow. If additional eDirectory attributes are expected by the workflow, you should also map those attributes. For example, if an eDirectory Address attribute is the trigger for a workflow, the workflow can also require attributes like City and State. Alternatively, these attributes can be mapped in policies.
-
In the list, select the _StartWorkflow attribute for the workflow that you want to configure. The following example shows the _StartWorkflow attribute for a BusinessCardChange workflow (BusinessCardChange_StartWorkflow).
-
In the list, select the eDirectory attribute that you want to use to start the workflow when that attribute changes. In the following example, the Telephone attribute is selected. This means that the BusinessCardChange workflow starts whenever an employee’s telephone number changes.
-
Click . The eDirectory attribute is mapped to the Application attribute.
-
Repeat Step 10 through Step 12 to map eDirectory attributes to the workflow _reason and _recipient attributes.
-
If additional eDirectory attributes are needed by the workflow, repeat Step 10 through Step 12 until you have mapped all of the attributes that you need to map.
The workflow starts automatically when a change occurs in the eDirectory attribute that is mapped to an application _StartApprovalFlow attribute. However, the eDirectory attribute only reaches the Schema Mapping policy if the eDirectory attribute is included in the Driver Filter. In the following steps, add the eDirectory attribute to the Driver Filter.
-
Click to close the Schema Mapping Policy Editor.
-
Click to close the Identity Manager Policy dialog box.
-
Click to close the Schema Mapping Policies dialog box.
-
Click the icon.
The filter window displays:
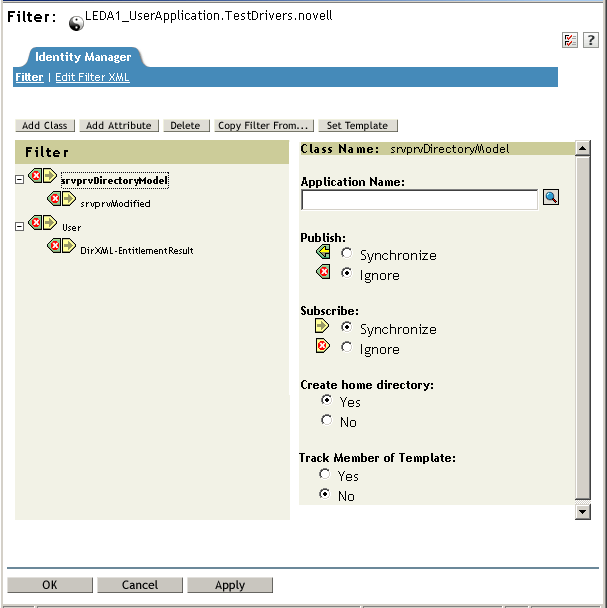
Event filters specify the object classes and the attributes for which the Identity Manager engine processes events. The read-only list on the left shows the attributes of the class. The list on the right displays options associated with the target object.
-
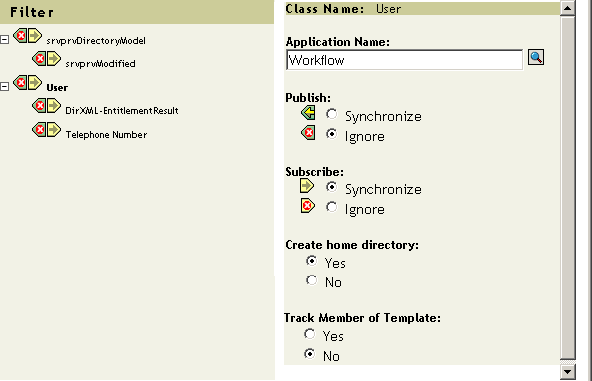
Click the name of the class to which the attribute that you want to add to the filter belongs (for example, User).
-
Click . A list of attributes displays.
-
Select an attribute, then click . The attribute is added to the list.
-
Click the attribute name. The synchronization options for the attribute are displayed on the panel on the right.
-
Under , click .
-
Specify any other attributes for the filter. Select for an attribute if you want changes to attribute values to be reported and synchronized. Select if you do not want changes to attribute values to be reported and synchronized.
-
Click A message displays asking you if you would like the driver to be restarted to put the changes into effect.
-
Click . You are returned to the Identity Manager Driver Overview page.