18.2 Role Reports
Two role reports are available:
-
Role List Report
-
Role Assignment Report
18.2.1 The Role List Report
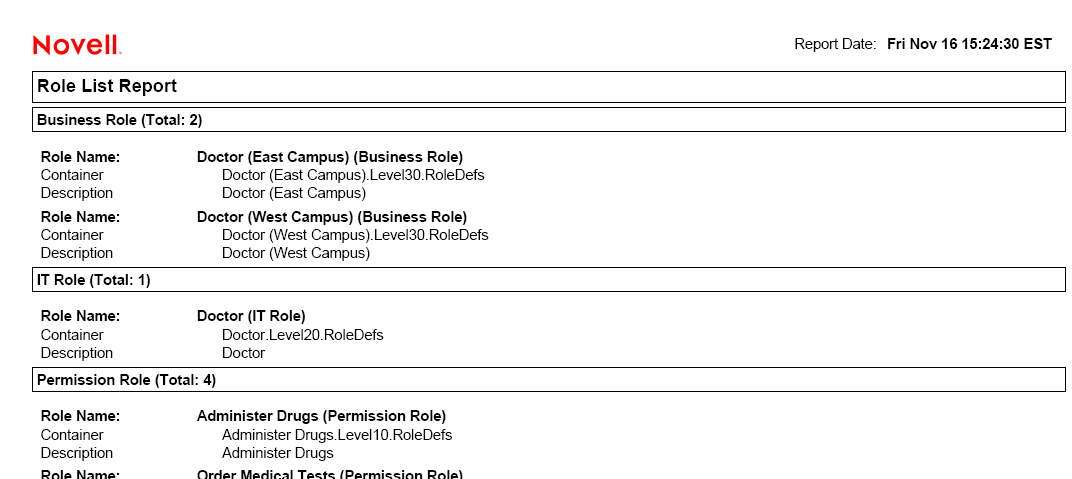
The Role List Report shows:
-
All roles, grouped by role level
-
The business name of each role
-
The container and description for each role
-
Optionally, Quorum percentages, contained roles, containing roles, groups and containers the role is indirectly assigned to, and entitlements that are bound to each role
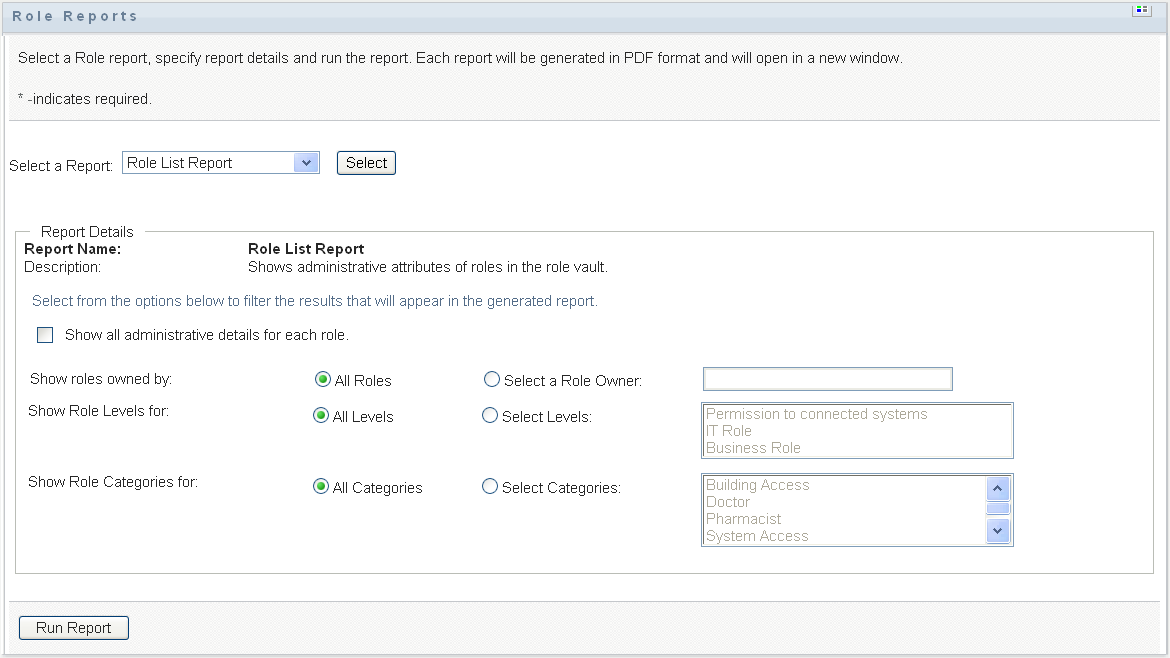
To create and view the Role List Report:
-
Open the User Application and choose
-
Choose in the drop-down menu and click . The Role Reports page prompts you to select the parameters to include in the report.
-
Check to see the following information if applicable and available:
-
Quorum percentage
-
Contained roles
-
Containing roles
-
Groups that this role is indirectly assigned to
-
Containers that this role is indirectly assigned to
-
Entitlements that are bound to the role
-
-
Choose whether to show all roles or roles owned by a selected owner. When you choose , the owner selection box activates. Use these icons to make your selection:
-
Choose whether to show roles at all security levels, or select one or more levels to show. To select a level, click it in the selection pull-down box. To select more than one level, hold down the Shift key or Ctrl key as you click.
-
Choose whether to show roles in all categories, or select one or more categories to show. To select a category, click it in the selection pull-down box. To select more than one category, hold down the Shift key or Ctrl key as you click.
-
Click to create and view a PDF report similar to the sample in Figure 18-1.
Figure 18-1 Sample Role List Report
-
To save the report, choose in the Adobe Reader window. Specify a directory to save the file in and specify a filename for the report.


18.2.2 The Role Assignment Report
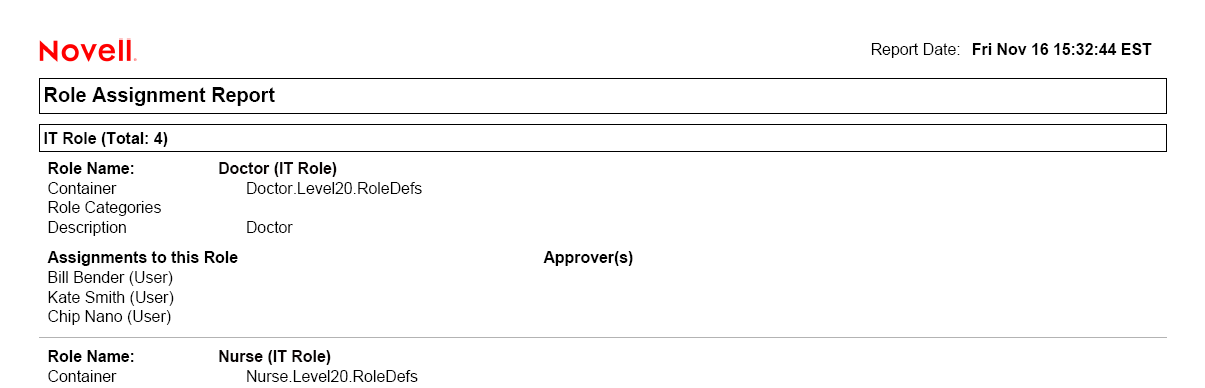
The Role Assignment Report shows:
-
Roles grouped by role level
-
Each role’s business name, container, category, and description
-
Users assigned to the role and names of people who approved the assignments
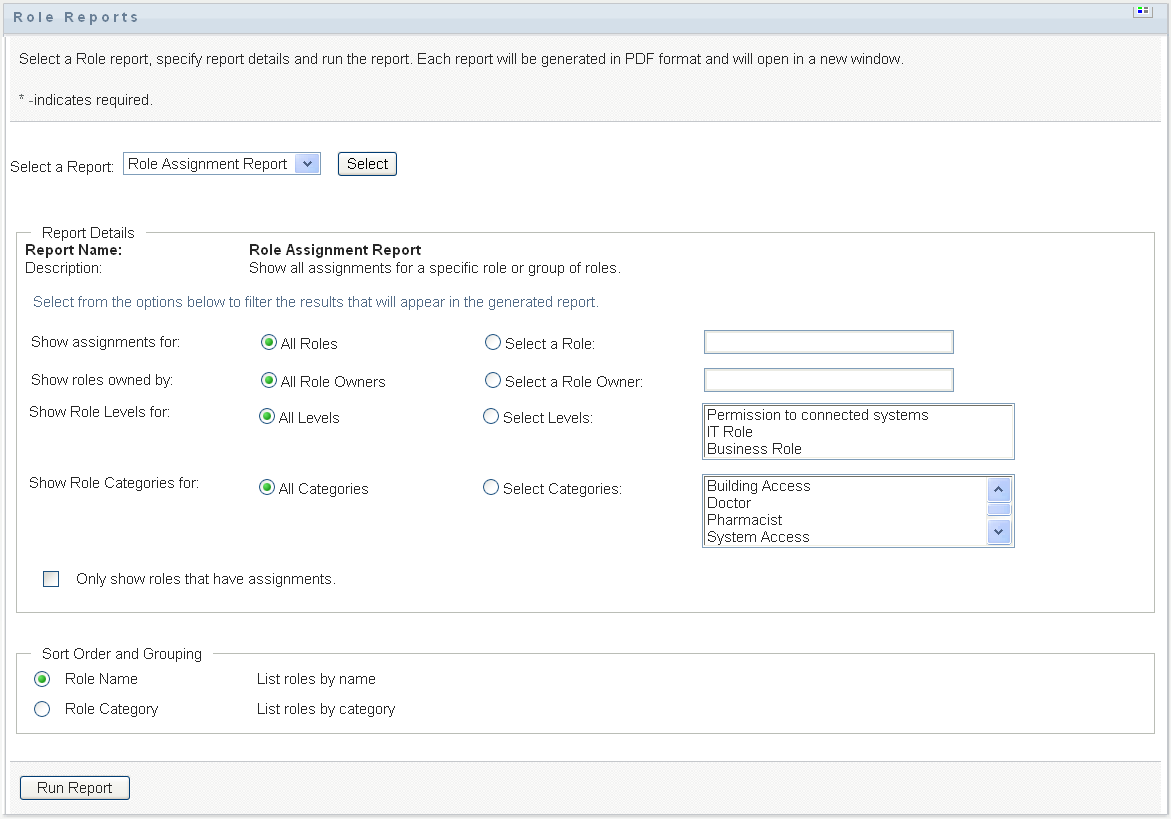
To create and view the Role Assignment Report:
-
Open the User Application and choose
-
Choose in the drop-down menu and click . The Role Reports page prompts you to select the parameters to include in the report.
-
Choose to show all role assignments or to show assignments for a selected role. If you choose , the selection box activates and presents the selection icons described in Step 4.
-
Choose to show roles owned by all role owners or by a selected role owner. If you choose , the selection box activates and presents the selection icons described in Step 4.
-
Choose to show roles for all role levels or to select one or more role levels. To select a level, click it in the selection pull-down box. To select more than one level, hold down the Shift key or Ctrl key as you click each level.
-
Choose to show roles for all role categories or to select one or more role categories. To select a category, click it in the selection pull-down box. To select more than one category, hold down the Shift key or Ctrl key as you click each category.
-
Click to filter the report to include only roles that have been assigned.
-
If you are choosing to show assignments for all roles rather than just one role, under choose to group roles by either name or category.
-
Click to create and view a PDF report similar to the sample in Figure 18-2.
Figure 18-2 Sample Role Assignment Report
-
To save the report, choose in the Adobe Reader window. Specify a directory to save the file in and specify a filename for the report.