17.2 Managing Roles
The action on the tab of the Identity Manager user interface allows you to create a new role or modify or delete an existing role.
NOTE:You cannot use this action to create new or delete existing system roles. You can use it to modify system roles.
What you can see and do on this page depends on your security role, as described in Table 17-1.
Table 17-1 Security Role Capabilities
17.2.1 Creating New Roles
-
Click in the list of actions.
-
Click .
The User Application prompts you to provide a in the section of the Manage Roles page. For more information on each of the fields in this section, see Table 17-2, Role Details.
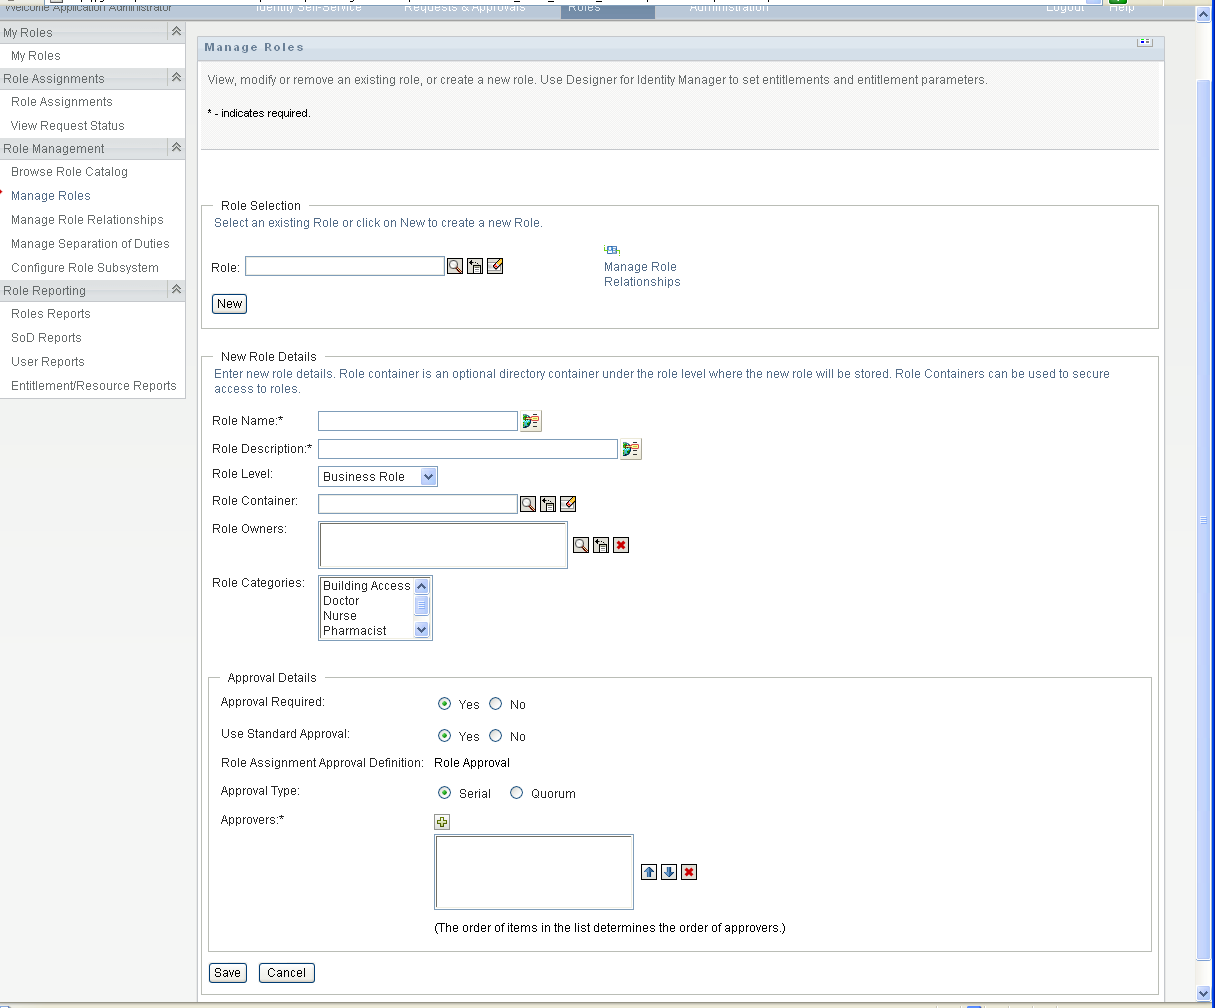
-
Navigate to , and complete the fields as described in Table 17-3, Approval Details.
-
Click to make your changes permanent.
17.2.2 Modifying or Deleting Existing Roles
-
Click in the list of actions.
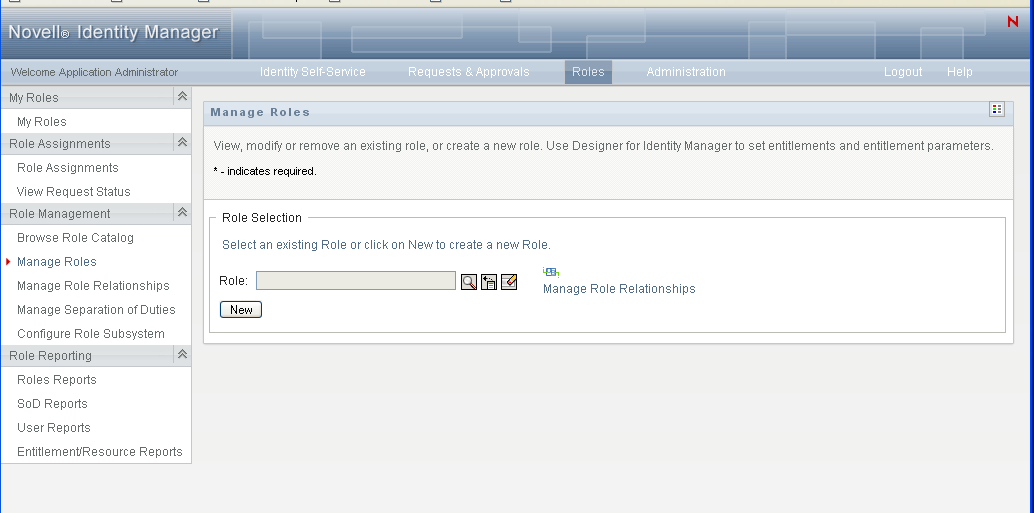
-
To find the role whose details you want to modify, use the or the tool to select the constraint. For details on using the and tools, see Common User Actions.
-
When you select the role you want from the list, the lookup page closes and displays the and for the selected role.
The Manage Roles page displays the name of the role that is currently selected in the section.
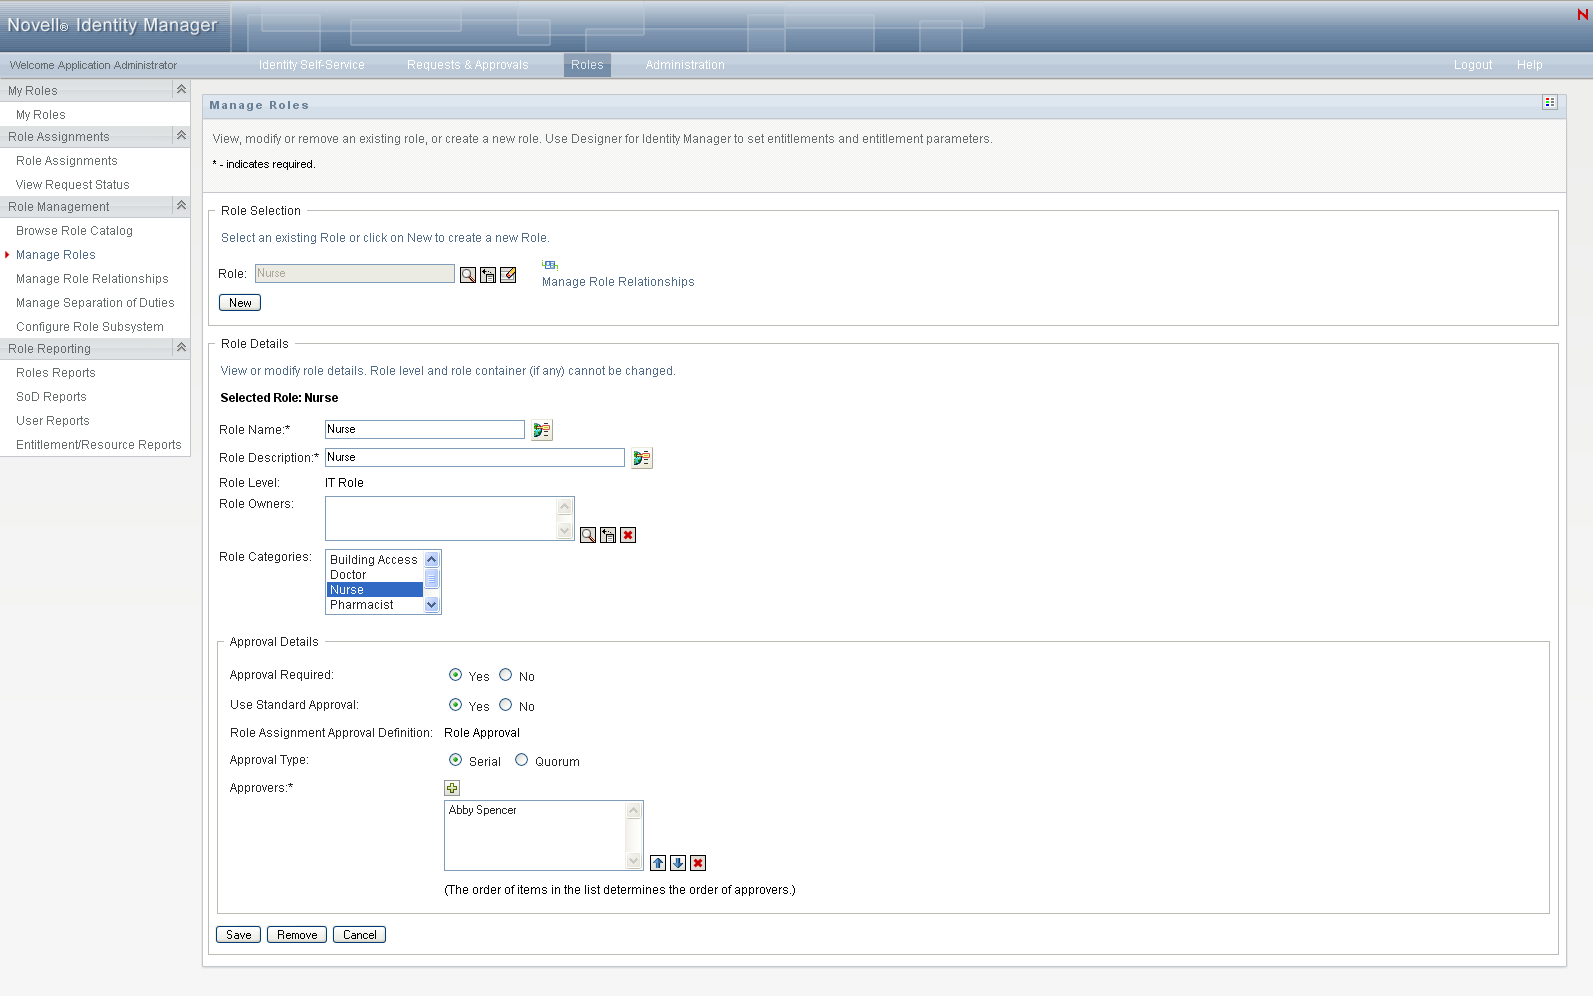
HINT:The link provides quick way access to the page. If you have selected a role, it displays the contents of the selected role for editing.
-
To delete the currently selected role, click .
For more information on the role details you can modify, see Table 17-2, Role Details.
For more information on the Approval Details you can modify, see Table 17-3, Approval Details.
-
After you complete the changes, click .
17.2.3 Role Properties
Role Details Properties
Table 17-2 Role Details
|
Field |
Description |
|---|---|
|
|
The text used when the role name displays in the User Application. You can translate this name in any of the user application’s supported languages. For more information, see Table 1-1, Common Buttons. |
|
|
The text used when the role description displays in the User Application. Like the Role Name, you can translate it to any of the user application’s supported languages. For more information, see Table 1-1, Common Buttons. |
|
|
(Read-only when modifying a role.) Choose a role level from the drop-down list. Role levels are defined using the Designer for Identity Manager Role Configuration editor. For more information about Role levels, see Section 14.1, About the Roles Tab. |
|
|
(Read-only when modifying a role.) The location for the role objects in the driver. Role containers reside under role levels. The user application shows only the role containers that reside under the role level that you choose. You can create a role either directly in a role level, or in a container within the role level. Specifying the role container is optional. |
|
|
A user who is designated as the owner of the role definition. When you generate reports against the Role Catalog, you can filter the report based on the role owner. The role owner does not automatically have the authorization to administer changes to a role definition. |
|
|
Allow you to categorize roles for role organization. Categories are used for filtering lists of roles. Categories are multi-select. |
Approval Details Properties
Table 17-3 Approval Details
|
Field |
Description |
|---|---|
|
|
Select if the role requires approval when requested, and you want the approval process to execute the standard role assignment approval definition. Select if the role does not require approval when requested. |
|
|
Select if this role uses the standard role assignment approval definition specified in the Role Subsystem. The name of the approval definition displays as read-only in the below. You must select the type of approval ( or ) and the valid approvers. When you select , you are prompted for the name of a custom Role Assignment Approval Definition. |
|
|
The name of the provisioning request definition executed when the role is requested. If the value of is , the value is derived from the Role Subsystem configuration settings. If the value is , then you must select the name of the custom provisioning request definition to use. |
|
|
Select if you want the role to be approved by all of the users in the list. The approvers are processed sequentially in the order they appear in the list. Select if you want the role to be approved by a percentage of the users in the list. The approval is complete when the percentage of users specified is reached. For example, if you want one of four users in the list to approve the condition, you would specify Quorum and a percentage of 25. Alternatively, you can specify 100% if all four approvers must approve in parallel. The value must be an integer between 1 and 100. HINT:The Serial and Quorum fields have hover text that explains their behavior. |
|
Approvers |
Click + to modify the approvers list. Select if the role approval task should be assigned to one or more users. Select if the role approval task should be assigned to a group. To locate a specific user or group, use the or buttons.To change the order of the approvers in the list, or to remove an approver, see Section 1.4.4, Common User Actions. |