19.2 Managing Provisioning Teams
Before configuring a provisioning team, you need to select the Identity Manager User Application driver that contains the definition. After selecting the driver, you can create a new team definition, edit an existing definition, or delete an existing definition.
The task uses the same driver as the task.
19.2.1 Selecting the Driver
After you have selected a User Application driver for the or task, you don’t have to select the User Application driver again during this iManager session.
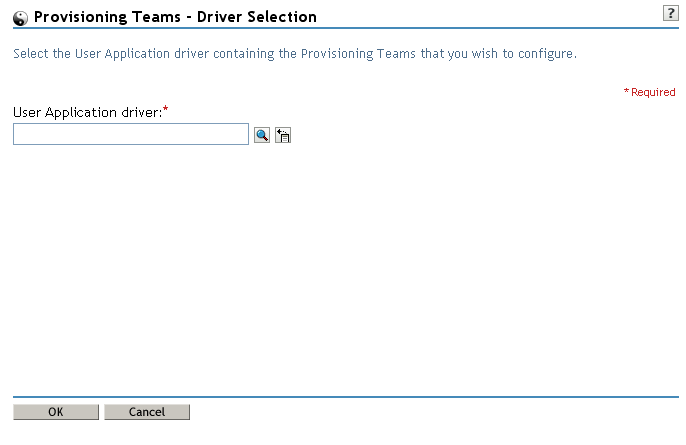
To select a User Application driver:
-
Select the category in iManager.
-
Open the role.
-
Click the task.
iManager displays the Driver Selection panel.
-
Specify the driver name in the field, then click .
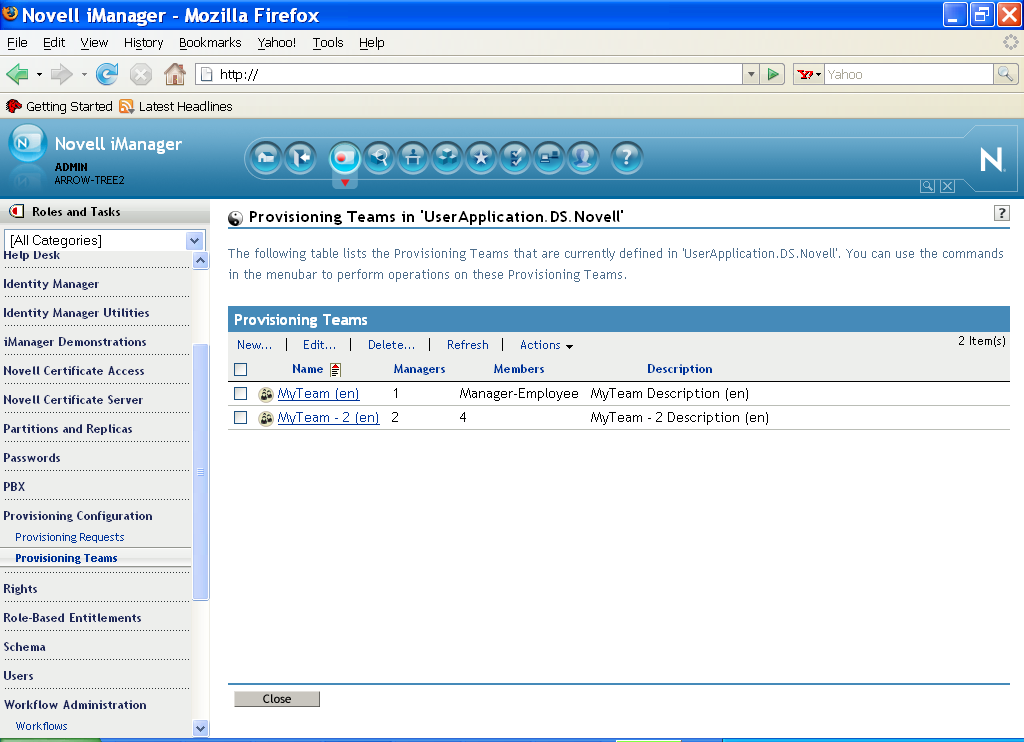
iManager displays the Provisioning Teams panel. The Provisioning Teams panel displays a list of existing team definitions.
Changing the driver. When you have selected a driver, the driver selection remains in effect for the duration of your iManager session, unless you select a new driver. To select a new driver, click the command and choose from the menu.
19.2.2 Creating or Editing a Provisioning Team
To create a new provisioning team:
-
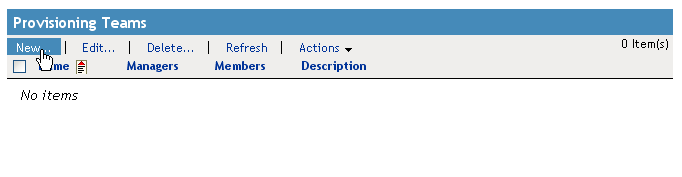
Click the command in the Provisioning Teams panel.
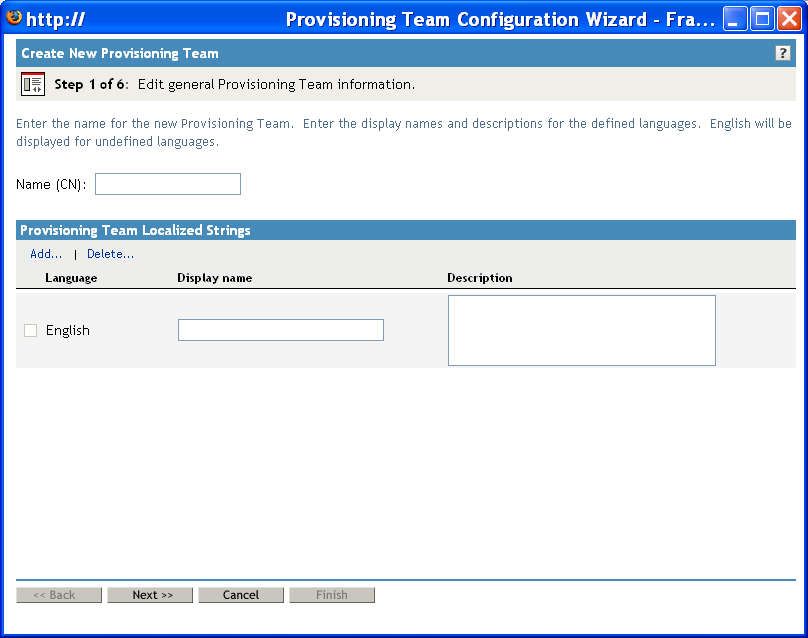
The first page of the Create New Provisioning Team wizard displays.
-
Type a common name for the new object in the field.
-
For each language you want to support in your application, type the localized text in the and fields under . This text is used to identify the provisioning team throughout the User Application.
-
To add a new language to the list, click , then select the desired language.
By default, a newly created provisioning team supports only English.
-
Click .
-
Specify the managers for the team, as described in Specifying the Team Managers.
-
Specify the members of the team, as described in Specifying the Team Members.
-
Specify the team options for the team, as described in Specifying the Team Options.
iManager displays a message asking you to commit the team definition to the Identity Vault. The team definition must exist before an associated team requests definition can be created.
-
Create the team requests definition, as described in Creating or Editing a Provisioning Team Requests Definition.
-
Review your settings, then click .
To edit an existing provisioning team:
-
Click the name of the provisioning team in the Provisioning Teams panel.
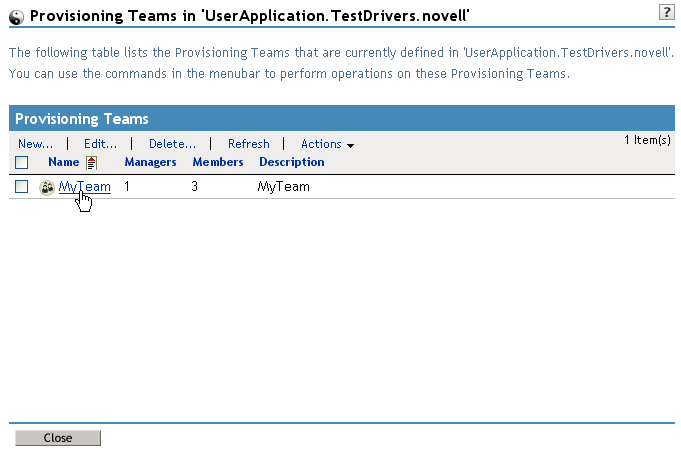
If you have a large number of team definitions, you might want to sort the list by a particular column, such as the or . To sort by a particular column, click the column heading.
-
For each language you want to support in your application, click the check box beside the language in the list under , and type the localized text in the and fields. This text is used to identify the provisioning team throughout the User Application.
-
To add a new language to the list, click and select the desired language.
By default, a newly created provisioning team supports only English.
-
Click .
-
Specify the managers for the team, as described in Specifying the Team Managers.
-
Specify the members of the team, as described in Specifying the Team Members.
-
Specify the team options for the team, as described in Specifying the Team Options.
-
Create the team requests definition, as described in Creating or Editing a Provisioning Team Requests Definition.
-
Review your settings, then click Finish.
-
Click .
Specifying the Team Managers
This section provides instructions for specifying the managers for a team.
To specify the team managers:
-
Click .
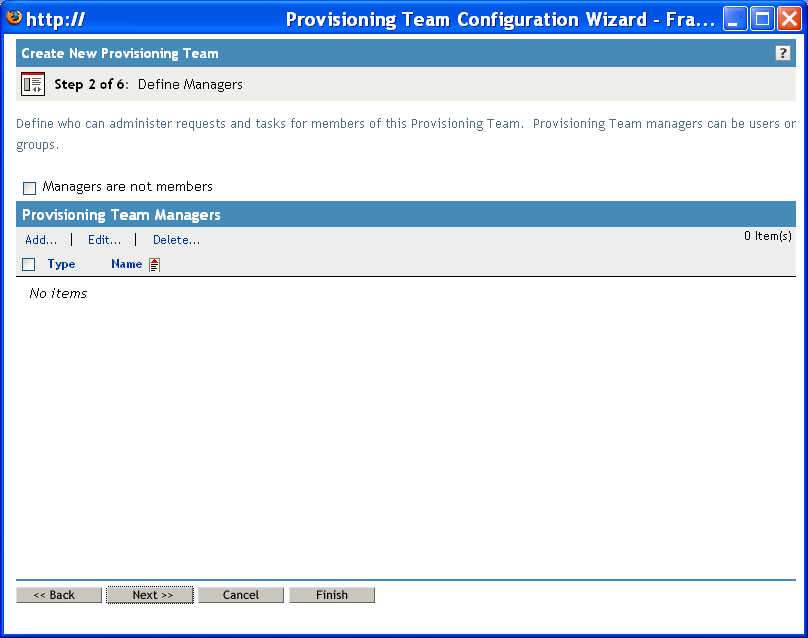
The interface displays the Object Selector.
-
Select one or more users or groups, then click .
-
Click .
Specifying the Team Members
To specify the team members:
-
To define the members by using a directory relationship, click , then select the relationship in the drop-down list.
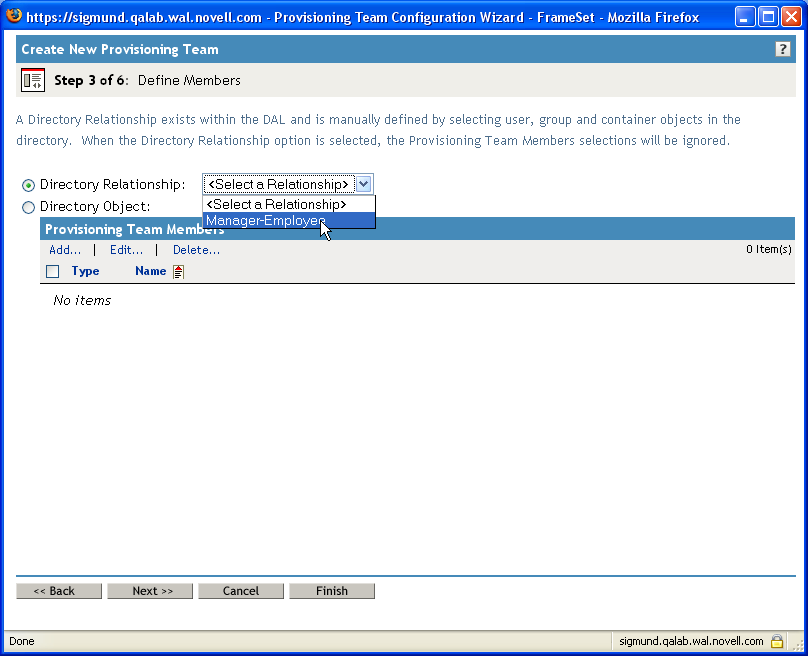
-
To define the members by selecting them individually, click , then follow these instructions:
-
Click .
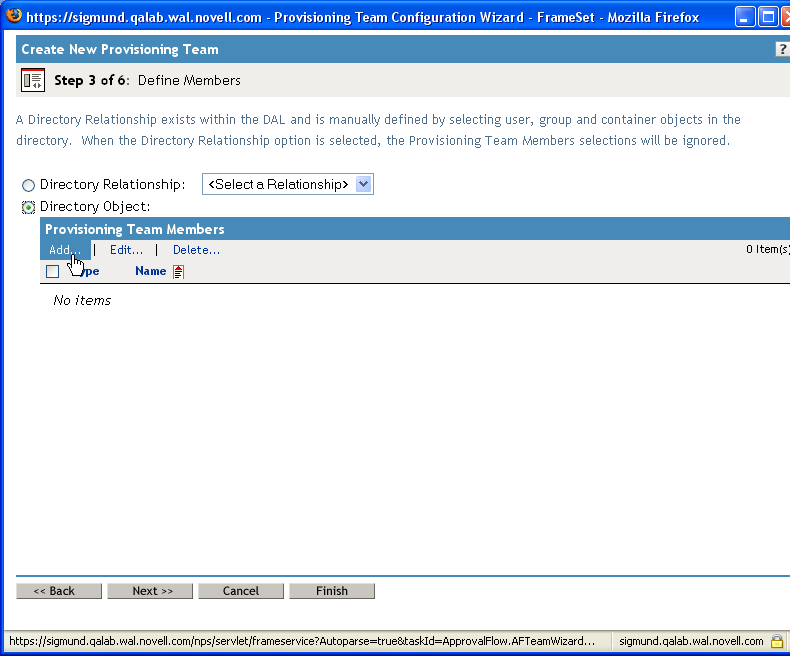
The interface displays the Object Selector.
-
Select one or more users, groups, or containers, then click .
-
-
Click .
Specifying the Team Options
To specify the team options:
-
Define which request types the team manager can act on by selecting one of these options in the drop-down list:
-
indicates that this team definition applies to a single request type. You specify the request type when you define the team requests definition.
-
indicates that this team definition applies to all request types associated with a particular category. You specify the category when you create the team requests definition.
-
indicates that this team definition applies to all request types.
-
-
Define the team settings, as follows:
If a particular team definition does not permit team managers to set proxies or team availability settings, the manager can still view the settings defined for the team members by the administrator or by a manager of another team to which these users belong. However, the team manager cannot edit these settings, view details for these settings, or create new proxy assignments or team availability settings.

-
Click .
19.2.3 Deleting a Provisioning Team
To delete a provisioning team:
-
Select the provisioning team you want to delete by clicking the check box next to the name.
-
Click the command in the Provisioning Teams panel.