8.3 Configuring the Digital Signature Service
This section provides details on configuring the Digital Signature Service.
To configure the Digital Signature Service:
-
Select the tab.
-
Select from the left navigation menu.
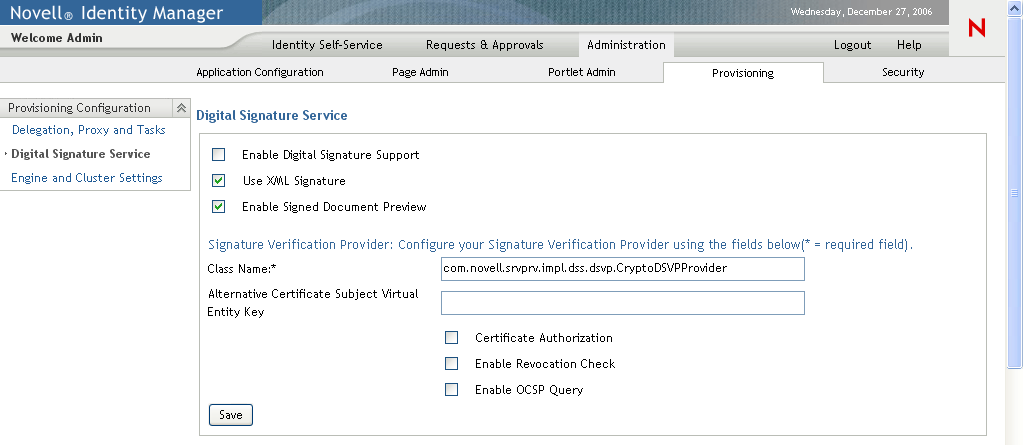
The user interface displays the Digital Signature Service panel:
-
Perform these steps to configure the Digital Signature Service:
-
Select the check box.
If this check box is not selected, users will see an error message when they try to access any provisioning resource that requires a digital signature.
Before enabling digital signature support, make sure all of the required JARs are present. If any of the JARs are missing, you will see an error message when you select the check box. For details on which JARs are required for digital signatures, see Section 2.3, Digital Signature Configuration.
-
Select the check box if you want to use an XML Signature. (This option is required if you are using cryptovision.).
-
Optionally select the to allow users to preview signed documents.
-
Type the name of the class for your digital signature service in the field.
For details on using cryptovision as your signature verification provider, see http://www.cryptovision.com/idmdigsig.html.
-
Optionally specify an entity key in the field. The entity key maps to an entity defined in the data abstraction layer. The entity provides a calculated attribute that can be used instead of the LDAP common name to ensure that only authorized users can perform digital signing. In the Designer, you define the entity, giving the key any name you like. On the Digital Signature Service configuration panel, you specify the key for the entity you defined. The alternative subject is an optional feature that you can use to add an extra layer of protection.
-
Optionally select the check box to ensure that the authenticated user matches the user associated with the selected user certificate. When is enabled, the current user is not permitted to use a certificate on the smart card (or browser) that has been given to a different user.
-
Optionally select the check box to cause the application to check the certificate revocation list (CRL) before using a certificate to be sure that it is still valid. A certificate might be revoked for several reasons. For example, the certificate authority might determine that a particular certificate was improperly issued. Alternatively, the certificate might be revoked if the private key for the certificate has been lost or stolen.
-
Optionally select the check box to perform a query against an Online Certificate Status Protocol (OCSP) server before using a certificate. OCSP is an alternative to certificate revocation lists that addresses problems associated with using CRLs in a public key infrastructure (PKI). The OCSP access point for the server is specified in the User Application Configuration utility.
-
-
To view the settings for a previously configured applet, select the applet from the dropdown list.
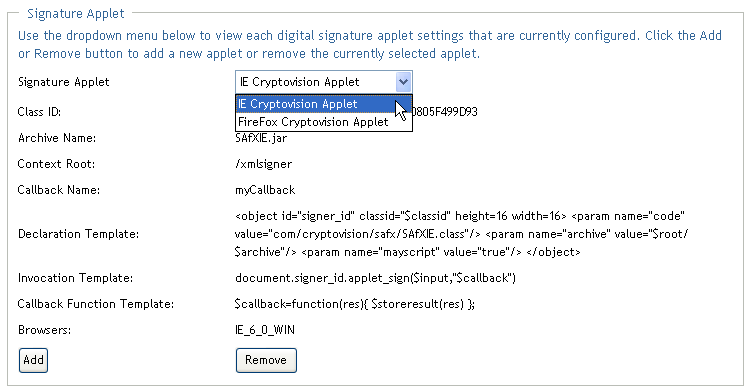
For details on configuring the cryptovision applet, see http://www.cryptovision.com/idmdigsig.html.
-
Perform these steps to add a new signature applet configuration:
-
Click .
The user interface makes the fields in the Signature Applet panel editable.
-
Provide a name for this applet configuration in the field.
-
Specify the class ID for the applet in the field.
-
Specify the entry of the JAR that contains the applet in the field.
-
Specify <context root path> of the Web application that contains the applet archive for the . (If the context root points to a different application, always start it with a “/” character.)
-
Specify the callback name in the field.
-
Specify the XML declaration string in the field.
-
Specify the invocation string in the field.
-
Specify the callback function in the field.
-
Select the browser type (for example, IE 6.0) in the select list.
-
-
Click to save your settings.