20.5 Requesting User Assignment Attestation Process
The action lets you initiate an attestation process to verify the accuracy of role assignments for selected users. It also gives you the option to save the details associated with an attestation request (such as parameter and form values) as a pre-filled form for later requests.
When you initiate a user assignment attestation process, the User Application generates a set of localized reports for the attesters to review.
The attesters do not need to have rights for the roles associated with the selected users to review the reports. If an attester selected for a user assignment attestation process does not have rights to view a particular role, the User Application still allows the attester to view the report showing the user assignments.
The report shows the role assignments for the selected users. If you choose a container, group, or role, the report shows the role assignments for users within the selected container, group, or role.
To initiate a role assignment attestation process:
-
Click in the list of actions.
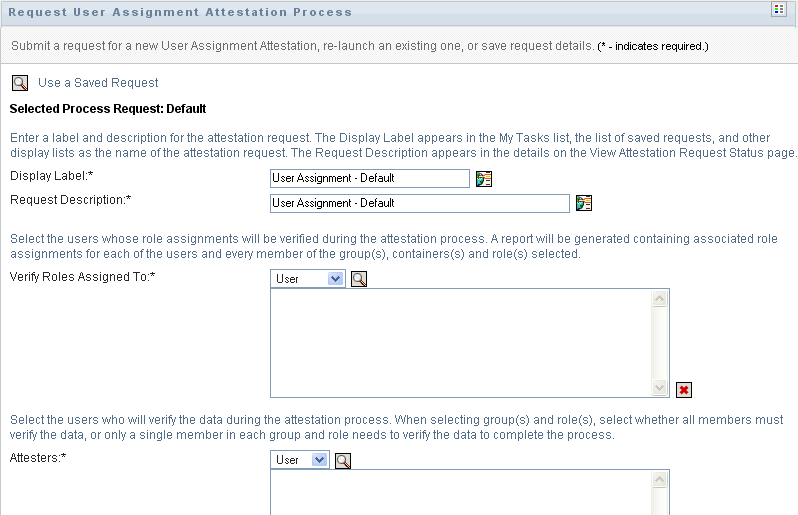
The User Application displays a page that lets you specify details about the attestation process.
-
If you want to use the details from a previously saved request as the basis for this request, click . For more information, see Section 19.6.7, Using a Saved Request.
-
Specify the display label and description for the request. For more information, see Section 19.6.1, Specifying the Label and Description for a Request.
-
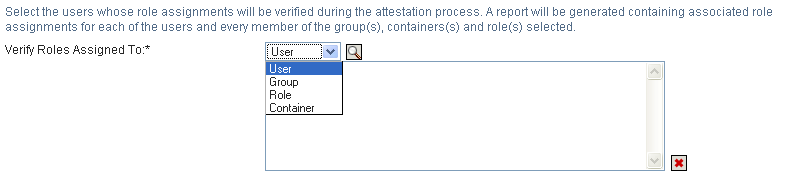
In the box, select the users whose assignments will be verified:
-
To include one or more users explicitly, select in the drop-down list.
Use the to select the users. In the , you can include multiple users by clicking the checkbox for each item, and clicking .
For details on using the , see Section 1.4.4, Common User Actions.
-
To include the users in one or more groups, select in the drop-down list.
Use the to select the groups. In the , you can include multiple users by clicking the checkbox for each item, and clicking .
-
To include the users in one or more roles, click in the drop-down list.
Use the to select the roles. In the , you can include multiple roles by clicking the checkbox for each item, and clicking .
-
To include the users in a container, click in the drop-down list.
Use the to drill down to the desired container, then click on the container to select it.
If you want the user assignment report to include all users in the selected sub-containers, you need to check the checkbox at the bottom of the list of selected items. The checkbox is displayed only when is selected in the drop-down list. However, you can change the setting without having to remove and add any of your previously selected containers.
You must select at least one user, group, role, or container to launch an attestation process. However, you are not required to select a user, group, role, or container to save a request.
-
-
In the field, specify which users, groups, and roles will be attesters for the attestation process. For details, see Section 19.6.2, Defining the Attesters.
You must select at least one user, group, or role as an attester to launch an attestation process. However, you are not required to select an attester to save a request.
-
Specify the deadline for the attestation process. For more information, see Section 19.6.3, Specifying the Deadline.
-
In the field, click the button to specify which languages you would like to use for the reports generated for the attestation process. Select the default locale in the dropdown list. Then, pick the languages you want to include and click .
When you initiate a user assignment attestation process, the User Application generates a set of localized reports for the attesters to review. These reports provide the same data in one or more languages. They are generated at the time the request is submitted to ensure all of the attesters are reviewing the same set of data. You can specify the set of report languages that will be generated and stored for the attestation process. When an attester selects an attestation task for review, the system displays the localized report that matches the attester's preferred locale (or browser locale, if the user does not have a preferred locale). If no report exists for that locale, the User Application displays the report that uses the default locale.
-
Define the details of the attestation form. For more information, see Section 19.6.4, Defining the Attestation Form.
-
Submit the request. For more information, see Section 19.6.5, Submitting an Attestation Request.
-
Optionally click to save the details associated with an attestation process request (such as parameter and form values) for later use. For more information, see Section 19.6.6, Saving Request Details.