1.4 Exploring the User Application
After you log in, the Identity Manager User Application displays the tab pages where you do your work:
Figure 1-3 On Login, You See Tabs and the Organization Chart

If you look along the top of the User Application, you’ll see the main tabs:
-
Identity Self-Service (which is open by default)
To learn about this tab and how to work with it, see Section II, Using the Identity Self-Service Tab.
-
Requests & Approvals
To learn about this tab and how to work with it, see Section III, Using the Requests & Approvals Tab.
NOTE:To enable the s tab, your organization must have the Roles Based Provisioning Module for Identity Manager.
-
Roles
To learn about this tab and how to work with it, see Section IV, Using the Roles Tab.
NOTE:To enable the tab, your organization must have the Roles Based Provisioning Module for Identity Manager.
-
Compliance
To learn about this tab and how to work with it, see Section V, Using the Compliance Tab.
NOTE:To enable the tab, your organization must have the Roles Based Provisioning Module for Identity Manager. The tab is not available unless you are a Compliance Module Administrator or Attestation Manager.
To switch to a different tab, simply click the tab you want to use.
1.4.1 Getting Help
While working in the Identity Manager User Application, you can display online help to get documentation about the tab that you’re currently using.
-
Go to the tab that you want to learn about (such as or ).
-
Click the link (in the top right corner of the page).
The help page for the current tab displays.
1.4.2 Preferred Locale
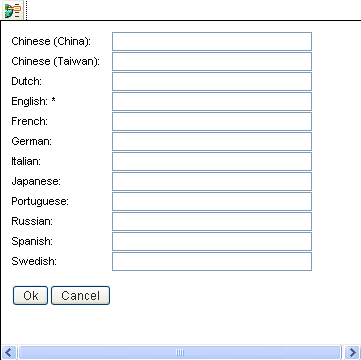
If your administrator has not defined a preferred locale (language) for the User Application, you receive a prompt to select your own preferred locale when you first log in.
-
When prompted, add a locale by opening the list, selecting a locale, and clicking .
For more information, see Section 5.6, Choosing a Preferred Language.

1.4.3 Logging Out
When you’re finished working in the Identity Manager User Application and want to end your session, you can log out.
-
Click the link (in the top right corner of the page).
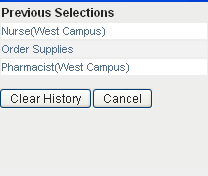
By default, the User Application thanks you for using Novell Identity Manager. Click the red link titled to return to a login prompt.
1.4.4 Common User Actions
The User Application provides a consistent user interface with common user interactions for accessing and displaying data. This section describes several of the common user interface elements and includes instructions for:
Table 1-1 Common Buttons


Using the Object Selector Button for Searching
To use the Object Selector button:
-
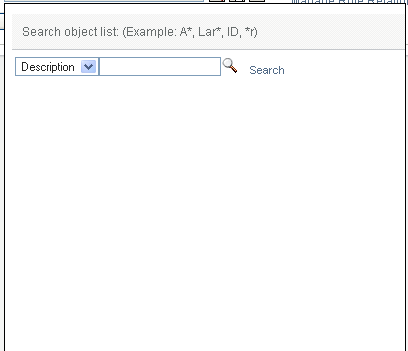
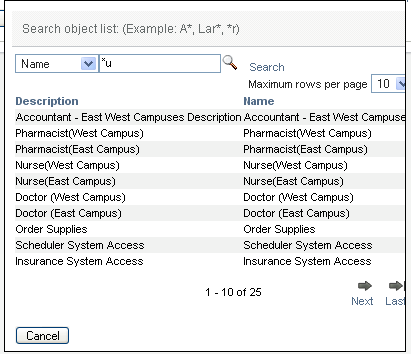
Click
 . The Search dialog displays:
-
Specify your search criteria as follows:
-
Use the drop-down list to choose a field on which to search. The drop-down list fields depend on where you launched the search. In this example, you can specify or .
-
In the text box next to the drop-down list, type all or part of the search criteria (such as name or description). The search finds every occurrence of the type of object you are searching for that begins with the text you type. You can optionally use the asterisk (*) as a wildcard in your text to represent zero or more of any character. For instance, all of the following examples find the role Nurse:
nurse
n
n*
*u
*r
*e
-
-
Click .
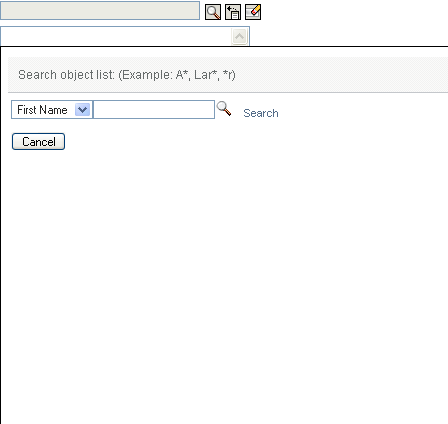
The search results display. You can sort the search results in ascending or descending order by clicking the column headings. This example shows a list of roles.
If you the result list includes the one you want, go to Step 4. Otherwise, go back to Step 2.
-
Select the item you want from the list. The lookup page closes and populates the page with the data associated with your selection.
Filtering Data
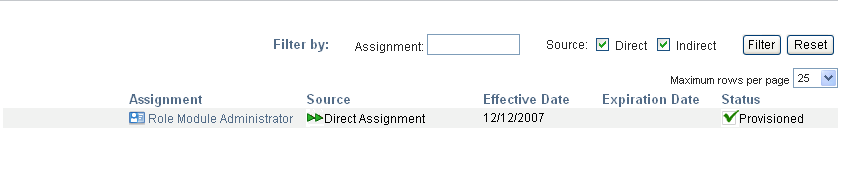
The Roles tab of the User Application provides filters so that you can display only the data that you are interested in viewing. You can additionally limit the amount of data displayed on a single page by using the Maximum rows per page setting. Some examples of filters include:
-
Filtering by role assignment and source (available in the My Roles action):
-
Filtering by role name, user, and status (available in the View Request Status action):

-
Filtering by role level and category (available in the Browse Role Catalog action):

To use filtering:
-
Specify a value in the text field, as follows:
-
To limit the items to those that start with a particular string of characters, type all or part of the character string in the box. You can optionally use the asterisk (*) as a wildcard in your text to represent zero or more of any character. For instance, all of the following examples find the role assignment called Nurse:
nurse
n
n*
*u
*r
*e
NOTE:A filter on Role Name does not limit the number of objects returned from the Identity Vault. It simply restricts the objects displayed on the page based on the filter criteria. Other filters (such as Status) do restrict the number of objects returned from the Identity Vault.
-
To further filter the items displayed, you can specify additional filter criteria. The User Application allows you to select the criteria in different ways depending on the data. You might select a checkbox or select one or more items from a list box (using your platforms multi-select keystrokes). The criteria is ANDed so that only the items that meet all of the criteria are displayed.
-
To apply the filter criteria you’ve specified to the display, click .
-
To clear the currently specified filter criteria, click .
-
-
To set the maximum number of items matching the filter by criteria that are displayed on each page, select a number in the dropdown list.