16.3 Configuring iFolder on Additional Servers
You can install iFolder on an unlimited number of servers to create your iFolder system.
-
Install iFolder on the additional server.
For links to specific installation instructions for your operating system, see the table in Section 3.1, Installation Scenarios for iFolder 2.1.
-
If you are not logged in, go to the iFolder Management Console, click Global Settings, enter your administrator username and password, then click login. For details, see Logging In to the iFolder Management Console.
-
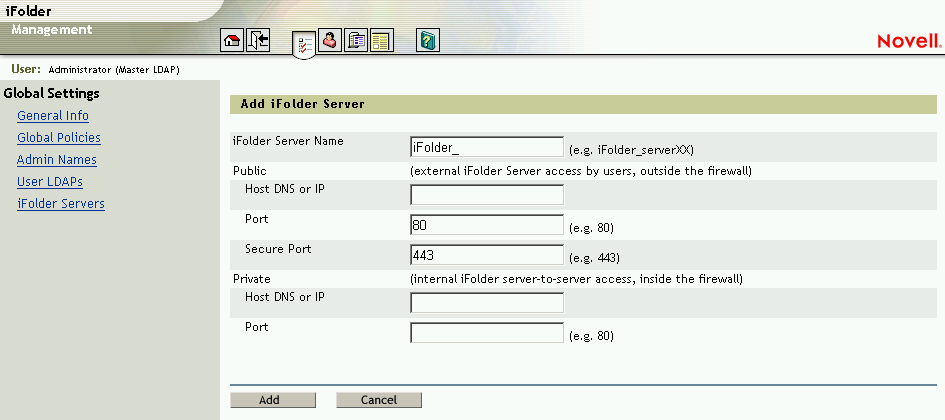
Add your iFolder server to the iFolder system.
-
Click Global Settings > iFolder Servers > Add.
-
Enter the appropriate information, then click Add.
-
Public and Private iFolder Server Names: If the DNS name or IP address of your iFolder server goes directly to the iFolder server without being routed through another device, meaning that your iFolder server is not behind a firewall, you are only required to fill in the information beneath the Public heading.
If the DNS name or IP address of your iFolder server goes through another device, like an L4 switch or a firewall that redirects the request to the iFolder server, you need to fill in the information under both the Public and Private headings.
IMPORTANT:If you have Network Address Translation (NAT) functionality built into your routers or switches, enter both your iFolder public and private DNS names and IP addresses.
If your public DNS name or IP address redirects requests to a private iFolder IP address, specify a DNS name (not an IP address) as the public address of the iFolder server. Then make sure you use an internal DNS server to resolve the DNS name to the private address for internal users and use an external DNS server to resolve the DNS name to the public address of external users.
The Private settings allow the iFolder servers to communicate directly to each other within the iFolder system. The Public settings allow you to access the iFolder server from outside the firewall.
-
iFolder Ports: The ports that you enter into the iFolder Management Console must match the ports that you specified during the iFolder installation. You can have multiple iFolder servers, using the same port numbers if they all have a unique DNS name or IP address.
Port 80 is used to send the encrypted username and password and data from the iFolder client to the iFolder server. iFolder uses RSA encryption to encrypt the username and password, and Blowfish encryption to encrypt the user data. Port 443 is used to access the iFolder Management Console and the Java applet via SSL and HTTPS.
Figure 16-15 Global Settings > iFolder Servers > Add > Add iFolder Server
-
-
-
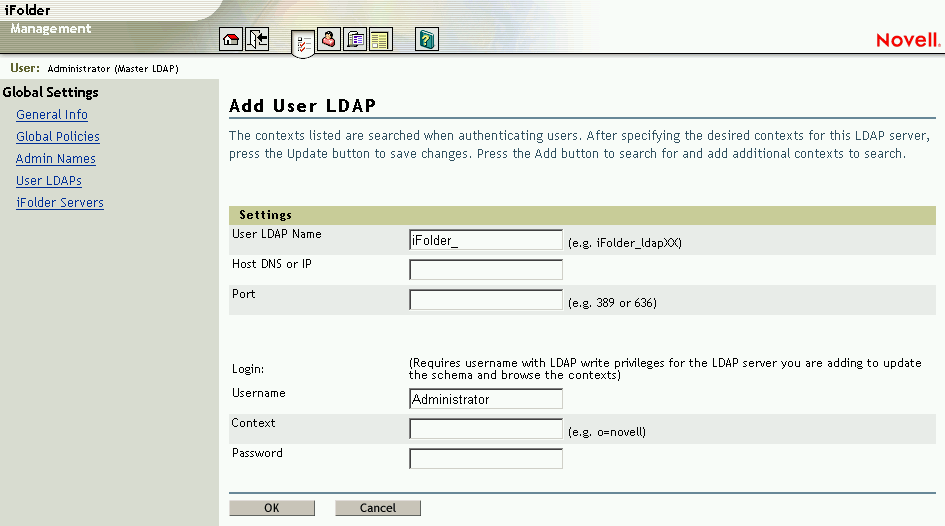
Add your LDAP server settings for the new server to the iFolder system.
-
Click the Global Settings icon at the top of the page, then click User LDAPs.
-
Click Add to add a User LDAP server.
You can add up to eight LDAP directories. The Global User LDAP that you specified during the first installation of iFolder appears as iFolder_ldap01.
The LDAP directories are accessed in alphabetical order when iFolder users are authenticated. Be careful when naming your LDAP directories. iFolder searches the directories in alphabetical order. Thus, if your company uses more than one LDAP directory, make sure you name the LDAP directories alphabetically, so that the first LDAP directories that are listed are the directories that have the majority of your iFolder users.
If you have users with the same username located in multiple contexts, iFolder will authenticate the first user it finds during LDAP authentication. All subsequent users who are located later in the LDAP authentication process will need to enter their usernames and full contexts in the User ID field of the iFolder client login box in order to properly authenticate and log in to the iFolder server.
Figure 16-16 Global Settings > User LDAPs > Add > Add User LDAP
-
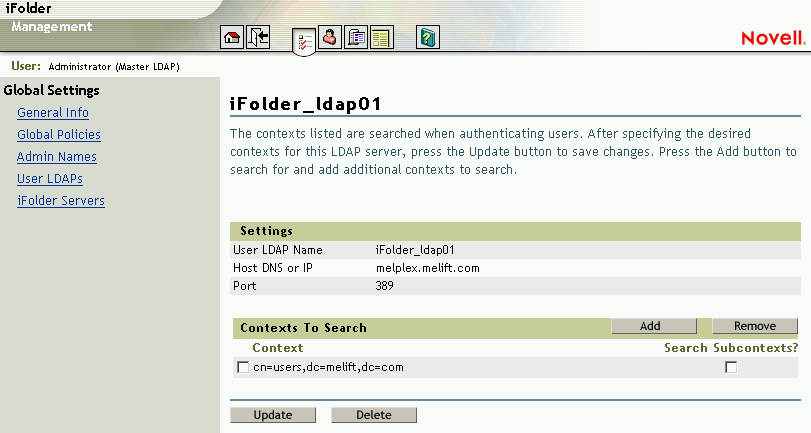
If you want LDAP to search subcontainers below the user context during user authentication, click Global Settings > User LDAPs, select the name of your LDAP server from the list, select your context from the drop-down list, check the check box, then click Update.
Figure 16-17 Global Settings > User LDAPS > Server Name > User Contexts for This Server
-