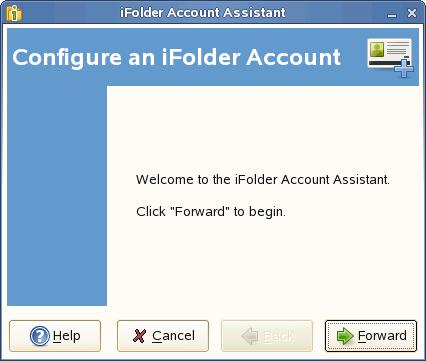
7.3 Configuring an iFolder Account
Use the iFolder Account Assistant to add and configure a new account. You must configure at least one iFolder account before you can create iFolders or share iFolders on your system. You can create only one account for any given iFolder host service, but you can have multiple accounts. You can log in separately to each account and be logged in concurrently to multiple accounts.
Multiple users with different local login identities can have iFolders on the same computer. iFolder prompts the active user to set up an account on the first time the iFolder client runs under that local user identity.
IMPORTANT:iFolder 3.7 introduces a new feature, auto-account creation, which helps the iFolder administrator to create and configure an account for you. If your iFolder administrator has enabled auto-account creation, you don’t need to configure an account for yourself. When you start an iFolder for the first time, you are prompted to enter your password. Enter your password to complete configuring the account.
To configure a new account:
-
Access the , using one of the following methods:
-
The first time you start iFolder under your current local login identity, iFolder prompts you to set up an iFolder account. Click to go directly to the .
-
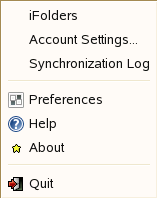
Right-click the iFolder Services
 icon in the notification area, select to open the iFolder Preferences dialog box to the tab, then click to open the .
-
-
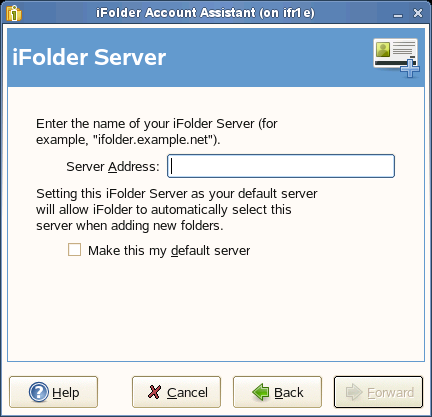
Follow the on-screen instructions to specify the following values:
Parameter
Description
Server Address
The DNS name or IP address of the iFolder enterprise server where you have an account. Get this information from your iFolder administrator.

For example: svr21.example.com or 192.168.1.1
The server name is always displayed along with it’s IP address in the iFolder user interface. For example: iFolder - 192.168.1.1
IMPORTANT:You cannot use an iFolder 3.7 client to connect to an iFolder 3.2 server.
Make this my default server
When you have multiple servers, select to make this server the one selected by default in the drop-down list of servers when you create and upload iFolders.
User Name
Specify your user identity for this account. Your iFolder administrator decides whether the format you should use is your network user ID (LDAP common name) or your e-mail address.
For example, if your name is John Smith with a user ID of jsmith and an e-mail address of john.smith@example.com, your administrator configures a setting for the server that determines which of the two formats to accept in the field for authentication purposes.
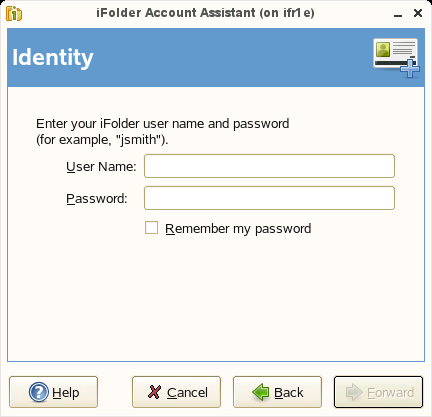
Password
Specify the password for your username.
Authentication happens through a Secure channel (SSL). You are prompted to validate and accept the SSL server certificate.
Remember My Password
Select to log in automatically to this iFolder account whenever you log in to your computer.
If your network password changes, automatic authentication fails gracefully the next time iFolder attempts to log in to the iFolder account. iFolder prompts you to log in with your new password and allows you to specify and save the new password.
If your admin has set your encryption policy to on, iFolder will prompts you to enter your passphrase and select the passphrase Recovery agent. For more information on passphrase management, see Section 8.11, Managing Passphrase for Encrypted iFolders.
Enter the Passphrase
Enter your secret passphrase in the field and re-enter it for verification.
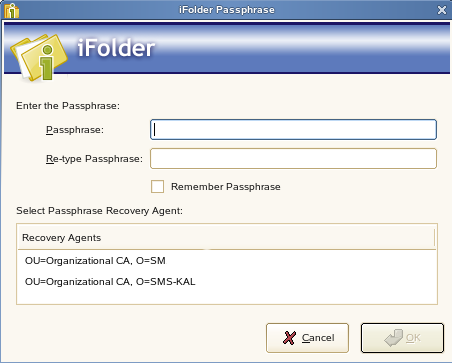
Remember the Passphrase on this Computer
Select this option to automatically access the encrypted iFolder data during the current session. If you choose this option, iFolder can remember your passphrase. The next time you begin the login process, this passphrase exchange is done automatically; no dialog box appears.
Passphrase Recovery Agents
Select the desired Recovery agent from the list and click .
The Recovery agent is a trustworthy organizations that helps you recover the encrypted data if you forget or lose your passphrase.
-
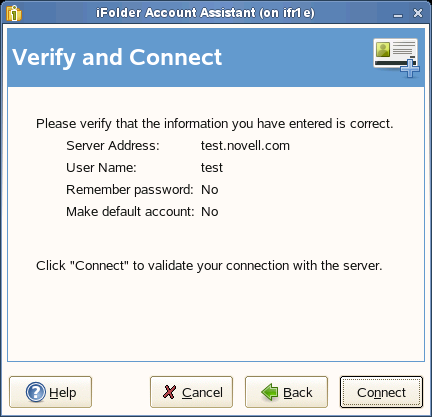
Verify that the information you have entered is correct, return to previous pages to make corrections if necessary, then click to validate the settings by logging in to the iFolder server.
-
If you are prompted to , click to review the certificate information, then click to accept it.
If you do not accept the certificate, you cannot connect to the server.
On successful connection, you are asked to create a default iFolder, if you do not have one currently.
-
Specify the location where you want to create the default iFolder.
The default iFolder name is , where username refers to your user identity for this account. For example: If your username for the current account is test1, the name of the default iFolder will be Default_test1.
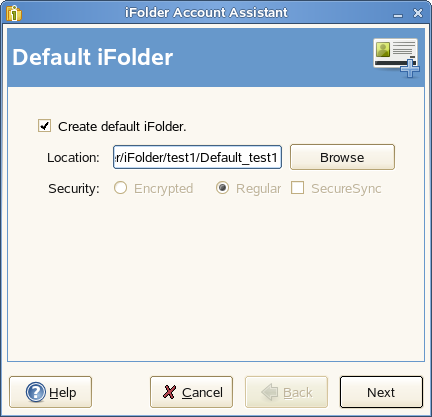
By default, the default iFolder is stored at <users home directory>/ifolder/server_name/user_name. You are allowed to change this location.
-
Select the type of the default iFolder that you want to create. If you choose , it prompts you to give the passphrase. For more information see Enter the Passphrase thru Passphrase Recovery Agents.
If your iFolder administrator has not enabled your encryption policy, you can create only regular iFolders, and the option is selected by default. In this case, both of the options for are disabled.
IMPORTANT:You can share only the regular iFolders. Encrypted iFolders cannot be shared.
-
Select to enable secure synchronization of files in the iFolder you are creating.
For more information on , see in the Secure Sync.
After a folder is made a default iFolder, you can change the type only by deleting it from the server. If you remove the default iFolder on the server, the next time you configure the account from any thick client, iFolder prompts you to create a default iFolder again.
-
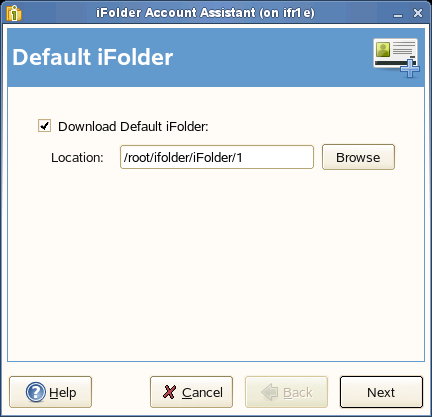
If you have already set up a default iFolder, it asks you to download it to your local machine.
Download the default iFolder and click to go to complete account configuration.
-
On successful connection, click to close the iFolder Account Assistant.
iFolder synchronizes the user list for the specified account and identifies iFolders that are available for download. This initial download can take a few seconds to a few minutes, depending on the size of the user list for the account.
-
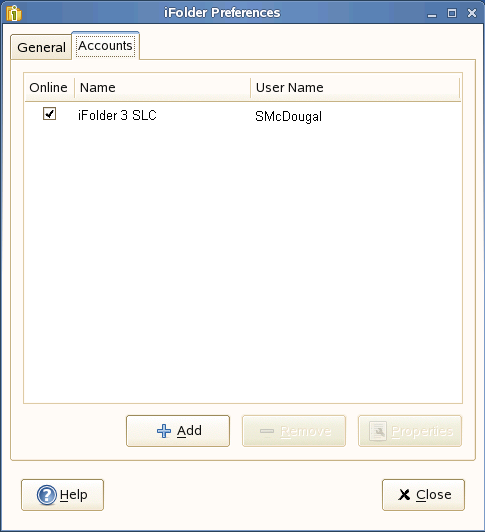
Verify that the account you set up appears in the list of accounts.
-
Right-click the
icon in the notification area, then select from the menu to open the dialog box to the tab.
When you are connected to the iFolder server, the check box is selected.
-
Close the iFolder Preferences dialog box.
-
-
Set up iFolders for the account using either of these methods:
-
Right-click the icon in the notification area, then select to open the iFolder browser. Continue with Section 8.5, Creating and Uploading an iFolder.
-
If iFolders for this account are available for download from the server, they are listed on the iFolder window under iFolders on <iFolder_server_name>. The download icon
 indicates that the iFolder is available for download. Continue with Section 8.9, Downloading an Available iFolder.
-