Analyzing Network Traffic
You can use ZfS to monitor your network and collect information such as a summary of real-time statistics to determine the performance of your network, or detailed real-time statistics to determine the performance of segments in your network.
Information about the activity of nodes and segments in your network is presented in views containing tables, dials, and graphs. You can use the information to perform various traffic management tasks such as establishing a baseline on your network to help you identify typical traffic loads and control network problems, and analyze real-time performance to help you balance traffic loads among network segments, servers, and routers. You can also collect node information to help you focus on specific entities that might be the source of problems.
The following sections provide detailed information about how you can use ZfS to manage your network monitoring activities:
- Analyzing Traffic on Segments
- Analyzing Traffic on Nodes Connected to a Segment
- Capturing Packets
- Displaying Captured Packets
- Analyzing Traffic Generated by Protocols in Your Network
- Analyzing Traffic on Switches
Analyzing Traffic on Segments
Monitoring the segments on your network helps you keep the network operating cost effectively, consistently, and smoothly. Based on the kind of information you want to obtain, you can choose the agent that will monitor the segments on your network. For details, see About Network Monitoring Agents. The agent monitoring the segments will collect traffic data and provide real-time or historical information to you when you require it.
ZfS provides various views you can use to obtain statistical information about monitored segments. You can choose to view statistical information for all segments in your network or for individual segments. You can view a trend of segment performance and a list of alarms generated on a segment. The Segment Summary view provides a summary of segment performance.
The following sections provide information to help you analyze the performance of segments in your network:
- Listing Statistics for Segments
- Determining the Performance of Individual Segments
- Analyzing Trend Data for a Segment
- Viewing Alarm Statistics for a Segment
- Viewing the Summarized Segment Information
HINT: Servers running the remote monitor (RMON) agent can notify you when nodes you selected for monitoring become inactive. For details, see Monitoring Nodes for Inactivity. Sometimes the RMON agent server must be taken off the network for maintenance. To prevent the segment from going unmonitored, you can choose a different RMON agent on the segment. For details, see Selecting the Preferred RMON Agent.
Listing Statistics for Segments
The List Segments view displays a list of segments and statistical information for each segment on your network. Statistics are displayed in columns of the table in the view. The view displays a list of segments associated with the object or node you selected from ConsoleOne.
See Analyzing Traffic on Nodes Connected to a Segment for details about how to use ZfS to get information about nodes on individual segments.
To view statistical information of all segments:
-
Select an Area or a node from ConsoleOne.
-
Click View > List Segments.
If you select an Area, the List Segments view displays statistics for all segments found within that Area. If you select a node, statistics for all segments connected to that node will be displayed.
The following table describes the statistics displayed for each segment. The sampling interval for updating statistics on segments is 15 seconds.
HINT: Statistics of segments are displayed in the List Segments view only if the segments are monitored by a Traffic Analysis Agent for NetWare or Traffic Analysis Agent for Windows NT/2000.
| Statistic | Explanation |
|---|---|
Segment Name |
Segment name or address. |
Type |
Physical segment type: Ethernet, FDDI, token ring, PPP, and unknown. Unknown indicates the segment whose physical segment type is other than the one listed. |
Speed (Mbps) |
The speed of the segment, as determined by the speed of the network board that attaches the RMON agent to the segment and factors such as the cable type of the segment. The value in this column appears only if you have at least one RMON agent connected to at least one server on your network. |
Utilization% |
Average percentage of the bandwidth currently used by all traffic on the segment. |
Packets/s |
Average number of packets per second currently transmitted on the segment. |
KBytes/s |
Average number of kilobytes per second currently transmitted on the segment. |
Errors/s |
Average number of errors per second currently appearing on the segment. |
Message |
Status of the RMON Agent on the segment. For details, see Selecting the Preferred RMON Agent. |
As ZfS polls segments, messages in the Messages column vary. These messages display the status of the preferred RMON agent on the segment.
The preferred RMON agent is the node you selected to send information about the segment to ConsoleOne. You can make this selection from the RMON Agent property page. For details, see Selecting the Preferred RMON Agent.
You can modify the view to show fields; format columns; sort and group items; change the font of text fields; or display grid lines in the table view by selecting the required option from View > Settings. For details, see Understanding Network Discovery and Atlas Management.
Determining the Performance of Individual Segments
ZfS provides real-time statistical information about the monitored segment on your network. This information is displayed in the Segment Dashboard view. The information displayed in this view is useful if you want to troubleshoot a segment.
The Segment Dashboard view displays four gauges that display the real-time statistics for a monitored segment. The lower portion of the view displays a bar graph of the top eight nodes, based on the value selected from the drop-down list. By default, it is based on packets out per second. See Viewing Statistics of the Top 20 Nodes for details about how to display a list of the most active nodes on a monitored segment.
You can configure the Segment Dashboard view to display the top eight nodes based on a different statistic. You can also choose to display or disable the top nodes graph. For details, see Choosing Options to Display Stations on a Segment.
You can set alarm threshold values on segment alarms for packets per second, broadcasts per second, and utilization percentage statistics displayed in the Segment Dashboard view. For details, see Defining Alarm Thresholds for Statistics Displayed in the Segment Dashboard View.
To view statistical information of an individual segment:
The Segment Dashboard view displays four gauges that display real-time statistics for a monitored segment. The peak value is indicated by a line on each bar in the graph. The following table describes the statistics displayed in the Segment Dashboard view.
Statistics are updated every five seconds. The numeric value of each statistic is displayed in the gauge.
Defining Alarm Thresholds for Statistics Displayed in the Segment Dashboard View
To set alarm threshold values for statistics displayed in the Segment Dashboard view:
-
Click the black ring outlining the gauge.
-
Drag the ring to increase or decrease the default values.
As you drag the ring, the color of the ring changes to red.
-
Stop at the value you want to set as the threshold value for the statistic.
The color of the ring is displayed in red up to the selected threshold value.
If the statistic on the monitored segment exceeds the threshold value, the RMON agent sends a trap to the management server, which forwards it to ConsoleOne and an alarm is generated.
Viewing the Graph of the Top Nodes on a Monitored Segment
The lower portion of the Segment Dashboard view displays a bar graph of the top eight nodes on a monitored segment. The default statistic on which the graph is based is packets out per second. You can change the statistic on which the graph is based. For details, see Choosing the Statistic Based on Which Top Nodes Graph Is Displayed. You can also choose to display or disable the top nodes graph. For details, see Choosing Options to Display the Top Nodes Graph.
Statistics for the graph are updated every five seconds. Every 60 seconds, the graph is re-sorted and the new top nodes are displayed. At this point, new nodes might be added and existing nodes might be discarded from the list.
Analyzing Trend Data for a Segment
ZfS allows you to determine trends of traffic patterns on the monitored segment. You can view the trend of segment performance from the Segment Trends view. You can use trend information to create a baseline of typical activity on segments. Having a baseline helps you set appropriate thresholds for segment alarms and plan maintenance activities and backups. Additionally, if problems occur on the segment, you can compare the typical traffic level against the atypical traffic level to help you discover the cause of the problem. For details, see Creating a Baseline of Typical Segment Activity.
The following topics will help you analyze trend data:
Understanding the Trend Display
Segment trend data is displayed depending on the type and settings of the RMON agent monitoring the selected segment.
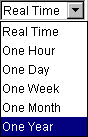
- If RMON Plus is the segment's preferred RMON agent, you can view current trends gathered every 30 seconds over the last hour and historical trends displayed over hourly, daily, weekly, monthly, or yearly periods.
IMPORTANT: If an RMON agent is installed on more than one node on a segment, the node you select in the RMON Agent property page as the node to send information about the segment to ConsoleOne is the preferred RMON agent server. For more details, see Selecting the Preferred RMON Agent.
- If RMON Plus is not selected as the preferred RMON agent for the segment, you can view only the current trends for the selected segment. Current trends are gathered every 30 seconds over the last hour. Select an RMON Plus agent as the preferred RMON agent for the segment to be able to view historical trends.
- If the preferred RMON agent is Traffic Analysis Agent for NetWare version earlier than 1.30, you can view current trends gathered over the past hour and trends for the past day.
- Real-time trends will not be displayed if memory usage is excessive or if configuration settings in the RMON agent are unacceptable.
- If the RMON agent is down or is experiencing problems, the trend for a monitored segment will be displayed as a broken graph.
- If the preferred RMON agent is a Novell Traffic Analysis Agent (version 1.30 or greater) or a third-party agent that implements the token ring Extensions to the Remote Network Monitoring MIB (RFC 1513), the segment bandwidth utilization graph displays slightly lower values than the actual utilization in the trend for the token ring segment view. This is because the MAC layer statistics are not taken into consideration for the utilization calculation.
Viewing Trend Statistics
To view the trend statistics for a segment:
Trend graphs are displayed for Ethernet, FDDI, and token ring segments. The default statistics, based on which graphs are displayed for the three types of segments, are as follows:
| Segment Type | Default Statistic |
|---|---|
Ethernet |
Total packets, good packets, and error packets |
FDDI |
Total packets |
Token ring |
Total packets |
The toolbar options let you change the time span of the trend you view, select statistics based on which you want the graph to be displayed, and export data to a file.
The following table describes the toolbar options in detail.


The File menu of the Segment Trends view can be used to print the statistical information of the current trend or to export the statistical information of a trend to a file and store the data in text format. You can later import the file into a spreadsheet for analysis.
You can view earlier or ensuing trends and change the size of the graph by using the options available in the graph area of the Segment Trends view, as shown in the following table.


Viewing Alarm Statistics for a Segment
ZfS tracks alarm statistics for segments. Alarms are generated when threshold values for statistics on a segment are exceeded. You can view a list of all the alarms for the monitored segment in the Segment Alarms property page.
To view alarm statistics for a segment:
ZfS provides default threshold values for various segment alarms. You can enable or disable the default values for a monitored segment. If you choose not to use the default values, you can set the threshold value using the Set Alarm dialog box. See Configuring Alarm Options from the Set Alarm Dialog Box for details about how to set segment alarms.
If a segment does not have an RMON agent connected to it, an error message is displayed.
Viewing the Summarized Segment Information
The Segment Summary view provides brief information about a monitored segment in your network. It displays static information about the monitored segment, whether the segment is monitored or not, and information about the alarms generated on the segment. At a glance, you can determine the utilization of network capacity by nodes on the monitored segment, view a trend based on packets transmitted by nodes on the segment, and see the distribution of protocols on the segment.
To view the summarized segment information:
The following table describes the static information displayed in the Segment Summary view.
The Segment Summary view displays information about alarms generated on a monitored segment, as described in the following table.
The Segment Summary view displays dynamic information about a monitored segment, as described in the following table.
Analyzing Traffic on Nodes Connected to a Segment
ZfS provides various views you can use to obtain information about nodes connected to the monitored segments in your network.
The following sections provide information that will help you monitor the performance of nodes connected to the segments in your network:
- Viewing Statistics of the Top 20 Nodes
- Viewing Statistics of Nodes on an FDDI Segment
- Viewing Statistics of Nodes on a Token Ring Segment
- Viewing Conversations (Traffic) Between Nodes
- Monitoring Nodes for Inactivity
Viewing Statistics of the Top 20 Nodes
You can use ZfS to determine the statistics of the most active nodes on a segment for a wide range of performance statistics. This is useful if you want to discover which node is generating the most traffic based on a particular statistic. For example, you can find the heaviest source of broadcast traffic.
The Stations view displays a list of all nodes on a monitored segment. You can use this view to determine the top 20 nodes on a monitored segment. The view lists the top 20 stations sorted by packets out per second. You can choose a different statistic based on which you want the top 20 nodes to display. For details, see Choosing a Statistic Based on Which Top 20 Nodes Are Displayed. If there are fewer than 20 top nodes, only the available number of top nodes are listed.
To view the statistics of the top 20 nodes on a segment:
-
Select a segment from ConsoleOne.
-
Click View > Stations.
-
From the Stations view, click View > Show Top N Stations.
The Stations view displays columns that provide statistical information for each station. The following table describes the statistics displayed in the Stations view.
Stations statistics are updated periodically. Every 60 seconds, the table is resorted and new top nodes are displayed. At this point, new nodes might be added and existing nodes might be discarded from the list.
Viewing Statistics of Nodes on an FDDI Segment
ZfS lets you display data for nodes on monitored FDDI ring segments to help troubleshoot problems.
The FDDI Ring Stations view displays statistics for individual nodes on the monitored FDDI ring segment. The view lists the nodes on the segment and shows the order of each node on the ring and which node is the active monitor.
To view the statistics of nodes on an FDDI ring segment:
The statistics shown for each node are cumulative since the Traffic Analysis Agent for NetWare was last started and are updated every ten seconds as described in the following table:
Viewing Statistics of Nodes on a Token Ring Segment
The Token Ring Stations view displays statistics for individual nodes on the monitored token ring segment. The view lists the nodes on the segment and shows the order of each node on the ring and which node is the active monitor.
To view the statistics of nodes on a token ring segment:
The view displays statistical information as described in the following table. Statistics are cumulative since the RMON agent was started and are updated every ten seconds.
Viewing Conversations (Traffic) Between Nodes
ZfS provides real-time data about all the network traffic between a selected node and one or more other nodes on a segment. This data can be viewed from the Conversations view. You can use the data displayed in this view to determine specific information about node communication. For example, it can show which nodes communicate with a router or server, determine the load on a server, or examine the traffic flowing to or from a node that is reporting difficulties.
To view conversations between nodes:
-
Select a node from ConsoleOne.
-
Click View > Conversations.
If the selected node is connected to more than one segment, the Select Segment dialog box displays.
The Conversations view lists the percentage of traffic that each destination node contributes to the load on the source node. However, due to sample skewing (samples not taking place at the same time) and rounding up of statistics, the numbers in the columns do not always add up to 100%.
The statistics displayed in the Conversations view are updated every 5 seconds. The following table describes the statistics displayed in the Conversations view.
Monitoring Nodes for Inactivity
For segments on which at least one Traffic Analysis Agent for NetWare version 1.0 or later is installed, you can specify the nodes on the segment you want to monitor so that you are alerted if they become inactive. You can do this using the Monitor Nodes for Inactivity view.
Monitoring nodes for inactivity has the following advantages:
- You can monitor any node on the segment, regardless of the protocol the node uses.
- This feature does not impact network traffic because the traffic analysis agent does not poll the nodes to obtain their status.
To view a list of nodes monitored for inactivity:
Another way to monitor connectivity is to specify the target in the Ping window and test the status of the specified node. The Connectivity Test window displays statistics that enable you to determine the status of the specified target. For details, see Monitoring Services.
By default, the poll interval for refreshing the Monitor Nodes for Inactivity view is zero seconds. You can configure the poll interval based on how often you want the view to be refreshed. For details, see Specifying the Poll Interval for Refreshing the Monitor Nodes for Inactivity View. You can also change the duration for the agent to verify the node before declaring it inactive. For details, see Specifying the Duration for the Agent to Determine if a Node Is Inactive.
IMPORTANT: You do not need to keep the Monitor Nodes for Inactivity view open or ConsoleOne for the nodes to be monitored because the RMON agent is doing the monitoring, not ConsoleOne. The Alarm Manager must be running to record an inactive node in the Alarm Report. If ConsoleOne is not running, check for alarms after you restart it.
To monitor a node for inactivity:
-
Right-click a node from ConsoleOne or from any view that displays a list of nodes > click Monitor Nodes for Inactivity > click Add.
To disable a node from being monitored for inactivity:
-
Right-click the node that is monitored for inactivity > click Monitor Nodes for Inactivity > click Delete.
IMPORTANT: After the addition of any inactive node, if the NIC card of the node is changed, you will be able to see the node in the Monitor Node for Inactivity view but will not be able to delete it because of the change of MAC address.
Statistics displayed in the Monitor Nodes for Inactivity view are described in the following table.
You can open the Monitor Nodes for Inactivity view to check the Status column any time ConsoleOne is running. To do this, complete the following steps:
Capturing Packets
ZfS provides packet capture and decoding tools that help you analyze your network activity and identify the source of network problems. Capturing and decoding packets can help you troubleshoot network problems by giving you detailed information about what is actually happening on a segment.
ConsoleOne can request packet capture on any monitored segment. Each RMON agent captures packets on the segment it monitors and stores information in its local buffer.
The following sections contain detailed information about capturing packets:
- Defining a Capture Filter
- Starting Packet Capture
- Creating Simultaneous Packet Capture
- Stopping Packet Capture
- Restarting a Stopped Packet Capture
- Saving and Viewing the Captured Packets
Defining a Capture Filter
ZfS provides a capture filter with default values you can use to capture packets on any monitored segment. You can modify the values by defining a filter. For example, if you want to capture only NetWare packets sent by a certain node, you can define a filter to capture only those packets. As a result, the buffer has more space to store your selected packets.
When you specify a capture filter, you are specifying the packets to capture (include) in the buffer on the RMON agent, not the packets to exclude. When you specify both a node and a protocol, packets must meet both criteria to be captured. If you select more than one protocol family, packets can meet either protocol criterion to be captured.
To define a capture filter:
-
Select a node or a segment from ConsoleOne.
-
Click File > Actions > Capture Packets.
-
Type a name in the Buffer Name text box, if you do not want to use the default name.
The buffer name helps you keep track of multiple captures on the same segment.
-
Type or select the source and destination nodes from the Stations box. You can also click the Find Node icon to select the node from the Find dialog box, an atlas component.
The Stations box displays a list of nodes on the segment from which the user can capture packets. You can select from Hardware, IP, or IPX stations.
If you choose ANY in both the source and destination node list, all packets sent by or received from any node are captured.
-
Select the direction of traffic flow between the nodes.
Click an arrow option from the drop-down list to specify the direction of the traffic flow. The available node and traffic flow directions are shown in the following table.
-
If you want to filter on protocols used, add the protocol suites you want to the Selected list box.
To add a protocol to the Selected list box, select it from the Available list box > click Add.
or
To delete a protocol from the Selected list box, select it > click Remove.
All protocols are selected by default when you first use ZfS. If no protocols are listed in the Selected list box, all protocols are captured.
See Protocol Decodes Suite Supported by ZfS for details about the protocol decoding support that ZfS provides.
-
Specify what kind of packets to capture on Ethernet, FDDI, or token ring segments.
The default statistics for the segments are listed in the following table.
-
Specify whether to stop packet capture or to overwrite the oldest packets in the buffer with newer ones when the buffer is full.
Continuing packet capture means that a stop criteria does not exist and new packets will overwrite those already captured. You will need to manually stop packet capture if you select to overwrite the oldest packets.
-
Specify a buffer size.
Select a buffer size from the drop-down list or specify the size you want. The default buffer size is 32 KB.
The RMON agent will attempt to provide the buffer size requested. If not enough space is available in server memory for a large buffer, the RMON agent cannot create the requested size.
-
Select a slice size.
A slice specifies the maximum number of bytes of each packet, counting from the packet header, to keep in the buffer. This helps maximize the number of packets you can store in your buffer space, as well as reduce the load on the RMON agent to process captured packets. If you want to decode protocol header information, you need only 100 to 150 bytes. The rest is typically data that you need only if you suspect a data corruption problem. However, on certain very large packets, slicing can cause incorrect decodes by truncating information.
Your capture filter is now set up. If you decide not to capture packets, click the Cancel button.
Starting Packet Capture
To start packet capture:
-
Define a capture filter. See Defining a Capture Filter for the procedure.
-
Click OK to apply the filter settings on the preferred RMON agent of the segment.
-
Click Start in the Capture Status dialog box.
When you start packet capture, the Start button in the Capture Status dialog box toggles to read Stop and the activity indicator reflects the capture buffer storage as it progresses. As packets that meet the filter criteria are captured, the capture buffer will begin to store the packet data, and a box below it will display the number of packets captured. The needle stops turning when the capture buffer is full.
Creating Simultaneous Packet Capture
You can create simultaneous packet captures by repeating the procedure you followed to start the first capture. This lets you set up and run captures with different capture criteria.
You can run a maximum of 20 packet captures with different capture criteria.
Stopping Packet Capture
When you set up a capture filter, you choose whether to stop packet capture when the capture buffer is full or to continue to capture packets but overwrite the oldest packets in the buffer.
By default, the packet capture will stop when the capture buffer is full. If you select to overwrite when the buffer is full, you must stop packet capture manually.
To stop packet capture manually, click the Close button in the Capture Status dialog box.
IMPORTANT: If you restart packet capture from the Packet Capture Setup window, the existing buffer is deleted and refreshed.
Restarting a Stopped Packet Capture
When the Packet Capture Setup window is open, you can start and stop capturing packets using the Start/Stop toggle button in the Capture Status dialog box. If ZfS is capturing packets, the button is labeled Stop; if it is not capturing packets, the button is labeled Restart. The RMON agent buffer is cleared when you restart.
Displaying Captured Packets
You can display and view decoded packets stored in the capture buffer from the Trace Display window by clicking the View button in the Capture Status dialog box. If you display this window while packets are being captured, capture automatically stops.
ZfS retrieves packet data from the RMON agent only as necessary for ConsoleOne to decode and display the packets as you view them. This minimizes the amount of packet data transferred between the RMON agent and ZfS. If you prefer not to display all the packets you captured, you can create a display filter to display only a defined group of captured packets. For details, see Defining the Display Filter.
The following sections provide information on how you can view captured packets and perform trace display operations:
- Viewing Captured Packets
- Filtering Packets for Display
- Defining the Display Filter
- Selecting and Decoding a Different Packet
- Highlighting Protocol Fields and Hexadecimal Bytes
- Saving Packet Files
- Opening Packet Files
- Printing Packets
ZfS provides default settings based on which captured packets are displayed in the Trace Display window. To change the default values provided for displaying captured packet, see Choosing Options to Display a Captured Packet.
Viewing Captured Packets
You can use the Trace Display view to view the decoded packet capture information, the packet data in hexadecimal format, and a summary of the captured packets:
To view a captured packet:
-
Select a node or a segment from ConsoleOne.
-
Click File > Actions > Capture Packet.
-
Capture packets using the capture filter of your choice. See Defining a Capture Filter for details.
-
Click the View button in the Capture Status dialog box.
The Trace Display window contains three panes that display captured and decoded packets, as described in the following sections:
- Viewing the Packet Decode
- Viewing Packet Data in Hexadecimal Format
- Viewing a Summary of Captured Packets
When you view packets initially, the first packet in the Summary pane is highlighted and selected. The contents of that packet are displayed in the Decode pane. If you select a different packet in the Summary pane, it is highlighted and the Decode pane displays its decoded contents.
You can change the size of the Trace Display panes by dragging the divider between windows.
Viewing the Packet Decode
The Decode pane displays detailed information about the contents of a selected packet. The packet contents are interpreted (decoded) and displayed by protocol fields.
By default, the Decode pane displays fully decoded packet data. You can configure the Trace Display window to display the decoded packets either as full protocol decodes or by one line per protocol layer. See Choosing Options to Display a Captured Packet for details about how to change the default settings.
Viewing Packet Data in Hexadecimal Format
The Hexadecimal pane shows uninterpreted packet data in hexadecimal format. The ASCII or EBCDIC portion of the Hexadecimal pane (to the right) displays a dot for every hexadecimal byte that has no ASCII or EBCDIC equivalent.
The first column in the pane indicates the offset in hexadecimal bytes. The offset is the number of bytes counting from the beginning of the header. For example, the first three lines have the following offset:
- Hexadecimal 0---indicates zero offset
- Hexadecimal 10---indicates decimal 16 offset (16 bytes precede this)
- Hexadecimal 20---indicates decimal 32 offset (32 bytes precede this)
Regardless of whether you choose to display one-line decoded or fully decoded packets in the Decode pane, entire packets are displayed in the Hexadecimal pane. The Hexadecimal pane and the highlighting tool are especially helpful with the full-decode display when you are trying to associate protocol fields with specific bytes in a packet. For details, see Highlighting Protocol Fields and Hexadecimal Bytes.
Viewing a Summary of Captured Packets
The Summary pane gives you an overview of the conversation between the source and the destination nodes. You can select a packet in this pane for further decoding and display in the other panes. You can scroll the pane horizontally, and you can change the size and position of the columns in the pane.
Statistical information about the captured packets displayed by the Summary pane is described in the following table:
Filtering Packets for Display
After you have captured packets, you can apply a display filter to the capture buffer and view only the packets that interest you. You can filter on node names or addresses, protocol families or protocol layers, or contents of a selected field. This is useful in situations when, after you have captured packets, you realize there is a problem with a specific workstation and you want to display only the packets it has sent or received.
Display filtering requires the transfer of a portion of every captured packet from the RMON agent to ConsoleOne. For large captures, this consumes time and network bandwidth. We recommend that you define very specific capture filters rather than filtering during display. However, subsequent filtering of the same capture does not result in additional data transfer from the traffic analysis agent because the data is already transferred to ConsoleOne. Therefore, it is much quicker to filter the same packet capture a second time.
Display filters affect only the display; they do not change the capture buffer. All captured packets remain in the capture buffer and are available for viewing with a different display filter or without any display filter.
You can define a display filter in either of two ways:
- From the Trace Display window, click View > Filter.
The Display Filter dialog box is displayed. For details, see Defining the Display Filter.
- Double-click a packet in the Summary pane or double-click a selected protocol layer or field in the Decode or Hexadecimal pane.
A filter is set based on what you selected. You can also modify the filter information as needed. For details, see Point-and-Click Filtering.
Defining the Display Filter
Capture packets using the capture filter of your choice. See Defining a Capture Filter for details. To define a display filter:
-
Select a segment from ConsoleOne.
-
Click File > Actions > Packet Capture.
-
Click the View button in the Capture Status dialog box.
-
With the Trace Display window displayed and active, click View > Filter.
-
Select the nodes from the drop-down lists. You can select from IP, IPX or MAC address.
Alternatively, you can enter a node name or address in place of ANY in either or both of the drop-down list boxes.
-
Select the direction of the traffic flow from the arrow options available in the drop-down list.
-
To display all the packets of a specific protocol layer:
-
To display all the packets that have the same contents in a specific field:
-
Enter the offset in hexadecimal bytes.
You can count the offset in the Hexadecimal pane when the packet is decoded, using the offset column for guidance. See Viewing Packet Data in Hexadecimal Format for details.
-
Specify whether the offset is counted from the beginning of the packet or from the beginning of a protocol layer.
If you choose the protocol layer option, you must select a specific protocol in the Protocol box.
-
Enter the data that you want to include in the filter.
-
Specify the format in which you want the data to be displayed. Select from hexadecimal, ASCII, or EBCDIC format options.
You can also fill in the values using point-and-click filtering. See Point-and-Click Filtering.
-
-
Click OK.
The dialog box closes and ZfS begins to select the required packets from the capture buffer.
If you have a large capture buffer, ZfS displays the initial packets that pass the filter. ZfS continues to filter in the background while you examine these packets.
The Summary pane shows the list of filtered packets that met the criteria in the display filter. You can view and decode them as described earlier in this section.
Point-and-Click Filtering
You can define a display filter using the point-and-click method by double-clicking a field in the Trace Display window.
To define a display filter using the point-and-click method:
-
To display only packets in one conversation (for example, between a node and a server), double-click a packet in that conversation in the Summary pane.
The Display Filter dialog box displays the source and destination of the selected packet. You can also modify the addresses, if needed. For example, you can change the destination address to ANY, the broadcast address, or a specific node address.
or
To display all the packets containing a specific protocol layer, double-click the protocol line in the Decode pane.
The Display Filter dialog box displays the protocol you selected.
or
To display all packets with the same contents as a specific field, double-click the field in the Decode pane.
The Display Filter dialog box displays the field, data, and type of data for the selected field.
or
To display all packets with the same content as a specific offset, click the field in the Hexadecimal pane.
The Display Filter dialog box displays the offset and the type of data for the selected field.
-
Click OK.
The dialog box closes and ZfS begins to select the packets from the capture buffer.
The Summary pane displays the list of packets that met the display filter criteria.
Selecting and Decoding a Different Packet
To select a different packet for decoding:
-
Select View > Go To.
You can also use the arrow keys on your keyboard to highlight a different packet.
-
Enter the packet number.
If the packet number specified is more than the total number of captured packets, an error message displays. If a display filter is set and the specified packet number has not passed the filter, then a packet closest to the specified packet is displayed.
Packets are retrieved from the RMON agent as you select their headers in the Summary pane using the mouse or the arrow keys. Using the Go To dialog box avoids transferring unwanted packet data from the RMON agent. Similarly, scrolling the Summary pane with the scroll button retrieves only the packet header data when creating the decode summary, whereas using the arrow keys retrieves all packet data.
Highlighting Protocol Fields and Hexadecimal Bytes
ZfS provides a highlighting tool that helps you associate protocol fields and hexadecimal bytes. Highlighting can be a useful training tool for new network managers who want to learn about protocol decoding.
You can use this tool in the following ways:
- Highlight a protocol layer in the Decode pane.
All bytes are highlighted in the selected protocol layer of the Hexadecimal pane.
- Click a field in any of the protocol layers in the Decode pane.
Associated bytes are highlighted in the Hexadecimal pane.
- Click hexadecimal bytes in the Hexadecimal pane.
All hexadecimal and ASCII or EBCDIC bytes of this field in the Hexadecimal pane are highlighted, and the associated field is highlighted in the Decode pane.
- Click ASCII or EBCDIC text in the Hexadecimal pane.
All hexadecimal and ASCII or EBCDIC bytes that belong to the field are highlighted in the Hexadecimal pane, and the associated field is highlighted in the Decode pane.
Saving Packet Files
You can save captured packets to a file and open the file later to analyze or print. When you save packets to a file, ZfS creates a binary file with the name you specify. You might want to save packets to a file in the following situations:
- To transfer the packets to another system or to send them for analysis.
- To apply a display filter to decoded captured packets so you can view only the packets that interest you. After you apply the display filter, you can save the filtered packets to a file.
- To compare packets saved from your buffer with other packets. You can either save the other packets, or view them from the capture buffer. You can view only one active capture buffer at a time. However, after you have saved packets to a file, you can open as many files as you want, and simultaneously view a capture buffer, if desired.
Packet files are compatible with the Traffic Analysis Agent for Windows NT/2000 and earlier versions of ManageWise®. Hence, packets captured and saved using Traffic Analysis Agent for Windows NT/2000 can be viewed using ZfS.
To save captured packets to a file while viewing the capture buffer:
-
Click File > Save As.
The Save Filtered Packets or Save Unfiltered Packets dialog box is displayed, depending on whether you filtered your packets.
-
Enter the name in the Filename text box.
The .TR1 file extension is appended automatically.
-
Click OK.
IMPORTANT: Filter out the captured packets you want to save. (See Filtering Packets for Display.) When you save packets, you save only those that pass the display filter. If you did not filter the display, all packets are saved.
Printing Packets
To print packets:
-
Open a Trace Display window, either by capturing packets or by opening a packet file.
-
Click File > Print.
-
Select the print options you want.
You can select the destination, format, and the packets you want to print.
- Choose whether to print to your default printer or to a file. If you choose a file, enter its name and specify whether the current packet data should overwrite the file or be appended to it.
- Choose whether you want a summary of the packet information, only the hexadecimal information, a full decode, or a brief decode. These formats correspond to the three panes described in Viewing Captured Packets.
- Choose whether to print all packets, a range of packets, or only the filtered packets.
-
Click OK.
Analyzing Traffic Generated by Protocols in Your Network
ZfS lets you determine the distribution of protocols in your network and provides statistical information of the protocols discovered by the RMON2 agent in the network, as well as transport and application layers. You can also add supported and custom protocols to your network. Supported protocols are those that the RMON2 agent is able to decode and count the number of packets transmitted in your network using the protocol. Custom protocols are not supported by the RMON2 agent but are used by nodes in your network.
The following sections explain how you can use ZfS to manage protocols in your network:
- Displaying a List of Protocols Used in Your Network
- Determining the Distribution of Protocols in a Segment
Displaying a List of Protocols Used in Your Network
You can use the Protocol Directory property page to view a hierarchical representation of supported and custom protocols used in the network, transport, and application layers in your network. By default, the page displays the Protocol Directory Tree that displays a collapsed list of protocols. The protocols used in the data link layer are displayed at the top level. You can expand each protocol to display the list of supported and custom protocols under the selected protocol.
You can also use the Protocol Directory property page to add or delete the protocols supported by the RMON2 agent. For details, see Adding Supported Protocols to the Protocol Directory Tree. The custom protocols that are used by the nodes in your network but are not supported by the RMON2 agent can also be added using the limited extensibility feature of RMON2. For details, see Adding Custom Protocols to a Supported Protocol Tree. For details about the limited extensibility feature, see RFC 2021.
For a selected protocol, you can specify the RMON2 groups you want the RMON2 agent to support. This will let you obtain the RMON2 details of the groups that you specify the agent to support. While adding the protocol, you can enable the agent support for the Host group, Matrix group, and Address Map group. The Groups Supported box in the lower portion of the property page indicates whether the agent support for the Host and Matrix groups in the network layer and application layer, and support for the Address Map group are enabled, disabled, or not supported for the selected protocol. You can configure the values displayed in the Groups Supported box.
The Add and Remove buttons are enabled only when you select a protocol in the Protocol Directory tree.
IMPORTANT: The Traffic Analysis Agent for NetWare and Traffic Analysis Agent for Windows NT/2000 do not support enabling of the Address Map, Host, and Matrix groups for protocols in the Protocol Directory.
To open the Protocol Directory property page:
-
Click RMON2 under Service within a node from ConsoleOne.
-
Click File > Properties > the Protocol Directory tab.
Refer to the following sections:
- Adding Supported Protocols to the Protocol Directory Tree
- Adding Custom Protocols to a Supported Protocol Tree
Adding Supported Protocols to the Protocol Directory Tree
Supported protocols are those that the RMON2 agent is able to decode and count the number of packets transmitted in your network using the protocol.
Default values are provided for the parameters of protocols supported by the RMON2 agent. When you enter the name of a protocol, the default values are displayed if the protocol is supported.
To add a protocol to the Protocol Directory tree:
-
Open the Protocol Directory property page.
-
Select a protocol from the Protocol Directory tree.
-
Click Add.
The following table describes the parameters for a selected protocol.
IMPORTANT: The Protocol Name parameter cannot be configured. If you configure the port number or protocol code of a selected protocol, all child protocols of the selected protocol will be deleted.
If the protocol name you enter or select from the Protocol Name list is supported by the RMON2 agent, the default parameters for the protocol are displayed in the appropriate fields of the Add Protocol dialog box. You cannot edit the parameters once you have added, if you do not want to use the default values.
-
Click OK.
The new protocol is added as a child protocol of the selected protocol. You cannot edit the parameters of the protocol you have added. You would need to delete the protocol and add the protocol again with different parameters.
Adding Custom Protocols to a Supported Protocol Tree
Custom protocols are those that are not supported by the RMON2 agent but are used by nodes in your network. If the RMON2 agent supports the limited extensibility feature of RMON2 for a selected protocol, you can add custom protocols under the selected protocol. See RFC 2021 for more information. If the RMON2 agent does not support the limited extensibility feature for a protocol, you cannot add custom protocols under that protocol. A custom protocol cannot have child protocols.
Because default values are not provided for custom protocols, you must enter the appropriate values if you are adding a protocol that is not supported by the RMON2 agent.
To add a custom protocol to the Protocol Directory tree:
-
Select a supported protocol from the Protocol Directory tree.
-
Click Add.
-
In the Protocol Name field, enter the name of the protocol.
-
In the Protocol ID field, enter the port number for an application layer protocol or a protocol code for protocols in other layers.
IMPORTANT: The port number or protocol code should be a decimal value.
-
From the Groups Supported box, select the groups you want the RMON2 agent to support for the protocol.
The custom protocol is added as a child protocol of the supported protocol.
To remove a protocol from the Protocol Directory tree:
Determining the Distribution of Protocols in a Segment
ZfS lets you determine the distribution of protocols discovered by the RMON2 agent. You can use the information displayed in this view to analyze the traffic in your network and to troubleshoot network problems. Use the Protocol Directory property page to add, delete, or edit a protocol. See Adding Supported Protocols to the Protocol Directory Tree and Adding Custom Protocols to a Supported Protocol Tree for details.
The distribution of protocols discovered by the RMON2 agent is displayed in the Protocol Distribution view, based on the layer in which the protocols are discovered.
To view the distribution of protocols in the selected segment:
The view displays the following three tables that list the protocols discovered in the network:
- Network layer table
- Transport layer table
- Application layer table
The protocols discovered by the RMON2 agent are placed in the appropriate table in the Protocol Distribution view depending on the layer in which they were discovered. Each table displays protocol statistics that are updated every 15 seconds.
The following table describes the protocol statistics displayed in the Protocol Distribution view.
IMPORTANT: Only one entry of each protocol is displayed in the Protocol Distribution view. Consolidated statistics are displayed for a supported protocol in more than one protocol suite.
Analyzing Traffic on Switches
ZfS provides statistical information about ports in a monitored switch and a list of nodes connected to each port in your switched network. This information is displayed in the Unified Port Traffic view. You can use the view to determine the load on the desktop and workgroup switches in your switched network. When only one node can be connected to each port in a switch, the switch is known as a desktop switch. When one port of a switch is connected to a connecting device to which more than one node is connected, the switch is called a Workgroup switch.
Ports and nodes connected to ports of a switch can be monitored using an embedded RMON agent or external RMON agent. An embedded RMON agent is installed on the port of a switch. An external RMON agent is installed on a node connected to a switch.
The following sections explain how you can obtain information about switch ports and nodes connected to ports in your switched network:
Viewing Statistics for Ports in a Switch
You can use the Unified Port Traffic view to obtain statistical information about every switch port in your network. The view also displays a drop-down list of nodes connected to each port. The information displayed in this view is useful if you want to troubleshoot a port.
The Unified Port Traffic view displays a list of nodes connected to ports on the switch and statistics for each port. You can view Ethernet specific statistics for Ethernet ports on a switch. Statistics specific to FDDI and token ring ports are not displayed with this version of ZfS, although general port statistics are displayed for all ports on a switch regardless of the media type. You can choose to display all statistics or configure the Unified Port Traffic view to display selected statistics. For details, see Choosing Statistics to Display in the Unified Port Traffic View.
To display the statistics of ports in a switch:
Viewing the Summarized Switch Information
The Switch Summary view provides brief information about a selected switch. You can view static information about a selected switch and information about alarms generated on the switch. You can also determine the packets and broadcasts received by the switch per second.
To view the summarized switch information:
The Switch Summary view displays static information about a selected switch, as described in the following table.
The Switch Summary view displays information about alarms generated on a selected switch, as described in the following table.
The Switch Summary view displays dynamic information about a selected switch, as described in the following table.