On the installation workstation, insert the ZENworks for Servers Program or ZENworks 6 Server Management Program CD.
The startup screen is displayed. If the startup screen is not automatically displayed after inserting the CD, run WINSETUP.EXE at the root of the CD.
IMPORTANT: If you copied the Program CD structure to the installation workstation's hard drive, the path between the root of the hard drive and the first CD directory can contain only directory names that conform to the 8.3-character DOS file naming convention. If any long directory names exist in the path, the installation program will not work.
Click the Policy-Enabled Server Management option.
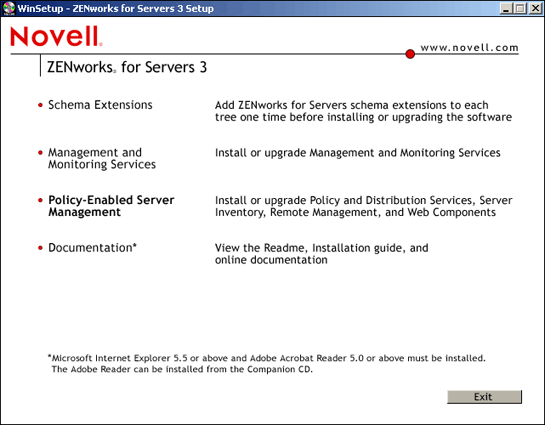
Click the Install/Upgrade option.
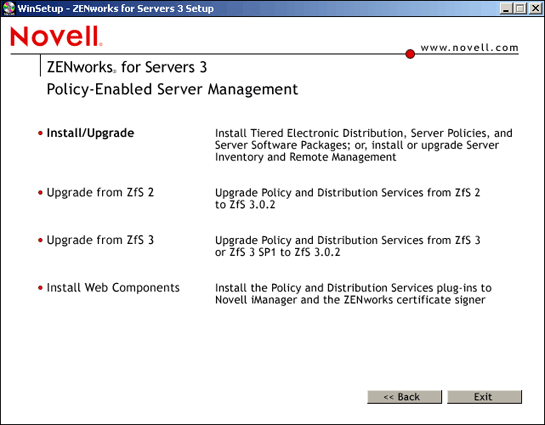
This starts the installation program, where you will select to install Policy and Distribution Services.
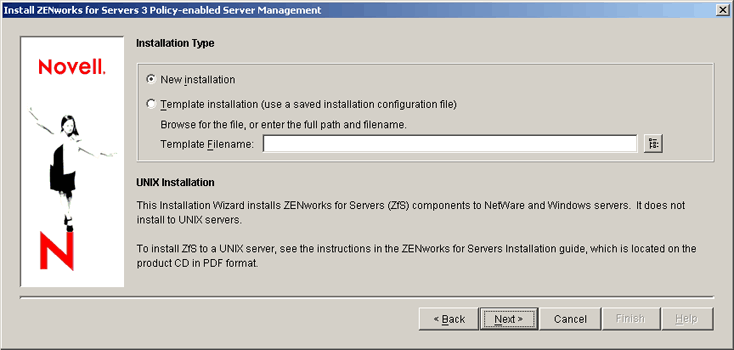
If you agree with the Software License Agreement, click Accept > Next.
Click Next to perform a new installation.
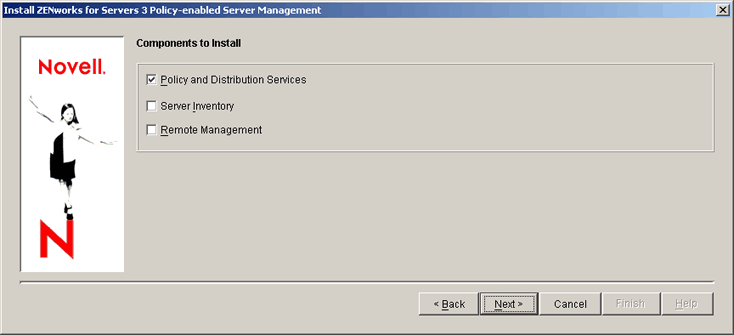
Click the check boxes for each of the components you want to reinstall > click Next.
On the Installation Options page, do the following:

-
For the Create eDirectory Objects option:
- Check this box if you will be reinstalling Distributor software. This is required for re-creating the Distributor's eDirectory object.
- Check this box if you will be installing additional Subscribers. This will create the Subscriber's eDirectory object, install its Subscriber software, and assign its trusted tree to be the tree that you select in the next installation page.
- Uncheck this box if you will only be reinstalling Subscriber software, such as to a server that already had a Subscriber object created for it.
- Uncheck this box if you will only be installing Subscriber software to a server that does not have a server object in any eDirectory tree, such as a Windows server that is in a Microsoft* domain. You can identify its trusted tree in a later installation page.
-
The Install Software Files option must be checked to install the Distributor or Subscriber software.
-
The Pause File Copying option is optional.
-
Click Next.
Browse for the target tree > click OK > click Next.
This installation page will display only if you enabled installation of ZfS objects (see Step 7).
This will automatically become the trusted tree for all Subscriber servers selected in the next installation page. The trusted tree is where the Subscriber receives its configuration updates.
For more information on trusted trees, see "Subscriber Software Configuration and Trusted Trees" under "External Subscribers" in "Tiered Electronic Distribution" in "Policy and Distribution Services" in the Administration guide.
Click Add Servers > browse for the servers where you want to reinstall the software > click OK to place the selected servers into the Server Selection page.
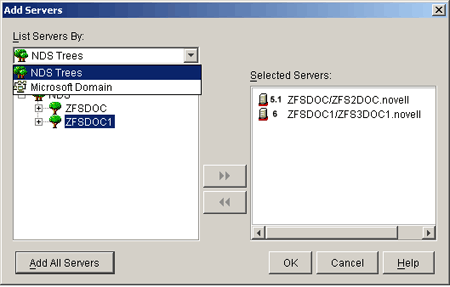
The Add Servers option displays the Add Servers dialog box, where you can browse for both NetWare and Windows servers by selecting either NetWare trees or Microsoft domains from a drop-down box. You can select servers individually or in multiples (using Ctrl and Shift). You can also select groups of servers by selecting eDirectory containers, Windows workgroups, or Microsoft domains.
For more information on using the Add Servers dialog box, click its Help button.
Make sure you have selected all of the NetWare and Windows servers before exiting the Add Servers dialog box.
IMPORTANT: If you checked the Create eDirectory Objects check box on the Installation Options page (see Step 7), both NetWare and Windows servers will have eDirectory Subscriber objects created in the tree that you identified in the eDirectory Tree for Creating Objects page (see Step 8). However, if you unchecked this box, you should identify a trusted tree for each Subscriber in the File Installation Paths and Options page (see Step 12).
On the Server Selection page for each listed server, click the check boxes the match the type of software installed on them.
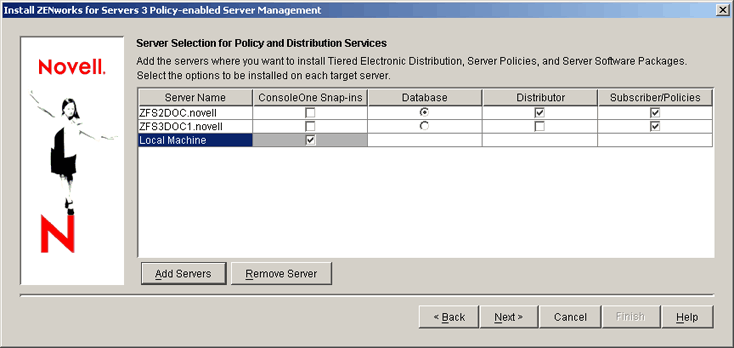
You only need to enable the Database column if you are reinstalling because of corruption of the Database file, or if the file was inadvertently deleted.
On the File Installation Paths and Options page (see Step 12), you can create different configurations for different sets of objects. Therefore, you can select objects that might have different installation paths and different trusted trees.
When you have finished configuring the selected servers, click Next.
On the File Installation Paths and Options page, do the following:
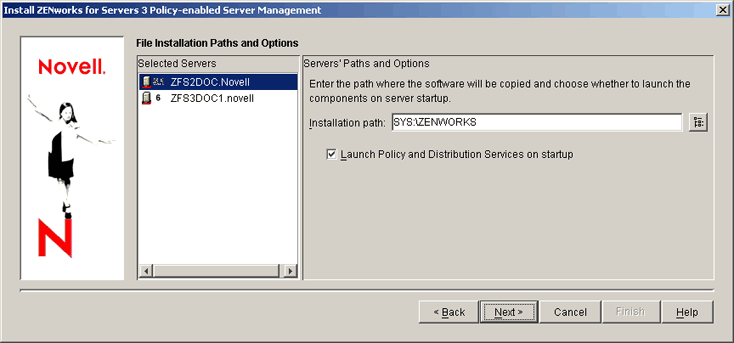
HINT: For all of the configuration options on this page, if you have multiple objects to select from, you can select some of them, fill in the fields, then select another set of objects, and fill in the fields for them. In other words, you can create different configurations for different sets of objects.
-
The installation paths for each listed server will display the current path used by the server. You can accept or change those paths.
IMPORTANT: Do not use double-byte or extended characters in any part of an installation path, including a NetWare volume name.
-
If you disabled installation of ZfS objects (see Step 7), an empty Trusted Tree field will be displayed.
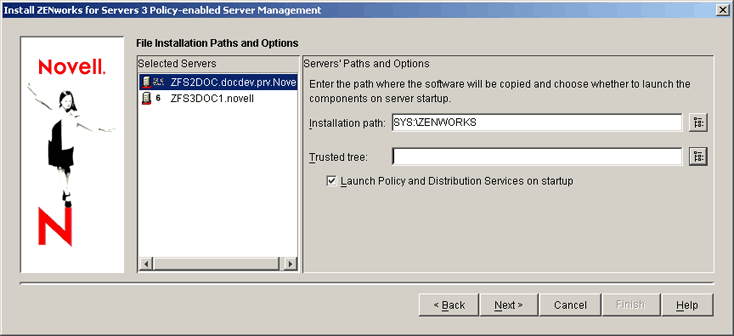
You must browse for or enter the exact tree name.
If you are reinstalling software for a Subscriber server, this would be the tree where you originally installed its Subscriber object.
The trusted tree has two purposes:
- To locate a Distributor that can give the TED configuration information to the Subscriber
- To indicate which tree to accept policies from
When you install the Subscriber software to a server in another tree or in a Microsoft domain, and you do not want to create a Subscriber object in your Distributor's tree, you should identify the trusted tree for the Subscriber server.
If you do not select a tree to be recognized as the Subscriber server's trusted tree during installation of only the Subscriber software (no object), your Policy Package Distributions will not extract on that Subscriber server, because policies often point to objects in a tree.
-
Click Next.
If you enabled installation of ZfS objects (see Step 7), the following pages will be displayed:
On the Installation Summary page, you can save this configuration, because you might run this particular installation configuration again if you have corrupted or deleted files.
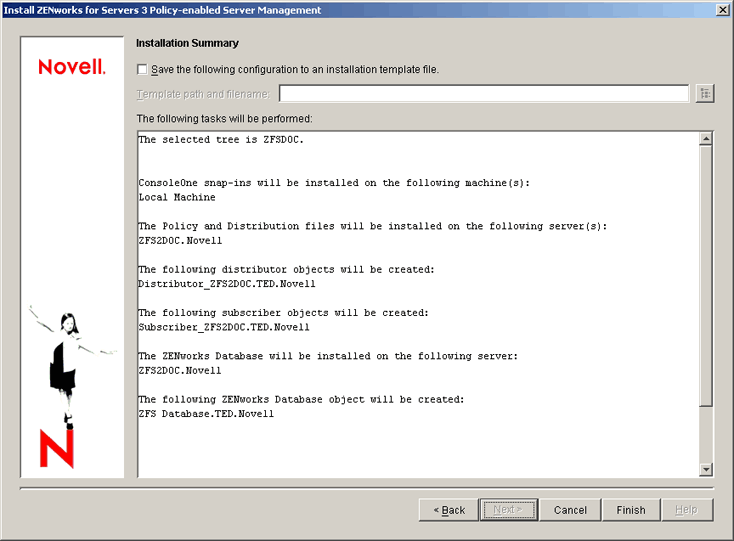
To save the configuration:
-
Click the Save the Following Configuration check box.
-
Enter a configuration filename, including its full path.
This is the file you would browse for when using the Template Installation option on the Installation Type page. The template file will cause the remaining installation pages to be filled in. You then have the option to change any installation page settings as you clicked Next on each page.
On the Installation Summary page, click Finish to begin the installation process.
Continue with Determining if Reinstalling Policy and Distribution Service Was Successful.