2.1 Using the Novell Client Configuration Wizard
The Novell Client for Linux includes a Novell Client Configuration Wizard to simplify the process of configuring your Novell Client.
-
Launch the Novell Client Configuration Wizard using either of the following methods:
-
Click
 > .
> .
-
In YaST, click .
-
-
If you are not logged in as root, type the root password, then click .
-
Select the Client Configuration Wizard pages that contain the settings you want to configure.
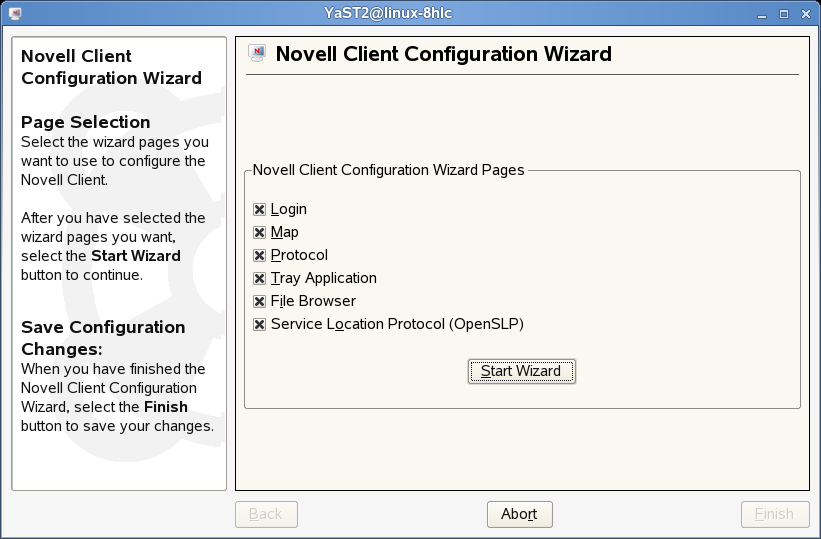
You can configure the following settings:
-
Click .
-
Follow the instructions in the left panel to configure Novell Client settings.
-
Click .
-
Restart the workstation to ensure that the settings take effect.
If you made changes to the Protocol Settings page or the Service Location Protocol (OpenSLP) Settings page, you must reboot the machine for those changes to take effect.
Any changes you make to the Novell Client settings are written to a set of configuration (.conf) files in the /etc/opt/novell/ncl directory.
IMPORTANT:When the Novell Client software is uninstalled, these settings are not saved.
2.1.1 Configuring Login Settings
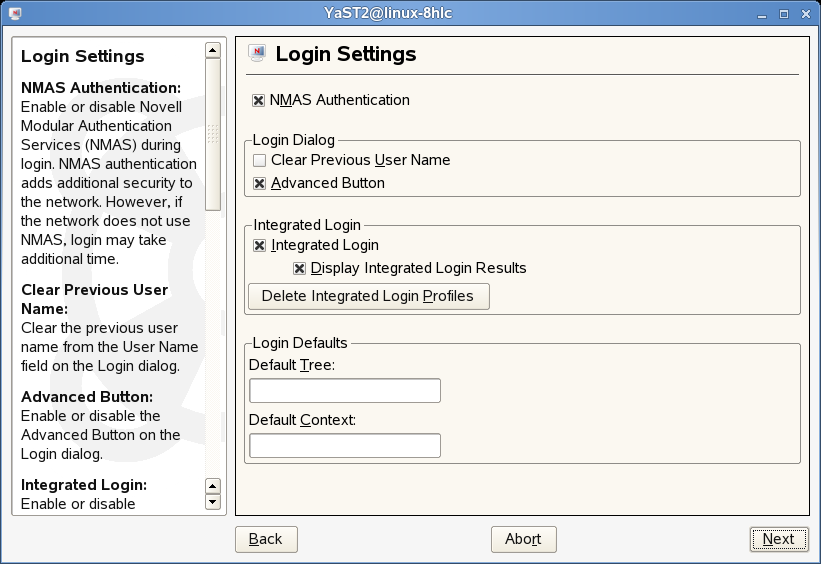
Use the Login Settings page in the Novell Client Configuration Wizard to configure the settings available to users in the Novell Login dialog box.
Figure 2-1 Login Settings Page
This page contains the following options:
-
NMAS Authentication: Enables or disables Novell Modular Authentication Services (NMAS™) during login. NMAS authentication can add additional security to the network, but if the network does not use NMAS, login might take additional time, so you can disable NMAS authentication by disabling this setting. This option is selected by default.
-
Clear Previous User Name: Clears the previous username from the field on the Novell Login dialog box every time you open the dialog box.
-
Advanced Button: Enables or disables the button in the Login dialog box. This option is selected by default.
-
Integrated Login: Enables the integrated login feature for the entire system. This is set by the administrator and cannot be overridden by the user.
-
Display Integrated Login Results: When this option is disabled, all login scripts are run silently and the script results window is not displayed, but login scripts are still processed.
-
Delete Integrated Login Profiles: Removes the existing login profiles for all users on this workstation.
-
Default Tree: Specify the default tree that Login attempts to log in to. This setting is overridden by the Login Dialog Tree history.
-
Default Context: Specify the default context that Login attempts to log in to. This setting is overridden by the Login Dialog Context history.
For more information on using the Novell Login dialog box, see Logging In to the Network
in the Novell Client for Linux User Guide.
2.1.2 Configuring Map Settings
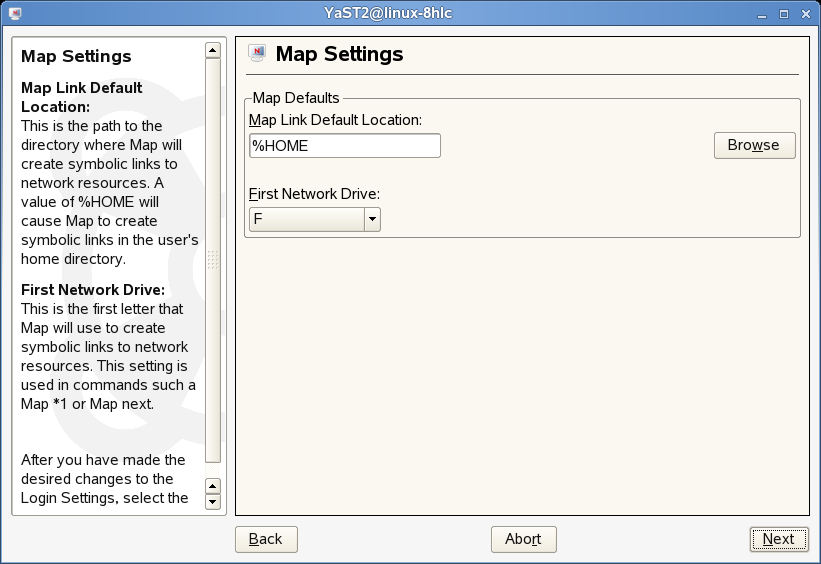
Use the Map Settings page in the Novell Client Configuration Wizard to specify the directory on the local workstation where symbolic links to network resources are created and to select the first letter to use when creating these links.
Figure 2-2 Map Settings Page
This page contains the following options:
-
Map Link Default Location: Specify the path to the directory where Map creates symbolic links to network resources. A value of %HOME (the default) causes Map to create symbolic links in the user’s home directory.
-
First Network Drive: Select the first letter for Map to use when creating symbolic links to network resources. This setting is used in commands such a Map *1 or Map next.
2.1.3 Configuring Protocol Settings
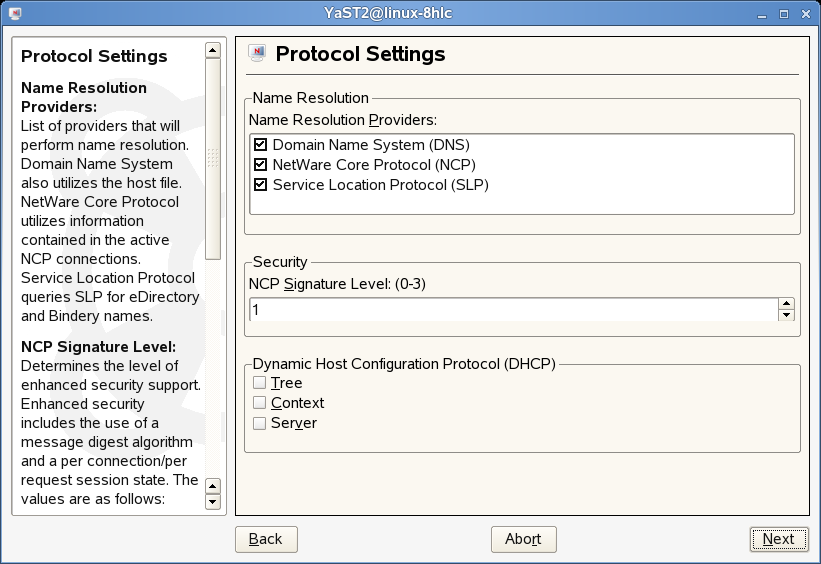
Use the Protocol Settings page in the Novell Client Configuration Wizard to determine the level of enhanced security support, select the providers to perform name resolution, and enable the Client to obtain configuration information from your DHCP server.
Figure 2-3 Protocol Settings Page
This page contains the following options:
-
Name Resolution Providers: Select the providers to perform name resolution. Domain Name System also uses the /etc/hosts file. NetWare® Core Protocol™ uses information contained in the active NCP™ connections. Service Location Protocol queries SLP for eDirectory™ and Bindery names.
-
NCP Signature Level: Specify the level of enhanced security support. Enhanced security includes the use of a message digest algorithm and a per connection/per request session state. The values are as follows:
0=Disabled
1=Enabled but not preferred
2=Preferred
3=Required
Changing the value of this setting to 2 or 3 increases security but decreases performance.
-
Dynamic Host Configuration Protocol (DHCP): If a DHCP server is set up on your network, the DHCP server can inform the Novell Client of network-specific configuration information. This information is made available when a user click the Tree, Context, or Server buttons on the eDirectory tab of the Novell Login dialog box.
If you make changes to the Protocol Settings page, you must reboot the workstation for those changes to take effect.
2.1.4 Configuring Tray Application Settings
Use the Tray Application Settings page in the Novell Client Configuration Wizard to automatically launch the Novell Client Tray Application when the desktop starts and to determine which options are available to users on the Tray Application menu.
Figure 2-4 Tray Application Settings Page
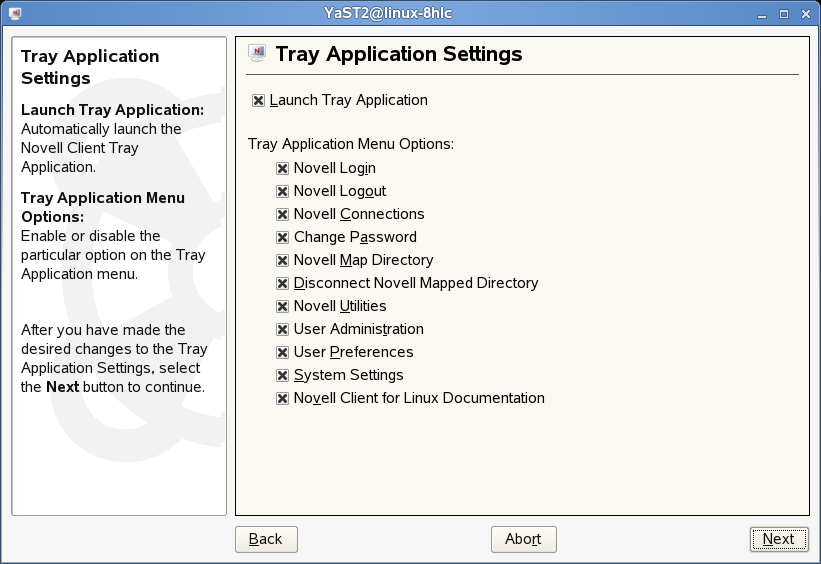
This page contains the following options:
-
Launch Tray Application: Select this option to automatically launch the Novell Client Tray Application.
-
Tray Application Menu Options: Enables or disables the options available to users on the Tray Application menu.
For more information, see Using the Novell Client Tray Application
in the Novell Client.for Linux User Guide.
2.1.5 Configuring File Browser Settings
Use the File Browser Settings page in the Novell Client Configuration Wizard to specify which Novell Client options are available to users when they right-click Novell file system directories or files in a file manager, and which tabs are available on the Novell File, Folder, and Volume Properties pages.
Figure 2-5 File Browser Settings Page
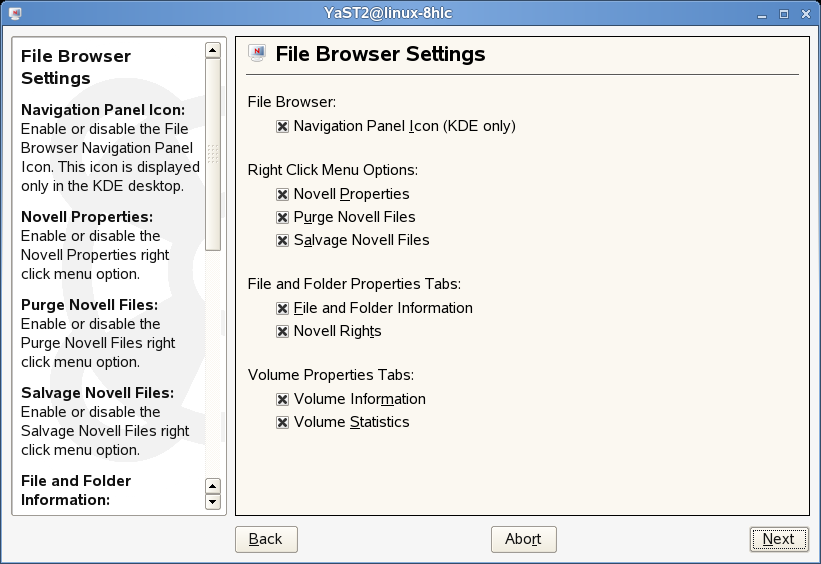
This page contains the following options:
-
Navigation Panel Icon (KDE only): Enables or disables the icon. This icon is displayed only in KDE.
-
Novell Properties: Enables or disables the menu option when users right-click a Novell file system directory or file in a file manager.
-
Purge Novell Files: Enables or disables the menu option when users right-click a Novell file system directory or file in a file manager.
-
Salvage Novell Files: Enables or disables the menu option when users right-click a Novell file system directory or file in a file manager.
-
File and Folder Information: Enables or disables the and tabs on the File and Folder Properties pages (available when users right-click a Novell file system directory or file in a file manager and then click ).
-
Novell Rights: Enables or disables the tab on the File and Folder Properties pages (available when users right-click a Novell file system directory or file in a file manager and then click ).
-
Volume Information: Enables or disables the tab on the Volume Properties page (available when users right-click a Novell file system volume in a file manager and then click ).
-
Volume Statistics: Enables or disables the tab on the Volume Properties page (available when users right-click a Novell file system volume in a file manager and then click ).
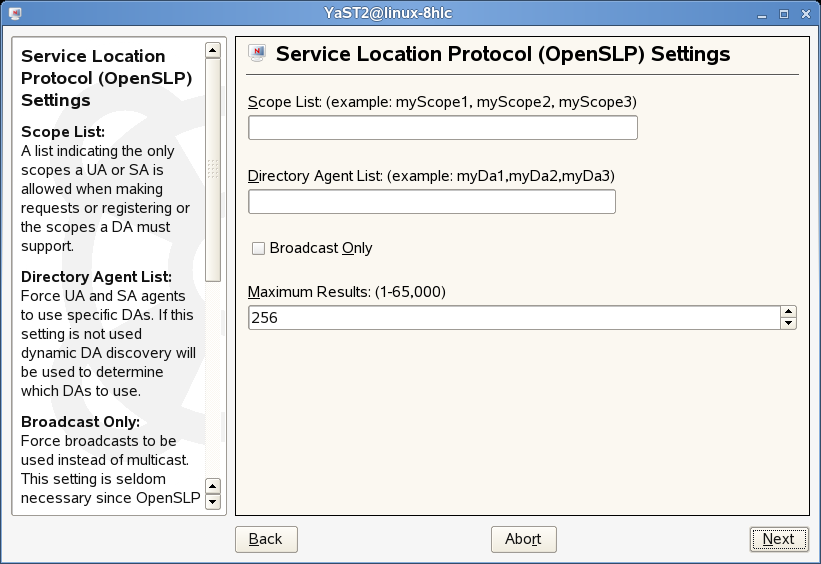
2.1.6 Configuring OpenSLP Settings
Use the Service Location Protocol (OpenSLP) Settings page in the Novell Client Configuration Wizard to specify where and how the Client requests network services.
In an IP-only network, the Novell Client needs a way to resolve the eDirectory tree, context and server names to an actual IP address of an eDirectory server that can provide authentication. On a simple LAN, the client can send an IP broadcast to discover this information, but on a multisite WAN, the SLP scope and Directory Agents must be listed.
Figure 2-6 Service Location Protocol (OpenSLP) Settings Page
This page contains the following options:
-
Scope List: Specify the scopes that a user agent (UA) or service agent (SA) is allowed when making requests or registering, or the scopes that a directory agent (DA) must support.
-
Directory Agent List: Specify the specific DAs that UA and SA agents must use. If this setting is not used, dynamic DA discovery is used to determine which DAs to use.
-
Broadcast Only: Select this option to use broadcasting instead of multicasting. This setting is not usually necessary because OpenSLP automatically uses broadcasting if multicasting is unavailable.
SLP is designed to use IP multicasting; however, if any SLP Agent does not implement IP multicasting, then all Agents must use broadcasting to reach that Agent. If a DA does not support multicasting, we recommend using the Directory Agent List to configure that Directory Agent rather than using this option.
If the network does not contain a DA, IP servers must use their own SAs to specify the services that are available. If the SA does not support multicasting and if there are any services advertised by that SA that are needed by the UA on this machine, then use the Broadcast Only option.
Broadcasting has the disadvantage of being limited to the local LAN segment.
-
Maximum Results: Specify a 32-bit integer giving the maximum number of results to accumulate and return for a synchronous request before the time-out, or the maximum number of results to return through a callback if the request results are reported asynchronously.
If you make changes to the Service Location Protocol (OpenSLP) Settings page, you must reboot the workstation for those changes to take effect.
For more information, see Section 3.4, Using OpenSLP to Simplify Login, SLP Fundamentals, and the OpenSLP Web site.