4.1 Configuring Proxy Logging
You can set up proxy logging for the HTTP server or HTTP acceleration at any time.
Logging does not appreciably slow access to Internet services and locally cached information. You can, therefore, leave logging enabled for an extended period of time.
The following types of logging are available:
-
Common Format: Logs the remote hostname, user’s remote login name, authenticated username, date, request line from client, status, and length of data in bytes.
-
Extended Format: Logs the common format information plus cached status, date, time, client IP address, URL method, and URL.
-
Indexed Format: Also referred to as the audit log. Logs the common and extended format information plus when access was allowed or denied, the IP address that initiated an access attempt, the destination, the HTTP command used, and the result of the attempt (hit or miss).
In addition to setting up common format, extended format, or indexed format logging for an HTTP server or HTTP acceleration, you can also set up indexed format logging for FTP, Mail, News, Generic, Domain Name System (DNS), and RealAudio and Real Time Streaming Protocol (RTSP) proxy services from the individual proxy configuration dialogs.
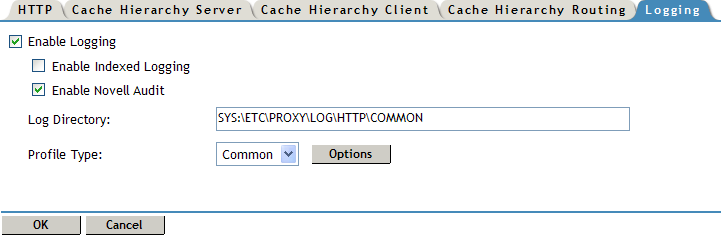
4.1.1 Configuring Logging for an HTTP Proxy
-
Log in to iManager.
-
Select
-
Browse to and select the BorderManager server or container that you want to configure, then click .
-
Click in the section.
-
Click the tab. The HTTP logging page is displayed.
-
Select to enable HTTP logging.
-
If you have selected common or extended logging, click the format name and specify the following parameters for each format:
Log File Directory: The directory to which the common or extended format log file is written.
Log Rollover: How often the file is overwritten (rolls over) by time (days or hours) or by size (KB or MB).
Old Log Files: Whether old log files are deleted because of their age or because of the number of old log files that are retained in the database.
Stop Services If Logging Fails: When enabled, stops all proxy services when the log file is full and log rollover is not specified.
-
Click to save the changes.
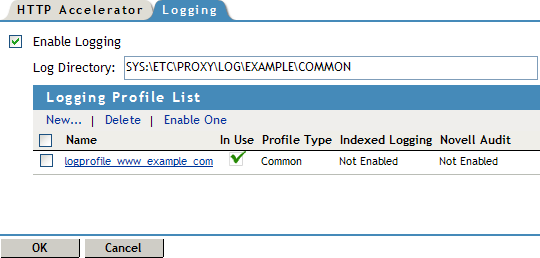
4.1.2 Configuring Logging for an HTTP Accelerator
-
Log in to iManager.
-
Select
-
Browse to and select the BorderManager server or container that you want to configure, then click .
-
Click in the section.
-
Click the tab. The HTTP logging page is displayed.
-
Select to enable HTTP logging.
-
If you have selected common or extended logging, click the format name and specify the following parameters for each format:
Log File Directory: Directory to which the common or extended format log file is written.
Log Rollover: How often the file is overwritten (rolls over) by time (days or hours) or by size (KB or MB).
Old Log Files: Whether old log files are deleted because of their age or because of the number of old log files that are retained in the database.
Stop Services If Logging Fails: When enabled, stops all proxy services when the log file is full and log rollover is not specified.
-
Click to save the changes.