4.5 Word Processing with Writer
There are two ways to create a new document: from scratch or using AutoPilot, which lets you use a standard format and predefined elements. This sections discusses the following tasks:
4.5.1 Creating Documents with AutoPilot
To use a standard format and predefined elements for your own documents, try AutoPilot. This is a small utility that lets you make some basic decisions and then produces a ready-made document from a template. For example, to create a business letter, click .
Figure 45 OpenOffice.org AutoPilot
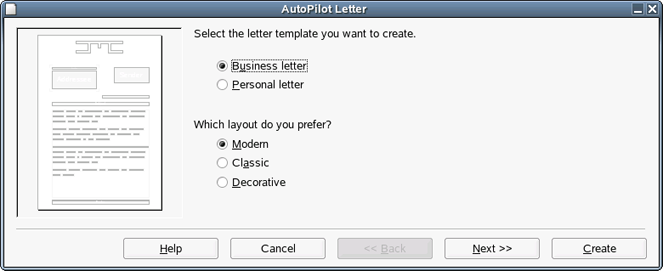
Click to proceed to each successive page. To modify any previous entries, click . Exit the AutoPilot by clicking . Access a help document with .
When you are finished, click . OpenOffice.org produces a document according your specifications. Now you can compose the text (body) of the document itself. AutoPilot can assist in the creation of letters, faxes, agendas, memos, and presentations.
4.5.2 Creating Documents without AutoPilot
Create a new text document by clicking . When editing a text document, a second toolbar called the object bar, is available just below the standard function bar. Move the mouse pointer over an icon to get a tooltip. Documents can also be formatted with the Stylist. See Using the Stylist for more information.
Figure 46 OpenOffice.org Writer
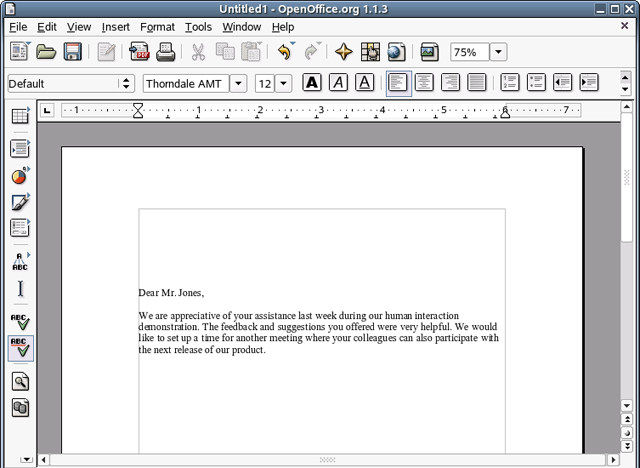
Use the menu or the relevant buttons on the toolbar to print and save your document. Use the options on the menu to add extra items to your document, such as a table, picture, or chart.
4.5.3 Selecting Text
To select text, click the desired beginning of the selection and, keeping the mouse button pressed, move the cursor toward the end of the range (which can be characters, lines, or entire paragraphs). Release the button when all desired text is selected. While selected, text is displayed in inverted colors. Open a context menu by right-clicking the selected text. Use the context menu to change the font, the font style, and other text properties.
Selected text can also be cut or copied to the clipboard, then pasted back into the document at another location. Use the context menu or the relevant toolbar icons to access these functions.
4.5.4 Navigating in Large Documents
The Navigator tool displays information about the contents of a document. It also lets you quickly jump to different elements. For example, you can use Navigator to get a quick overview of all the chapters or to see a list of the images included in the document.
Figure 47 Navigator Tool in Writer
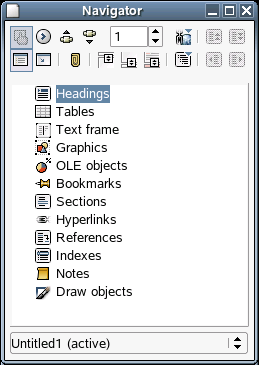
Open Navigator by clicking . The elements listed in Navigator vary according to the document loaded in Writer.
4.5.5 Formatting with Styles
Styles save you time by letting you make formatting changes once that apply to the entire document. They give you templates not only for paragraphs and individual characters, but also for pages, text frames, and lists.
Using the Style Catalog
Click to open the Style Catalog, which you can use to create, edit, and manage the formatting styles used by OpenOffice.org.
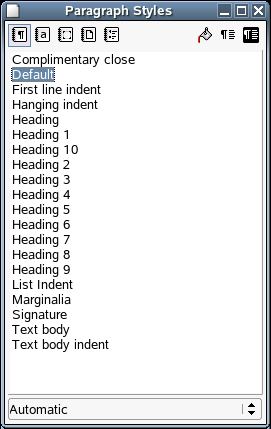
Figure 48 OpenOffice.org Style Catalog
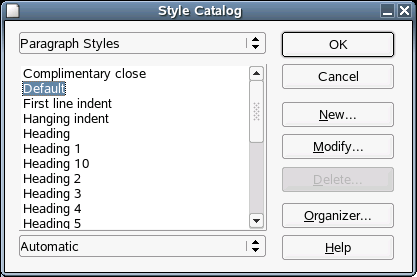
If you set the drop-down list at the bottom of this dialog box to , OpenOffice.org offers a selection of styles appropriate for the task at hand. If you select from the list, the Style Catalog displays all styles from the currently active category. In the previous figure, the category is Paragraph Styles. You can select a different category by clicking the drop-down list at the top of the dialog.
By formatting your text with this method, called soft formatting, text is not formatted directly. Instead, a style is applied to it. The style can be easily modified, automatically resulting in a formatting change for all the text that the style is assigned to.
To assign a style to a paragraph, click anywhere inside the paragraph, click , and then double-click the style you want to apply.
Creating Your Own Styles
-
Format a paragraph or a character as desired using the menu or the toolbar.
-
Select the formatted item whose style you want to copy.
-
Click .
-
Click , then type a name for your style.
-
Click .
This style can now be applied to other texts.
You can change the details of a style by selecting it in the Style Catalog and then clicking . This opens a dialog in which all the possible formatting properties are available for modification.
Using the Stylist
The Stylist is a floating palette you can use to apply styles quickly as you type. You can also use it to modify existing styles or create new ones. The Stylist lists styles using several different filters, so you can locate the ones you need quickly. To open the Stylist, click
Figure 49 OpenOffice.org Stylist
To dock the Stylist, hold down the Ctrl key and drag the title bar to the left or to the right side of your workspace. To undock the Stylist, hold down the Ctrl key and double-click a free space on the Stylist's toolbar.
To apply a style:
-
Select the text you want to format.
To apply a character style to a word, click the word; to apply a paragraph style, click the paragraph.
-
Double-click the style in the Stylist.