3.1 Personal Settings
Personal settings include the following:
3.1.1 Configuring Accessibility Settings
Click .
The settings of this module facilitate the use of the keyboard for users with motion impairments. The module consists of the three tabs: , , and . Before modifying settings, activate .
Figure 19 Keyboard Accessibility Preferences Dialog
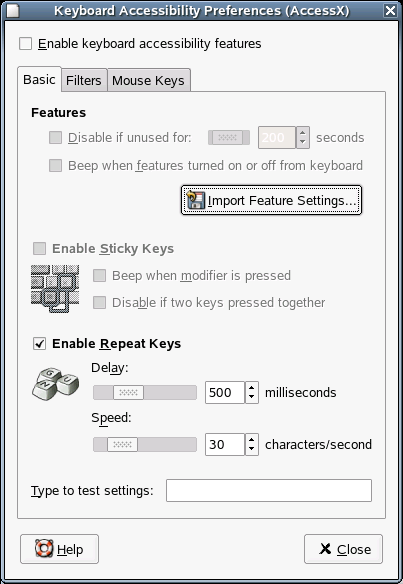
Features (Basic Tab)
The keyboard accessibility functions can be deactivated automatically after a certain time. Set an appropriate time limit (measured in seconds) with the slider. The system can additionally provide audible feedback when the keyboard accessibility functions are activated and deactivated.
Enable Sticky Keys (Basic Tab)
Some keyboard shortcuts require that one key (a modifier key) is kept pressed constantly (this applies to Alt, Ctrl, and Shift) while the rest of the shortcut is typed. When sticky keys are used, the system regards those keys as staying pressed after being pressed once. For an audible feedback generated each time a modifier key is pressed, activate when the modifier is pressed. If is selected, the keys do not “stick” anymore when two keys are pressed simultaneously. The system then assumes that the keyboard shortcut has been completely entered.
Enable Repeat Keys (Basic Tab)
Activate to make settings with sliders for and . This determines how long a key must be pressed for the automatic keyboard repeat function to be activated and at what speed the characters are then typed.
Test the effect of the settings in the field at the bottom of the dialog. Select parameters that reflect your normal typing habits.
Enable Slow Keys (Filters Tab)
To prevent accidental typing, set a minimum time limit that a key must be pressed and held before it is recognized as valid input by the system. Also determine whether audible feedback should be provided for keypress events, accepted keypresses, and the rejection of a keypress.
Enable Bounce Keys (Filters Tab)
To prevent double typing, set a minimum time limit for accepting two subsequent keypress events of the same key as the input of two individual characters. If desired, activate audible feedback upon rejection of a keypress event.
Toggle Keys (Filters Tab)
You can request audible feedback from the system when a keycap modifier key is pressed.
Mouse Keys Tab
Activates the keyboard mouse; the mouse pointer is controlled with the arrow keys of the number pad. Use the sliders to set the maximum speed of the mouse pointer, the acceleration time until the maximum speed is reached, and the latency between the pressing of a key and the cursor movement.
3.1.2 Configuring Assistive Technology Support
Click .
NLD includes assistive technologies for users with special needs. These technologies include a screenreader, magnifier, and on-screen keyboard. To enable the technologies, first select and then select the technologies you want.
Figure 20 Assistive Technology Preferences Dialog
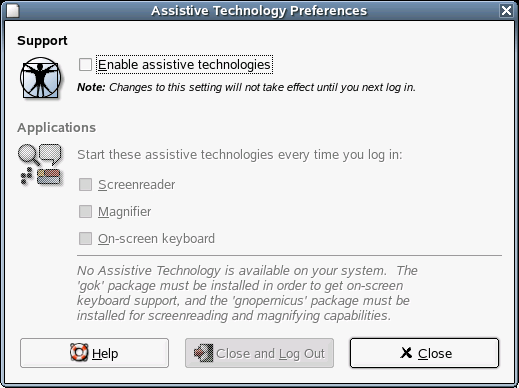
The gok package must be installed in order to get on-screen keyboard support, and the gnopernicus and gnome-mag packages must be installed in order to get screenreading and magnifying capabilities.
To install these packages:
-
Click .
-
Type the root password, then click .
-
Click .
-
Select from the drop-down menu, then select from the list.
-
Select gok, gnopernicus, and gnome-mag from the list
-
Click .
-
Insert Novell Linux Desktop 9 CD 2, then click .
-
Click after the package installation is complete.
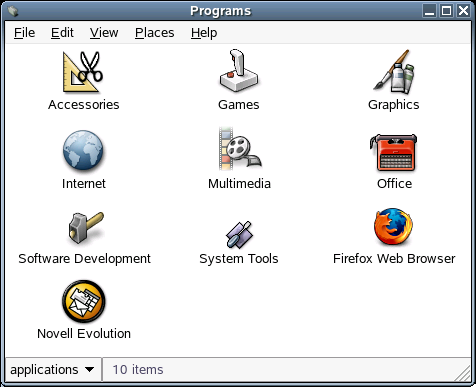
3.1.3 Modifying the Contents of the Programs Menu
Click .
Use this module to modify the contents of the menu.
Figure 21 Programs Menu Dialog
Adding a Menu
-
Click .
-
Access the location where you want to add the menu.
-
Click .
An untitled folder is added to the menu. The name of the folder is selected.
-
Type a name for the folder, then press Enter.
The next time that you log out then log in again, the menu is in the assigned location.
Adding a Launcher to a Menu
When you click a launcher, you initiate one of the following actions:
- Start a particular application.
- Execute a command.
- Open a folder in a File Manager window.
- Open a Web browser at a particular URL. A URL (the address of a particular location on the Web).
- Open special URIs. The GNOME Desktop contains special URIs that enable you to access particular functions from File Manager.
You can find launchers in the following places in the GNOME Desktop:
-
Panels:Launchers are represented by icons.
-
Menus:Launchers are represented by menu items, which usually have icons beside them.
-
Desktop:Launchers are represented by icons.
To add a launcher to a menu:
-
Click .
-
Access the location where you want to add the launcher.
-
Click .
-
Specify the properties of the launcher in the Create Launcher dialog.
-
Click .
Editing a Menu Item
-
Click .
-
Right-click the item that you want to edit, then click .
Click if the item you are editing is a launcher.
-
Modify the properties of the menu item.
-
Click .
Deleting an Item from a Menu
-
Right-click the item that you want to delete.
-
Click .
3.1.4 Customizing Keyboard Shortcuts
Click .
A keyboard shortcut is a key or combination of keys that provides an alternative to standard ways of performing an action. Use the Keyboard Shortcuts tool to display the default keyboard shortcuts. You can customize the shortcuts to your preferences.
Figure 22 Keyboard Shortcuts Dialog
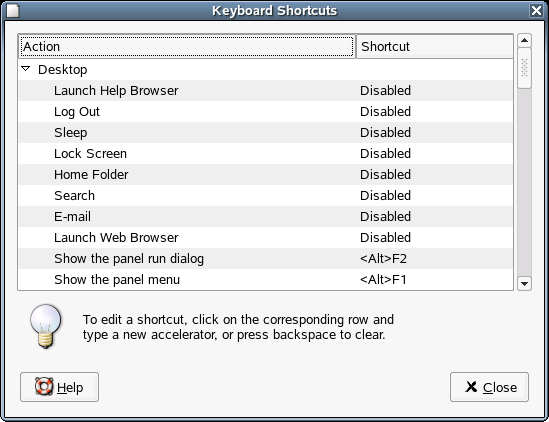
To change the shortcut keys for an action, click the shortcut for the action and then press the keys you want to associate with the action. To disable the shortcut keys for an action, click the shortcut for the action and then press the Backspace key.