7.7 Extracting Audio from CDs
NLD includes the following tools that let you extract audio files from CDs:
7.7.1 KAudioCreator
KAudioCreator is a front-end tool for ripping audio CDs and encoding WAV files using any encoder you choose.
To launch the tool, click .
Figure 117 KAudioCreator
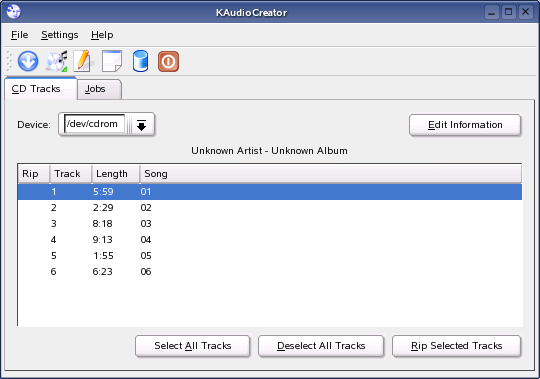
After it is started, KAudioCreator lists all the tracks of your CD on the CD Tracks tab. Select the tracks to rip and encode. To edit the track information, click . Otherwise just start the ripping and encoding by clicking . You can watch the progress of these jobs on the Jobs tab. If configured accordingly, KAudioCreator also generates playlist files for your selection that can be used by players such as amaroK.
7.7.2 Sound Juicer
Sound Juicer is a.CD ripper tool that lets you extract the audio from audio CDs and convert it into a variety of audio formats your computer can understand and play. It can also look up the titles and artists of the tracks on your CD from the Internet using the freely available MusicBrainz service.
To launch Sound Juicer, click .
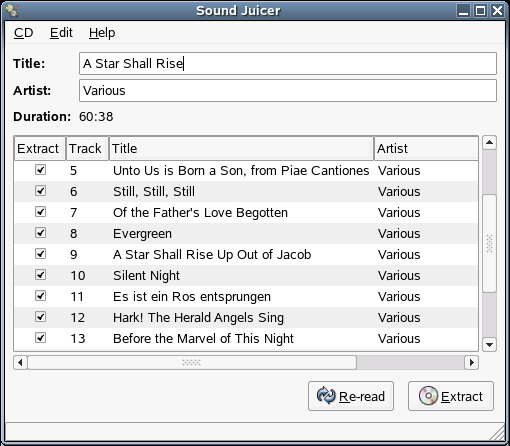
Figure 118 Sound Juicer
Using Sound Juicer
-
Insert an audio CD into your drive.
-
Click .
When you start Sound Juicer, it examines the CD in the currently selected drive and tries to locate information about its contents. It can match against things like the serial number and the length and positions of the tracks.
-
In the fields at the top of the dialog, type the artist and album name.
If the disk is a single, type the name of the artist and the title of the track. If the disc is by multiple artists, you can type Various or leave it blank. This information is placed in the extracted files so that the files can be easily catalogued and searched by music-playing software. Each track also has a title and artist field that can be set separately. This information is also encoded in the output files.
HINT: When you edit the disk field, all the track fields are updated. This saves you typing, because most discs are by a single artist.
-
To exclude tracks, deselect them in the Extract column.
Use the options on the menu to select or deselect all the tracks at the same time.
-
Click to read the audio from the CD and save it to disk.
By default, files are stored in the /album_artist/album_title directory in your home directory, but you can change this in the Preferences dialog.
Extracting a CD can take a long time, depending on the speed of your computer. By default, Sound Juicer compresses the audio at the same time it extracts it from the CD so that it takes up less space on disk.
The button is useful if you change CDs but don’t want to restart the program. Clicking this button causes Sound Juicer to update the list of tracks.
Configuring Sound Juicer Preferences
The Preferences window lets you control which CD drive Sound Juicer uses (if you have more than one CD drive), where the extracted audio is placed, and which file format/codec is used for the extracted audio.
Figure 119 Sound Juicer Preferences Dialog
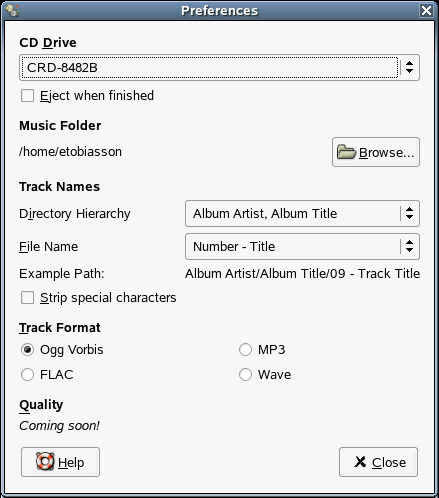
If you have multiple CD drives in your system, click the drop-down list to select the drive to use by default. You can also browse for a directory to place the audio files in.
The section lets you control how the audio files are laid out in your chosen directory. For example, in the default setup, the first track of your CD might be extracted to ~ /album artist/album title/01 - Rapture [Radio Edit].ogg.
controls whether the filename should be made safe for the command line. This involves removing characters such as / \ * and ?. It's a good idea to select this option.
The options in the section let you select the file format you want to save the audio files to:
- Ogg Vorbis is the default and is recommended due to its high quality and low file size nature, as well as the fact that it is an open format available to everyone. Ogg Vorbis can be played by virtually all Linux installations out of the box, and WinAmp for Windows also supports it.
- MP3 is widely known and used, and has good hardware support. If you have a portable MP3 player that doesn't accept Vorbis files, you might want to use this so you can upload the music to that device.
- FLAC is a lossless codec, as opposed to Vorbis and MP3 which are lossy. Lossless codecs don't throw away any information, which means that you get a 100% faithful reproduction of the original sound. Lossy codecs use complex mathematical constructions, called psychoacoustic models, to eliminate information that you cannot normally hear. The end result sounds virtually identical to the original, however. If quality is of the highest concern to you, and you have a lot of disk space, you might want to try FLAC.
- Wave raw audio is the lowest common denominator format. It isn't compressed at all, and results in the biggest files. It's often used for professional audio work.