Connection Profiles
Connection profiles comprise a unique configuration of the parameters used for making a successful VPN connection. Each profile in XML format is saved as a .prf file. VPN Client provides a Profile Manager to help you with the connection profiles.
Using the Profile Manager
The Profile Manager helps you create, edit, or delete profiles. While editing profiles, you are not allowed to change the profile names.
NOTE: You cannot create profiles using CLI. Therefore, use Profile Manager to create and modify profiles.
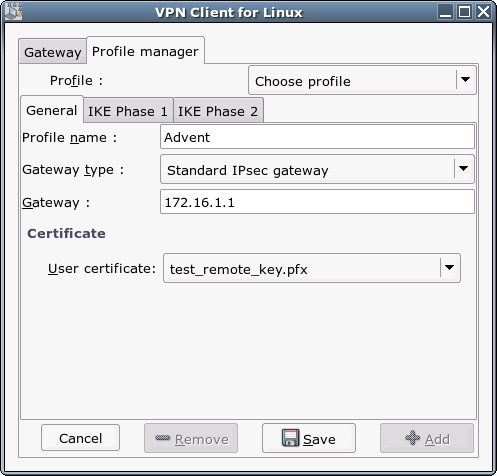
Creating a Profile for Connecting to the Standard IPsec Gateway
-
In the Profile Name field of the VPN Client for Linux dialog, select Profile Manager.
The Profile Manager tabbed page is displayed.
-
Click Add to create a profile.
The General screen is displayed.
-
Specify the following details:
Gateway Type: Select Standard IPsec gateway as the gateway type.
HINT: If you have not copied the user certificate in the .pfx format, the error No .pfx files appears. For details, refer to Copying the User Certificate.
-
Click the IKE Phase1 tab to configure the encryption algorithm, hash algorithm, DH group, mode, and authentication method.
IMPORTANT: While configuring IKE phase 1 and IKE phase 2, ensure that the VPN Client configuration matches the configuration on the gateway you are connecting to.
-
Click the IKE Phase 2 tab to configure the common parameters (encryption algorithm, hash algorithm, and PFS group), network, and mask.
-
Click Save to save the profile.
-
Click Done to return to the VPN Client dialog.
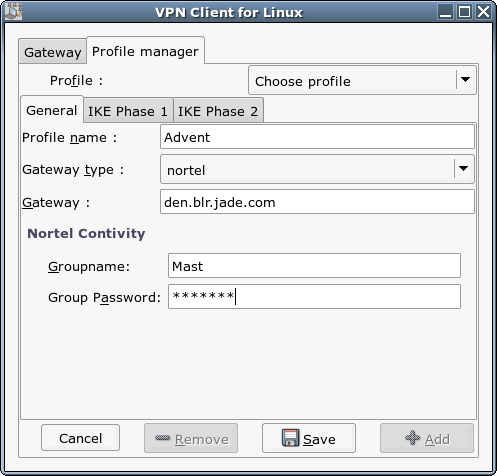
Creating a Profile for Connecting to the Nortel Contivity Server
-
In the Profile Name field of the VPN Client for Linux dialog, select Profile Manager.
The Profile Manager tabbed page is displayed.
-
Click Add to create a profile.
The General screen is displayed.
-
Specify the following details:
-
Click the IKE Phase1 tab to configure the encryption algorithm, hash algorithm, and DH group.
You cannot change the default configuration for Mode and Authentication Method.
IMPORTANT: While configuring IKE phase 1 and IKE phase 2, ensure that the VPN client configuration matches the configuration on the gateway you are connecting to.
-
Click the IKE Phase 2 tab to configure the common parameters (encryption algorithm, hash algorithm, and PFS group).
WARNING: Configuring Network and Mask settings can result in undesirable consequences.
-
Click Save to save the profile.
-
Click Done to return to the VPN Client dialog.