Specialized Installations
The GroupWise/Messenger Setup Wizard in YaST is the best way to set up your GroupWise system for most Small Business systems. This section provides additional information for those with multiserver Small Business systems and for resellers of the Novell Small Business Suite 9 product.
- Setting Up a Multiple Server System
- Using a Response File
- Using the Standard GroupWise Installation Advisor
Setting Up a Multiple Server System
The GroupWise/Messenger Setup Wizard in YaST allows you to set up all or just some of the components of GroupWise and Messenger on your initial Small Business server.

By default, all components are installed together on the same server. However, if you anticipate a high volume of incoming and outgoing Internet e-mail, you might, for example, consider installing the Internet Agent on a different server from where the Post Office Agent is servicing GroupWise client requests. If you anticipate a high volume of instant messaging, you might consider installing your Messenger system on a different server from your GroupWise system.
You can run the GroupWise/Messenger Setup Wizard in YaST on any server where you want to install a GroupWise or Messenger component, keeping in mind the following:
- Select the Basic GroupWise System item only once. If you run it a second time on the same server, it deletes the existing GroupWise system and creates a new one. If you run it a second time on a different server, it creates a new, independent GroupWise system.
- Each domain needs only one Internet Agent and only one WebAccess Agent. If you choose to install either of these agents on a different server from where you set up your initial GroupWise system, you must provide a read/write file system mount from the server where they are installed to the domain directory.
- Your Messenger system is completely independent from your GroupWise system. If you install it on a different server, there are no dependencies to consider.
If you would prefer to use the standard GroupWise Installation Advisor to install on multiple servers, see Using the Standard GroupWise Installation Advisor.
Using a Response File
Resellers of Novell products install the Small Business Suite and set up GroupWise systems at numerous customer sites. To assist with this repetitive task, the GroupWise/Messenger Setup Wizard provides the option of saving GroupWise configuration information in a response file. That response file can then be used as input to the Silent Install script that sets up a standardized GroupWise system automatically, without user intervention during the process.
-
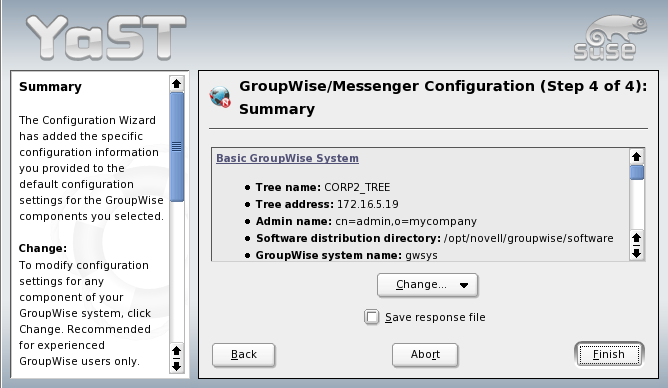
Run the GroupWise/Messenger Setup Wizard as described in Setting Up GroupWise E-Mail and Messenger until you reach the Summary page.
-
If necessary, click Change to specify configuration settings that are different from the defaults provided by the GroupWise/Messenger Setup Wizard.
You might also choose to edit the response file after it has been created, as explained in Step 6 below.
-
Select Save Response File, and then click Finish to finish the GroupWise/Messenger setup process.
By default, the response file is created in the following location:
/opt/novell/groupwise/software/gwinst.YaST2.cfg
-
If desired, change the location or filename in the Response File Path field, and then click Finish to create the response file.
The steps below elaborate on the instructions that appear in a warning dialog box when you click Finish.
-
Click Continue close the warning dialog box and create the response file.
When you create a response file, no GroupWise system is created on the server where you ran the GroupWise/Messenger Setup Wizard, nor is any other configuration performed. In this case, the response file is the only output from the wizard.
-
Print the response file to become familiar with its content.
The response file is an ASCII text file in .ini format. It contains a section for each item on the Select Items to Configure page of the GroupWise/Messenger Setup Wizard. You can use the response file with all sections in order to install all components on the target server or you can remove sections of the response file so that the removed components are not installed on the target server.
Some fields in the response file must be edited to provide information specific to each customer site:
- eDirectory tree name
- Admin user context of the
- Admin user password
- Server IP address where the Small Business Suite is installed
- Customer time zone
You might want to edit other fields to customize the GroupWise system for the customer:
- GroupWise system name
- Domain name
- Post office name
- GroupWise eDirectory object context
-
Edit the response file as needed for the customer site where you plan to use the Silent Install script to set up the GroupWise system.
-
Copy the response file from the software distribution directory to whatever medium you use to bring data with you to the customer site.
-
At the customer site, install Novell Small Business Suite 9 and run the eDirectory Setup Wizard.
-
Copy the response file to /opt/novell/groupwise/software, and then change to that directory.
-
As root, run the silent-install script.
Syntax:
./silent-install -r response_file -p admin_password -s status_fileExample:
./silent-install -r gwinst.YaST2.cfg -p palmtree -s gwinst.logIf you do not use the -s option, status information is displayed on the screen but is not written to a log file.
-
When the Silent Install script finishes, continue setting up the Small Business server as needed.
Using the Standard GroupWise Installation Advisor
If you would prefer to run the standard GroupWise Installation Advisor rather than the GroupWise/Messenger Setup Wizard, you can use YaST to set up a GroupWise software distribution directory where a standard GroupWise installation can be performed from.
-
In the YaST Control Center, click Software > Install and Remove Software.
-
In the Filter field, select Search.
-
In the Search field, type groupwise, and then click Search.
-
Select GroupWise Software Distribution Directory, and then click Accept.
-
After YaST has set up the GroupWise software distribution directory, open a terminal window.
-
Become root by entering su and the root password.
-
Use the following command to start the GroupWise Installation Advisor:
/opt/novell/groupwise/software/install
-
Follow the instructions in "Installing a Basic GroupWise System" in the GroupWise 6.5 Administration Guide to install and set up GroupWise.
For your convenience, the Messenger software is also included in the GroupWise Software Distribution Directory RPM. After that RPM has been installed, you can start the standard Messenger Installation program using the following command:
/opt/novell/messenger/software/server/install.sh
Then follow the instructions in "Installing a Novell Messenger System" in the Messenger 1.0 Installation Guide to install and set up Messenger.