Samba Configuration --- Start Up
With the program Samba, convert a UNIX machine into a file and print server for DOS, Windows, and OS/2 machines. The Samba Project is run by the Samba Team and was originally developed by the Australian Andrew Tridgell.
Samba has now become a fully-fledged and rather complex product. This section presents an overview of its basic functionality. Samba offers plenty of online documentation. Enter apropos samba at the command line to display some manual pages or just browse the /usr/share/doc/packages/samba directory if Samba is installed for more online documentation and examples. A commented example configuration (smb.conf.SuSE) can be found in the examples subdirectory.
Beginning from version 9.1, the SUSE LINUX samba package provides version 3 of the Samba suite, which brings some important added features:
NOTE: There are some special points to take into account when migrating from Samba 2.x to Samba 3. A discussion of this topic is included in the Samba HOWTO Collection, where an entire chapter is dedicated to it. After installing the samba-doc package, find the HOWTO in /usr/share/doc/packages/samba/Samba-HOWTO-Collection.pdf.
Samba uses the SMB protocol (server message block) that is based on the NetBIOS services. Due to pressure from IBM, Microsoft released the protocol so other software manufacturers could establish connections to a Microsoft domain network. With Samba, the SMB protocol works on top of the TCP/IP protocol, so the TCP/IP protocol must be installed on all clients.
NetBIOS is a software interface (API) designed for communication between machines. Here, a name service is provided. It enables machines connected to the net to reserve names for themselves. After reservation, these machines can be addressed by name. There is no central process that checks names. Any machine on the network can reserve as many names as it wants, if the names are not already in use. The NetBIOS interface can now be implemented for different network architectures. An implementation that works relatively closely with network hardware is called NetBEUI, but this is often referred to as NetBIOS. Network protocols implemented with NetBIOS are IPX from Novell (NetBIOS via TCP/IP) and TCP/IP.
The NetBIOS names sent via TCP/IP have nothing in common with the names used in /etc/hosts or those defined by DNS. NetBIOS uses its own, completely independent naming convention. However, it is recommended to use names that correspond to DNS host names to make administration easier. This is the default used by Samba.
All common operating systems, such as Mac OS X, Windows, and OS/2, support the SMB protocol. The TCP/IP protocol must be installed on all computers. Samba provides a client for the different UNIX flavors. For Linux, there is a kernel module for SMB that allows the integration of SMB resources on the Linux system level.
SMB servers provide hardware space to their clients by means of shares. A share includes a directory and its subdirectories on the server. It is exported by means of a name and can be accessed by its name. The share name can be set to any name --- it does not have to be the name of the export directory. A printer is also assigned a name. Clients can access the printer by its name.
If you intend to use Samba as a server, install samba. Start the services required for Samba with rcnmb start && rcsmb start and stop them with rcsmb stop && rcnmb stop.
The main configuration file of Samba is /etc/samba/smb.conf. This file can be divided into two logical parts. The [global] section contains the central and global settings. The [share] sections contain the individual file and printer shares. By means of this approach, details regarding the shares can be set differently or globally in the [global] section, which enhances the structural transparency of the configuration file.
The following parameters of the [global] section need some adjustment to match the requirements of your network setup so other machines can access your Samba server via SMB in a Windows environment.
The following examples illustrate how a CD-ROM drive and the user directories (homes) are made available to the SMB clients.
To avoid having the CD-ROM drive accidentally made available, these lines are deactivated with comment marks (semicolons in this case). Remove the semicolons in the first column to share the CD-ROM drive with Samba.
;[cdrom]
;       comment = Linux CD-ROM
;       path = /media/cdrom
;       locking = No
By means of a very restrictive default configuration, this kind of share is only made available to the users present on this system. If this share should be made available to everybody, add a line guest ok = yes to the configuration. This setting gives read permissions to anyone on the network. It is recommended to handle this parameter with great care. This applies even more to the use of this parameter in the [global] section.
The [home] share is of special importance here. If the user has a valid account and password for the Linux file server and his own home directory, he can be connected to it.
[homes]
	comment = Home Directories
	valid users = %S
	browseable = No
	read only = No
	create mask = 0640
	directory mask = 0750
The SMB protocol comes from the DOS and Windows world and directly takes into consideration the problem of security. Each share access can be protected with a password. SMB has three possible ways of checking the permissions:
Share Level Security (security = share): A password is firmly assigned to a share. Everyone who knows this password has access to that share.
User Level Security (security = user): This variation introduces the concept of the user to SMB. Each user must register with the server with his own password. After registration, the server can grant access to individual exported shares dependent on user names.
Server Level Security (security = server): To its clients, Samba pretends to be working in user level mode. However, it passes all password queries to another user level mode server, which takes care of authentication. This setting expects an additional parameter (password server =).
The distinction between share, user, and server level security applies to the entire server. It is not possible to offer individual shares of a server configuration with share level security and others with user level security. However, you can run a separate Samba server for each configured IP address on a system.
More information about this subject can be found in the Samba HOWTO Collection. For multiple servers on one system, pay attention to the options interfaces and bind interfaces only.
NOTE: For simple administration tasks with the Samba server, there is also the program swat. It provides a simple web interface with which to configure the Samba server conveniently. In a web browser, open http://localhost:901 and log in as user root. However, swat must also be activated in the files /etc/xinetd.d/samba and /etc/services. To do so in /etc/xinetd.d/samba, edit the disable line so it reads disable = no. More information about swat is provided in the man page.
In networks where predominantly Windows clients are found, it is often preferable that users may only register with a valid account and password. This can done with the help of a Samba server. In a Windows-based network, this task is handled by a Windows NT server configured as a primary domain controller (PDC). The entries that must be made in the [global] section of smb.conf are shown in .
[global]
  workgroup = TUX-NET
  domain logons = Yes
  domain master = Yes
If encrypted passwords are used for verification purposes --- this is the default setting with well-maintained MS Windows 9x installations, MS Windows NT 4.0 from service pack 3, and all later products --- the Samba server must be able to handle these. The entry encrypt passwords = yes in the [global] section enables this (with Samba version 3, this is now the default). In addition, it is necessary to prepare user accounts and passwords in an encryption format that conforms with Windows. Do this with the command smbpasswd -a name. Create the domain account for the computers, required by the Windows NT domain concept, with the following commands:
useradd hostname\$
smbpasswd -a -m hostname
With the useradd command, a dollar sign is added. The command smbpasswd inserts this automatically when the parameter -m is used. The commented configuration example (/usr/share/doc/packages/Samba/examples/smb.conf.SuSE) contains settings that automate this task.
add machine script = /usr/sbin/useradd -g machines \
                  -c "NT Machine Account" -d \
                  /dev/null -s /bin/false %m\$
To make sure Samba can execute this script correctly, choose a Samba user with the required administrator permissions. To do so, select one user and add it to the ntadmin group. After that, all users belonging to this Linux group can be assigned Domain Admin status with the command:
net groupmap add ntgroup="Domain Admins" unixgroup=ntadmin
More information about this topic is provided in Chapter 12 of the Samba HOWTO Collection, found in /usr/share/doc/packages/samba/Samba-HOWTO-Collection.pdf.
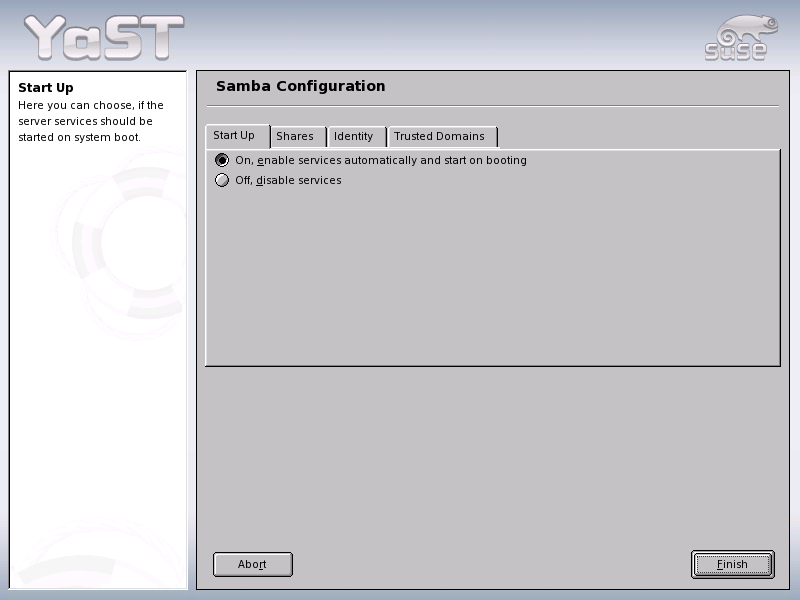
Figure 119
Samba Configuration --- Start Up
In Start Up (Figure 119), select whether to start Samba. If you activate Samba, the service is started every time the system boots.
Figure 120
Samba Configuration --- Shares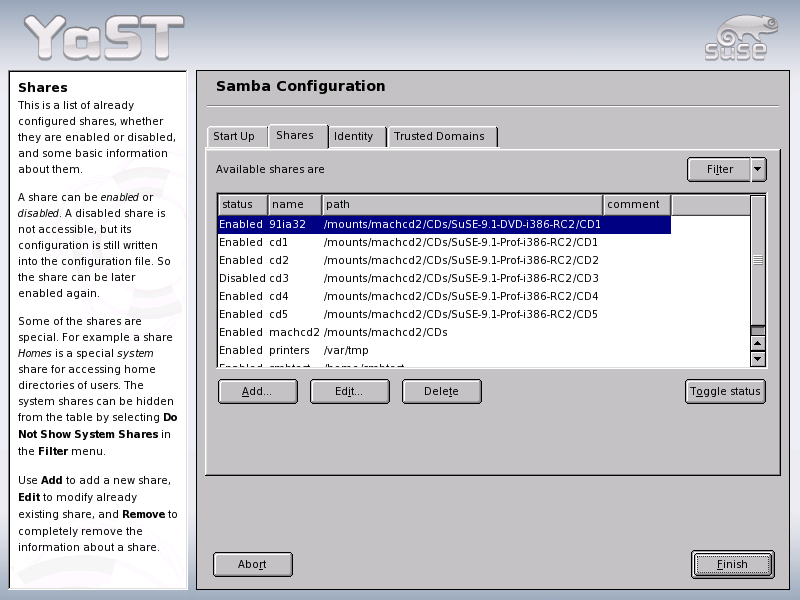
In Shares (Figure 120), determine the Samba shares to activate. Use Toggle Status to switch between Active and Inactive. Click Add to add new shares.
Figure 121
Samba Configuration --- Identity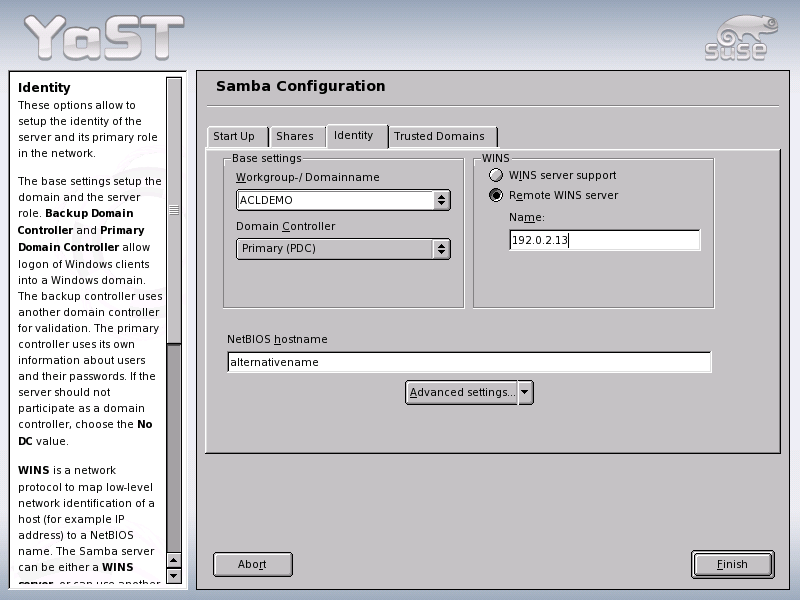
In Identity (Figure 121), determine the domain with which the host is associated (Base Settings) and whether to use an alternative host name in the network (NetBIOS Host Name). If desired, configure the host as a WINS server. If this is not the case, specify the IP address of the WINS server. If you enter an asterisk (*), YaST automatically finds the WINS server.
Figure 122
Samba Configuration --- Trusted Domains
In Trusted Domains (Figure 122), determine which domains the host should trust. This means that you adopt the settings of the trusted domain.
Clients can only access the Samba server via TCP/IP. NetBEUI and NetBIOS via IPX cannot be used with Samba.
Windows 9x and ME already have built-in support for TCP/IP. However, this is not installed as the default. To add TCP/IP, go to Control PanelSystem and choose AddProtocolsTCP/IP from Microsoft. After rebooting your Windows machine, find the Samba server by double-clicking the desktop icon for the network environment.
NOTE: To use a printer on the Samba server, install the standard or Apple-PostScript printer driver from the corresponding Windows version. It is best to link this to the Linux printer queue, which accepts Postscript as an input format.
socket options is one possible optimization provided with the sample configuration that ships with your Samba version. Its default configuration refers to a local ethernet network. For additional information about socket options, refer to the relevant section of the manual pages of smb.conf and to the manual page of socket(7). Further information is provided in the Samba performance tuning chapter of the Samba HOWTO Collection.
The standard configuration in /etc/samba/smb.conf is designed to provide useful settings based on the default settings of the Samba team. However, a ready-to-use configuration is not possible, especially in view of the network configuration and the workgroup name. The commented sample configuration examples/smb.conf.SuSE contains information that is helpful for adaption to local requirements.
NOTE: The Samba HOWTO Collection provided by the Samba team includes a section about troubleshooting. In addition to that, Part V of the document provides a step-by-step guide to checking your configuration.