9.1 Creating Static Groups
Static groups are groups whose membership does not change based on LDAP queries.
This section describes how to create static groups directly from Filr. Alternatively, you can synchronize static groups to Filr from your LDAP directory as described in Section 18.1, Synchronizing Users and Groups from an LDAP Directory.
To create static groups in Filr:
-
Log in to the Filr site as the Filr administrator.
-
Launch a web browser.
-
Specify one of the following URLs, depending on whether you are using a secure SSL connection:
http://filr_hostname:8080
https://filr_hostname:8443
Replace filr_hostname with the hostname or fully qualified domain name of the Filr server that you have set up in DNS.
Depending on how you have configured your Filr system, you might not be required to enter the port number in the URL. If you are using NetIQ Access Manager, the Filr login screen is not used.
-
-
Click the link in the upper-right corner of the page, then click the icon
 .
.
-
Under , click , then click .

-
Fill in the following fields:
Name: Specify the unique name under which the group is stored in the Filr database. You can use only alphanumeric characters (a-z, A-Z, 0-9), hyphens (-), and underscores (_).
This is the name that appears to users in Filr.
You can modify the name completion settings (the group name that is displayed when users are specifying the group, such as in the Share dialog) to use the Title instead of the Name.
For more information about modifying the name completion settings, see Section 19.4, Managing How Group Names Are Displayed during Name Completion.
Title: Enter a descriptive group title. This string can include any characters that you can type.
You can modify the name completion settings (the group name that is displayed when users are specifying the group, such as in the Share dialog) to use the Title instead of the Name.
For more information about modifying the name completion settings, see Section 19.4, Managing How Group Names Are Displayed during Name Completion.
Description: Describe what the members of this group have in common.
-
Select .
This means that group membership does not change based on LDAP queries.
-
Click .
-
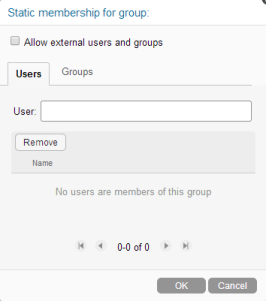
Select if you want to allow external users and groups to be members of the group that you are creating.
-
Click the or tab, depending on whether you want to add users or groups to the group that you are creating.
-
In the or field, specify the name of the user or group that you want to add to the group that you are creating, then click the name of the user or group when it appears in the drop-down list.
-
Repeat Step 8 and Step 9 to add multiple users and groups to the group that you are creating, then click when you have finished adding users and groups.
-
Click to create the group.
After you have created one or more small groups, you can use the field to create larger groups from smaller groups.