Novell Filr 1.0.2 Desktop Application for Mac Quick Start
Novell Filr allows you to easily access all your files and folders from your desktop, browser, or a mobile device. In addition, you can promote collaboration around your files by sharing files and folders with others. For more general information about Novell Filr, see About Novell Filr
in the Filr Web Application User Guide.
This Quick Start describes how to use Filr from your desktop.
In addition to accessing Filr from your desktop, you can also access it in the following ways:
-
From a Web browser on your workstation, as described in the Filr Web Application User Guide
-
From a mobile device, as described in the Filr 1.0 Mobile App Quick Start
You can synchronize your Novell Filr files with your computer, and then modify the files without accessing the Filr site directly. Additions, modifications, and other actions are synchronized between Filr and your computer.
Your Filr administrator must enable the Filr desktop application to be used with the Filr site before it can be used as described here. For information about how administrators can enable this functionality, see Configuring the Filr Desktop Application to Access Files
in theNovell Filr 1.0.1 Administration Guide.
1.0 Supported Environments
The Filr desktop application for Mac is supported on Mac OSX 10.7 and later.
2.0 Synchronization Performance Limits
For optimal performance, the Filr desktop application should not be configured to exceed the following synchronization limits:
Maximum Number of Total Synchronized Files: 10,000
Maximum Size Per Individual File: 1 GB
For information about how to configure files to synchronize, see Configuring Folders to Synchronize.
3.0 Getting Started
3.1 Understanding Synchronization
When Synchronization Occurs
Synchronization from the Filr desktop application to the Filr server occurs immediately when changes are made; synchronization from the Filr server to the Filr desktop application occurs at an interval designated by your Filr administrator. The default is every 15 minutes. If the server becomes unavailable, the desktop client attempts to contact the server every minute until a connection is re-established.
You can manually synchronize files if you do not want to wait for the scheduled synchronization. For more information, see Manually Synchronizing Files.
Which Folders Are Synchronized
Filr synchronizes files to your workstation when the files are located in the following locations in Filr:
My Files: Files that are located in your My Files area on the Filr site are synchronized to your workstation by default. When you add files to the My Files folder from your workstation (Users/userid/Filr/My Files), the files are automatically synchronized to Filr at the next synchronization.
Shared with Me: Files that are located in your Shared with Me area on the Filr site are synchronized to your workstation by default. You can edit files in your Shared with Me area and the edits are synchronized to Filr. However, you cannot add files to the root of the folder from the Filr desktop application on your workstation (/Users/userid/Filr/Shared with Me). If you do, the files are not synchronized to Filr. You can add files to folders that have been shared with you, if you have Contributor rights to the folder.
Net Folders: Files that are located in Net Folders are not synchronized to your workstation by default. You can configure Net Folders to be synchronized, as described in Configuring Folders to Synchronize.
Files located at the root of the /Users/userid/Filr folder cannot be synchronized. Instead, add files to one of the appropriate subfolders ( or ; you cannot add files to the folder).
What Actions Are Supported
When you perform any of the following actions on folders and documents within the Filr folder on your file system, the action is immediately synchronized from your computer’s file system to the Filr server:
-
Create documents and folders
-
Modify documents
-
Move documents
-
Rename documents and folders
-
Delete documents and folders
Documents and folders that you delete from the Filr desktop application are also deleted on the server, as long as you have rights to delete it. However, this is not always true when deleting documents from the Shared with Me area.
If you delete a document or folder from the Shared with Me area, and that document or folder has been directly shared with you, it is no longer synchronized to the Filr desktop application, and the documents and folders remain on the server.
If you delete a document or folder that is a subfolder of a folder that was shared with you, or if the document is located in a folder that was shared with you, the document or folder is deleted, if you have sufficient rights to delete it.
3.2 Downloading and Installing the Filr Desktop Application
-
On your workstation, access the Filr Web client from a browser.
For information about how to start Novell Filr from a browser, see
Accessing Novell Filr from a Web Browser
in the Novell Filr 1.0.1 Web Application User Guide. -
Click your linked name in the upper-right corner of the page, then click .
-
Click the NovellFilr-version.pkg file to download it.
-
After the download finishes, open the NovellFilr-version.pkg file.
You must have Administrator privileges on the workstation to run the file.
If you do not have the Microsoft Visual C++ 2013 Redistributable Package installed on your workstation, you are prompted to accept a license agreement and install it.
Microsoft .NET Framework 4.5 is not supported on Windows XP.
-
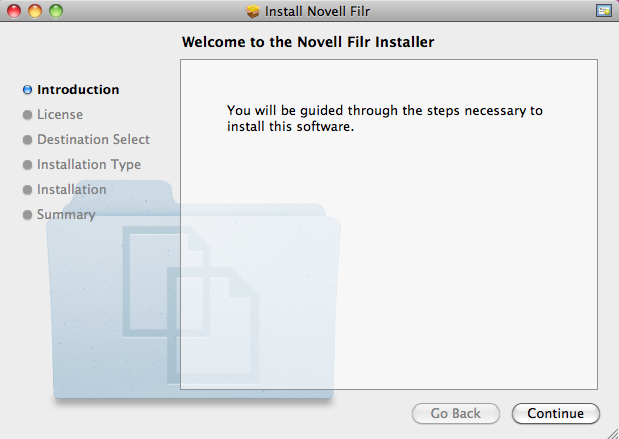
Click .
-
Select the language to view the license agreement, click then click .
-
Change the installation location for the Filr desktop application, or simply click to accept the default location.
-
Click .

-
After the installation finishes, click .
-
Start Filr by running it manually from Launch Pad or from /Applications/Novell Filr, then continue with Configuring the Filr Desktop Application for the First Time.
3.3 Configuring the Filr Desktop Application for the First Time
After you have downloaded and installed the Filr desktop application for the first time, as described in Downloading and Installing the Filr Desktop Application, you are prompted to configure it. This process includes entering account information, choosing which folders to synchronize, and choosing where to store information on your computer’s file system.
-
Click to begin setting up the Filr desktop application.
-
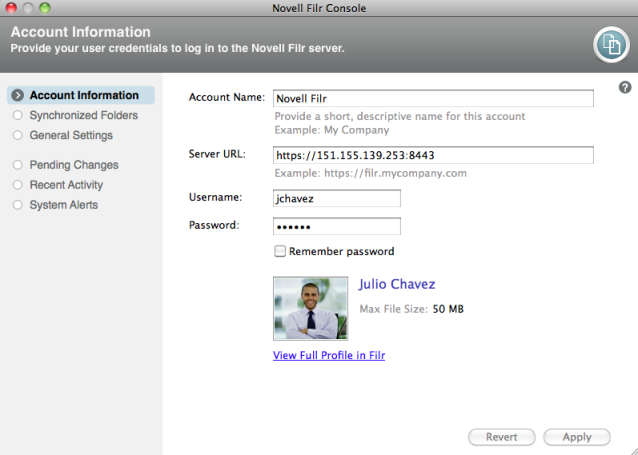
In the section, specify the following information:
Server URL: Specify the URL for the Filr site where you want to synchronize files to your computer. For example, https://Filr.mycompany.com.
Depending on how your Filr system is set up, you might have to enter the port number. For example, https://Filr.mycompany.com:8443.
Username: Specify the Filr username that you use to log in to the Filr site.
Password: Specify the Filr password that you use to log in to the Filr site.
Remember password: Select this option to have the Filr desktop application remember your password. (This option can be disabled by your Filr administrator.)
-
Click .
-
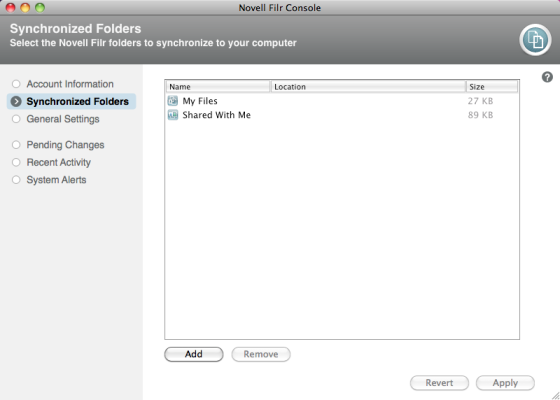
In the section, notice that files in your and folders are synchronized by default.
-
(Optional) If you want to synchronize specific Net Folders:
-
Click in the section, then click the tab.
-
Navigate to and click the icon
 next to the Net Folders that you want to synchronize, then click .
-
-
(Optional) If you want to stop synchronizing files in your My Files or Shared with Me areas:
-
Click in the section, then click the or tab.
-
Click the icon
 at the column heading to stop synchronizing all files and folders in the My Files or Shared with Me areas. You can then click the icon next to specific folders that you want to synchronize.
The icon
indicates that files are being synchronized.
The icon
is displayed to indicate that files in your My Files or Shared with Me areas are no longer being synchronized.
-
Click .
-
-
Click .
-
In the section, specify the following information:
Filr Folder: Click if you want to change the installation location for the Filr desktop application; or simply keep the default location.
Start Novell Filr at login: Keep this option selected to have the Filr desktop application start when you turn on your workstation.
-
Click to review your selections, then click .
The Filr desktop application is now running, and the icon
 is visible in the menu bar.
4.0 Configuring Folders to Synchronize
When you first configure the Filr desktop application, you can choose which folders you want to synchronize. My Files and Shared with Me are synchronized by default; Net Folders must be manually configured to synchronize. You can configure folders to be synchronized during the initial configuration or any time after the initial configuration.
You must have appropriate View rights on a Net Folder in order to synchronize it.
For optimal performance, the Filr desktop application should not be configured to exceed the synchronization limits. For information about synchronization limits, see Synchronization Performance Limits.
To configure Net Folders in Filr to be synchronized to your computer:
-
Click the icon
in the menu bar, then click .
-
Click to display the folders that are currently being synchronized.
-
Click .
The Add Novell Filr Folders dialog box is displayed.
-
Select the , , or tab, depending on the location of the folder that you want to synchronize.
-
(Optional) Click a folder name to navigate to subfolders.
-
Click the icon
next to the folder that you want to synchronize.
or
Click the icon
at the top of the folder list to synchronize all folders.
When you select a folder to synchronize, subfolders are also synchronized.
The Filr administrator must enable Net Folders to be synchronized to the Filr desktop application. If the administrator has not enabled a Net Folder to be synchronized, a red icon is displayed next to the folder and you cannot synchronize it.
Files in a Net Folder might not synchronize immediately, depending on the way your Filr administrator implemented file synchronization. If there are files in a Net Folder that are not synchronized, try accessing those files first from the Filr Web application or the Filr mobile app. If files still fail to synchronize to the Filr desktop application, contact your Filr administrator.
-
Repeat Step 4 through Step 6 to synchronize additional folders in your , , or locations.
-
(Optional) Click the icon
next to any folder that you want to stop synchronizing.
You cannot stop synchronizing a subfolder if the parent folder is being synchronized; you must stop synchronizing the parent folder.
or
Click the icon
at the top of the folder list to stop synchronizing all folders.
-
Click .
The folders that you have selected to be synchronized are listed on the Synchronized Folders page. The size of the folder is displayed next to the folder, in the column.
-
Ensure that you want to synchronize the folders that are listed, then click .
If you have selected a folder that is over 500 MB, you are warned before proceeding.
5.0 Viewing Filr Files from Your Computer
-
Click the icon
in the menu bar, then click .
You can access the Filr folder directly from your file system. The Filr folder is in the Places/userid directory.
For information on how to change the default location, see Changing the Location on Your File System Where Filr Files Are Synchronized.
For specific information about file synchronization between your workstation and Filr, see Understanding Synchronization.
6.0 Manually Synchronizing Files
You can manually synchronize files between Filr and your computer if you do not want to wait for the scheduled synchronization. Files must be closed before they can be synchronized.
To manually synchronize all your files:
-
Click the icon
in the menu bar, then click .
To manually synchronize an individual file:
-
Navigate to the file that you want to synchronize.
-
Option-click the file, then click .
7.0 Launching Filr in a Browser from Filr Desktop
You can launch Novell Filr in a browser by using the Filr desktop application.
-
Click the icon
in the menu bar, then click .
8.0 Commenting on a File and Viewing Comments
-
Navigate to the file that you want to comment on or view comments for.
-
Option-click the file, then click .
The Filr Comments dialog box is displayed, listing all existing comments that are associated with the file.
-
In the comment field, specify your comment, then click .
or
To reply to an existing comment, click the icon
 next to the comment that you want to reply to, then click .
9.0 Sharing a File or Folder
-
Navigate to the file or folder that you want to share.
-
Option-click the file or folder, then click .
The Filr Share dialog box is displayed.
If a synchronization is in process or if the address book is being cached, the Filr Share dialog box might not be immediately displayed.
-
In the field, begin typing the name of a user or group that you want to share with, then click the name when it appears in the drop-down list.
or
Specify the complete email address of the external user that you want to share with, then press Enter.
-
(Optional) Repeat Step 3 to share with additional users.
-
(Conditional) To modify access settings for an individual user:
-
In the section, select the user whose access settings you want to modify.
-
Choose from the following access settings to modify:
Access: Grant Viewer, Editor, or Contributor access rights. (Contributor applies only to folders.)
Expires: Specify when the share will expire.
You can configure the share to expire either after a given number of days (each day is counted as a 24-hour period from the time that you set the expiration) or on a specific day (rights expire at the beginning of the day that you select).
Internal users: Allow share recipients to re-share the item with internal users.
External users: Allow share recipients to re-share the item with external users.
Public: Allow share recipients to re-share the item with the public.
Note: Include a personal note to share recipients. Only share recipients can read the note.
-
-
(Conditional) To modify access settings for multiple users simultaneously:
-
Hold the Command key and select the users in the section whose access settings you want to modify.
-
Choose from the following access settings to modify. (Access settings that you leave undefined retain any individual access settings that are present on a given user. Access settings that you define are modified for each user that is currently selected.)
Access: Grant Viewer, Editor, or Contributor access rights. (Contributor applies only to folders.)
Expires: Set a date when the share will expire.
Internal users: Allow share recipients to re-share the item with internal users.
External users: Allow share recipients to re-share the item with external users.
All Public: Allow share recipients to re-share the item with the public.
Note: Include a personal note to share recipients. Only share recipients can read the note.
-
-
(Optional) Click
 to make the item publicly available. Then in the section, tap the user that was just added, and set the access control settings for the public.
-
(Optional) In the Notify section, click the drop-down list and choose from the following notification options:
None: Send no notifications.
All recipients: All recipients in the share list are notified.
Only newly added recipients: Only recipients that you add to the share list are notified.
New and modified recipients: Only recipients whose share rights you are modifying, as well as new recipients, are notified.
-
Click .
10.0 Viewing Filr Properties for a File or Folder
You can view the following Filr properties that are associated with your files and folders:
-
File name
-
File path (this is the path to the file or folder from within the Filr system)
-
File size (applies to files only, not folders)
-
User who created the file or folder
-
Date the file or folder was created
-
Date the file or folder was modified
-
User who shared the file
-
Users who the file is shared with
To view Filr properties for a file or folder:
-
Option-click the file or folder for which you want to view the Filr properties.
-
Click .
The Filr properties for the file or folder are displayed in the Filr Info dialog box.
-
(Optional) If you have rights to share the file or folder, you can click to launch the Filr Share dialog box.
11.0 Viewing Recent Activity
You can view activity that has recently taken place in the Filr desktop application. For example, you can see the date and time that Filr folders were synchronized, which files were modified, and information about any synchronization issues you might be experiencing.
To view recent activity:
-
Click the icon
in the menu bar, then click .
-
Click .
12.0 Viewing System Alerts
The Filr desktop application might need to make you aware of various alerts, such as new software updates, expired passwords, server downtime, and so forth.
When system alerts are available, this information icon ![]() flashes over the icon
flashes over the icon ![]() .
.
To view system alerts:
-
Click the icon
in the menu bar, then click .
-
Click .
13.0 Changing the Location on Your File System Where Filr Files Are Synchronized
By default, Filr files are synchronized to the /Users/username/Filr folder on your file system.
When you first configure the Filr desktop application, you can specify the installation location on your file system. You can change the location of the Filr folder at any time after initial configuration.
NOTE:You should not synchronize files to a location on a network that can be accessed by multiple computers. If the Filr folder is on a network location that is accessed by multiple computers, synchronization issues can occur when Filr files accessed from either computer are out of sync with each other and with the Filr server.
To change the location of the Filr folder:
-
Ensure that no files from the Filr folder are currently open.
-
Click the icon
in the menu bar, then click .
-
Click , then click to browse to the new location on the file system where you want the Filr folder to reside.
-
Click > .
-
Click to change the location of the Filr folder.
14.0 Changing Your Filr Account Information for the Filr Desktop Application
When you first configure the Filr desktop application, you specify your account information and Filr server information.
You can change your Filr desktop application account information and Filr server information at any time after the initial configuration:
-
Click the icon
in the menu bar, then click .
-
Click in the Novell Filr Console dialog box.
-
Specify the following information:
Account Name: Specify a descriptive name for the Filr account. A folder with this name is created in your user directory in the file system.
Server URL: Specify the URL for the Filr site where you want to synchronize files to your computer. For example, https://Filr.mycompany.com.
Depending on how your Filr system is set up, you might have to enter the port number. For example, https://Filr.mycompany.com:8443.
Username: Specify the Filr username that you use to log in to the Filr site.
Password: Specify the Filr password that you use to log in to the Filr site.
Remember password: Select this option to have the Filr desktop application remember your password.
This option can be disabled by your Filr administrator.
-
Click .
15.0 Viewing Your Data Quota
Data quotas can be enabled by your Novell Filr administrator in order to limit the amount of data that is stored on the Filr site. For information on how the Filr administrator can enable data quotas, see Managing Disk Space Usage with Data Quotas and File Restrictions
in the Novell Filr 1.0.1 Administration Guide.
If data quotas have been enabled on your Filr site, you need to understand what counts toward your data quotas, the different kinds of data quotas that exist, and how you can view the current data usage, so you can know when you are approaching the allotted data quota. If you meet your allotted quota, Filr enables you to purge files and attachments that you have previously deleted.
15.1 Understanding Data Quotas
Data quotas limit the amount of data individual users can add to the Filr site. Files that are located in Net Folders (including your Home directory) do not count toward your data quota.
15.2 Viewing Your Data Quota
Data quotas might or might not be in use on your Filr site. If you are unable to view your data quotas as described in this section, your Filr administrator has not yet restricted the amount of data that can be added to the Filr site.
You can view your data quota directly from the desktop application:
-
Click the icon
in the menu bar.
-
Click .
-
Click in the Novell Filr Console dialog box.
Your data quota is displayed with the amount that you have currently used. The max file size is also displayed; this is the largest size of file that you are allowed to upload to the Filr site.
For information about how to manage your data quota from within the Filr Web application, see Managing Your Data Quota
in the Novell Filr 1.0.1 Web Application User Guide.
16.0 Understanding and Resolving Synchronization Issues
Most synchronization issues can be resolved through the Pending Actions section of the Filr Console. If issues require further investigation, you can check the desktop logs.
16.1 Understanding Pending Actions
You might encounter any of the following synchronization issues, indicated by one of the following icons:
![]() : There is an upload error.
: There is an upload error.
![]() : There is an upload warning.
: There is an upload warning.
![]() : There is a download error.
: There is a download error.
![]() : There is a download warning.
: There is a download warning.
![]() : There are upload and download errors.
: There are upload and download errors.
![]() : There are upload and download warnings.
: There are upload and download warnings.
![]() : The client has not yet attempted to upload or download the file.
: The client has not yet attempted to upload or download the file.
If you are unsure why a document is not downloading or uploading, view the recent activity, as described in Viewing Recent Activity.
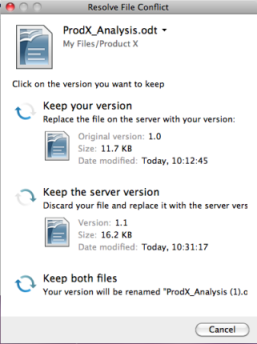
16.2 Resolving Document Conflicts
If a document is edited at the same time from various locations, conflicts can arise.
To resolve document conflicts:
-
Click the icon
in the menu bar.
-
Click .
-
Click .

-
Next to the conflict that you want to resolve, click , then choose one of the available options:
Keep your version: Replaces the file on the Filr server with your version.
Keep the server version: Discards your file and replaces it with the version on the Filr server.
Keep both files: The file on the Filr server is saved as the original file, and your version of the file is renamed.
16.3 Viewing Log Files for the Filr Desktop Application
If Filr files are not being downloaded to your workstation as you expect, or if you are experiencing other unexpected behaviors, see the filr.log file for more information.
-
Click , then from the menu bar, click > .
-
Double-click .
-
Locate the Log List (navigation panel) on the left side of the console. If the Log List is not currently displayed, click > in the menu bar.
-
In the section, expand , expand , expand , then select .
After information in the filr.log file exceeds 1MB, older log information is moved to the filr.log.1, filr.log.2, and filr.log.3 files.
17.0 Uninstalling the Novell Filr Desktop Application
To completely uninstall the Filr desktop application, follow the instructions in the following sections:
17.1 Deleting the Application
-
Move /Applications/Novell Filr to the trash.
17.2 Deleting Filr Metadata
You need to delete the Filr desktop application metadata contained in /Users/username/Library/Application Support/Novell/Filr.
Because the Library directory is usually a hidden directory, complete the following steps to accomplish this.
-
Click , then from the menu bar, click > .
-
Specify ~/Library, then click .
-
Double-click the Application Support folder.
-
Double-click the Novell folder.
-
Move the Filr folder to the trash.
17.3 Deleting Log Files for the Filr Desktop Application
You need to delete the Filr logs contained in /Users/username/Library/Logs/Novell/Filr.
Because the Library directory is usually a hidden directory, complete the following steps to accomplish this:
-
Click , then from the menu bar, click > .
-
Specify ~/Library, then click .
-
Double-click the Logs folder.
-
Double-click the Novell folder.
-
Move the Filr folder to the trash.
17.4 Deleting the Finder Plugin
-
Click , then from the menu bar, click > .
-
Specify /Library/ScriptingAdditions, then click .
-
Move the FilrFinderPluginLaunch.osax file to the trash.
17.5 Deleting Credentials
-
Click > > .
-
Delete any passwords that have the names beginning with Novell Filr.
17.6 Emptying the Trash
-
After the Filr application, metadata, log files, and credentials have been deleted, empty the trash (double-click the icon, then click ).
18.0 Known Issues
For a list of known issues, see the Novell Filr Desktop Application Readme.
19.0 Legal Notices
Copyright © 2013-2014 Novell, Inc. All rights reserved. No part of this publication may be reproduced, photocopied, stored on a retrieval system, or transmitted without the express written consent of the publisher. For Novell trademarks, see the Novell Trademark and Service Mark list. All third-party trademarks are the property of their respective owners.