6.2 Viewing the Recording of Your Meeting
After the meeting ends, Novell Conferencing automatically sends an e-mail to the meeting host with a link to the recording and chat transcript. You can use the e-mail link to view the recording, you can use the Search feature in the dashboard to find and view it, or you can view the recordings in the section of the dashboard.
6.2.1 Using the Link in the E-Mail
After the meeting ends, Novell Conferencing automatically sends an e-mail to the meeting host, using the e-mail address that is set in the host’s Preferences. The e-mail contains a link to the recorded session. It might take up to 24 hours to generate the recording.
-
To view the recording, click the link in the e-mail.
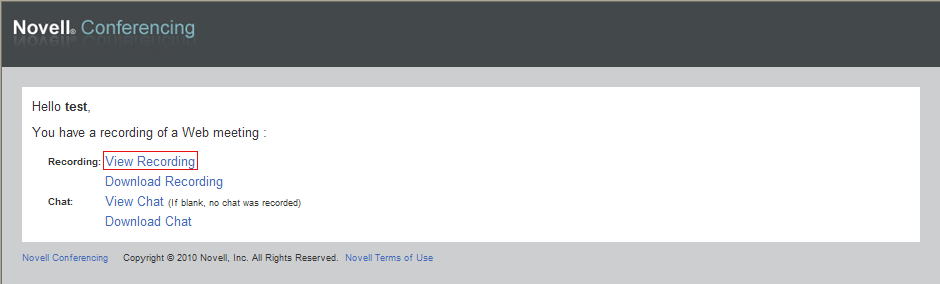
You can also forward this e-mail to others so they can view the recording.
You can also choose to download the recording file (FLV) and play it in any Flash player. You can even embed the codes and paste the meeting player into your Web site or blog.
6.2.2 Using the Search Option
The Search option lets the host look for information about previous meetings, including registrants, chat transcripts, or recordings.
-
End the meeting.
When you end a meeting, you are returned to your dashboard. For information on how to end a meeting, see Section 1.10, Ending a Meeting.
-
Click .
-
In the Search Meetings panel, specify the search data and click .
You can choose to search by start date, end date, current/future date, past date, all dates, and by text. The start date and end date are available only when is selected.
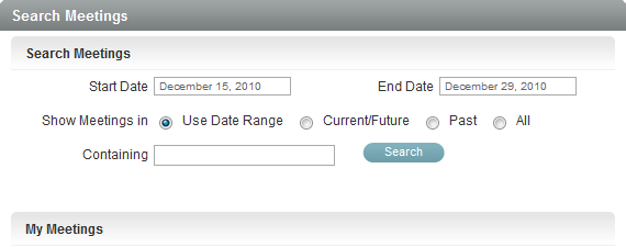
The search result appears.
-
Click the link next to .
The recording opens in a new dialog box You can view the recording here or you can download the recording or chat transcript.
-
Click the link to download the recording.
or
Click the link to download the chat transcript.

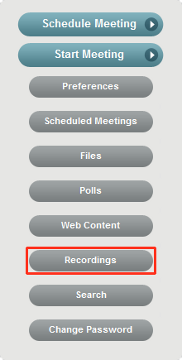
6.2.3 Using the Recordings Option
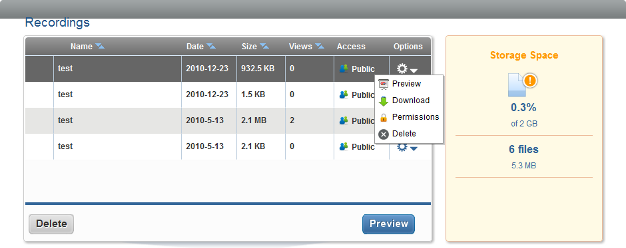
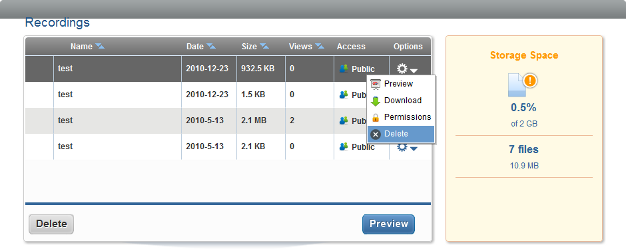
The option in the dashboard allows you to access and manage your saved recordings. Saved recordings share the same storage space on the Conferencing server as saved files, polls, and Web content. The option allows you to preview, download, set access permissions, and delete your saved recordings.
To view a list of your saved recordings:
-
Log in to your Novell Conferencing account.
For information on how to log in, see Section 1.3, Logging In.
-
Click .
Your saved recordings are displayed. Each recording is named with the name of the meeting. The following options are available if you click the button in the column of the saved recordings.
-
Preview: Lets you view the recording without requiring you to download it.
-
Download: Allows you to download and save a copy of your recording.
-
Permissions: Provides you with a link that you can share so others can download a copy of your recording. Also enables you to set a password to protect the recording.
-
Delete: Deletes the recording from the Conferencing storage.
Previewing a Saved Recording
You can preview a saved recording before downloading, sharing, or deleting it.
-
In the recording manager, select the recording you want to preview.
-
Click the
 button in the column.
-
In the drop-down that appears, select .
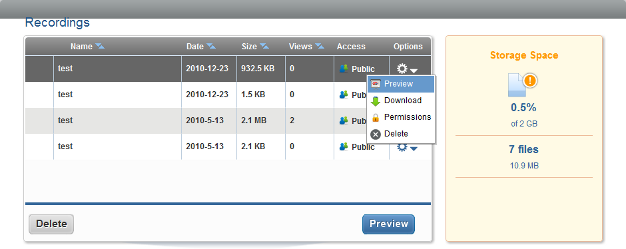
A preview window appears, allowing you to view and change the name of the recording.
-
Click if you changed the name of the recording or click if you did not.
Downloading a Saved Recording
You can download any saved recording to your computer.
-
In the recording manager, select the recording that you want to download.
-
Click the
button in the column.
-
In the drop-down list that appears, select .
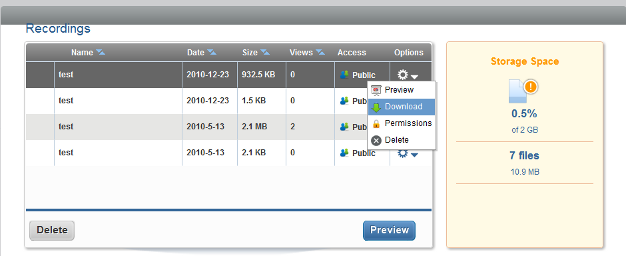
The recording is downloaded to your computer. You can view it with the program that you prefer.
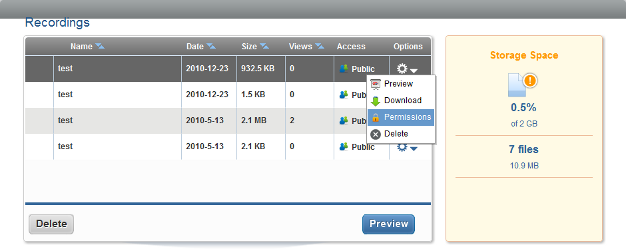
Setting Permissions
Permissions allow you to select who can view a recording. The recordings can either be public or you can select and enter a passcode that people must use to view the recording.
-
In the recording manager, select the recording for which you want to change the permissions.
-
Click the
button in the column.
-
In the drop-down list that appears, select .
-
(Optional) Select , then specify a passcode for people to use to view the recording.
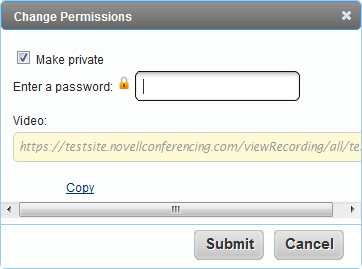
The link displayed in the dialog box is where other people can go to view the recording. Click to copy the URL to your clipboard. You can then share the URL via e-mail, chat, or any other way you desire.
-
When you are finished setting up the permissions or copying the URL, click if you made any changes or click if you didn’t.
Deleting a Saved Recording
You can delete a saved recording when you no longer need it so it doesn’t take up storage space.
-
In the recording manager, select the recording you want to delete.
-
Click the
button in the column.
-
In the drop-down list that appears, select .
-
In the dialog box that appears, select .
Your file is deleted from the Conferencing storage.