2.2 Injecting the SSL VPN Header
The example in this section explains how to accelerate SSL VPN server in a path-based multi-homing configuration.
Before you begin, make sure you have already created a proxy service and an authentication procedure. For more information on creating a proxy service and authentication procedure, see Section 1.4.1, Configuring a Reverse Proxy.
-
In the Administration Console, click > > > [Name of Reverse Proxy].
-
In the section, click .
-
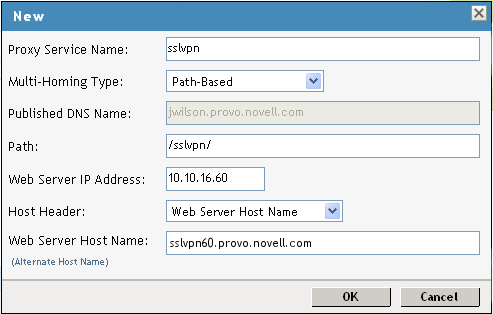
Fill in the following fields.
Proxy Service Name: Specify a name for proxy service.
Multi-Homing Type: Specify the method for finding a second resource on the reverse proxy. For this example configuration, has been selected.
Published DNS Name: This field is populated by default with the published DNS name.
Path: Specify the path to the SSL VPN resource. This must be
/sslvpn/
Web Server IP Address: Specify the IP address of the SSL VPN server.
Host Header: Select which hostname is forwarded to the Web server in the host header. If your SSL VPN server has a DNS name, select .
Web Server Host Name: Specify the DNS name of the SSL VPN server.
-
Click .
-
To configure the default Identity Injection policy and protected resources, click the newly added proxy service.

-
In the section, make sure the is .
-
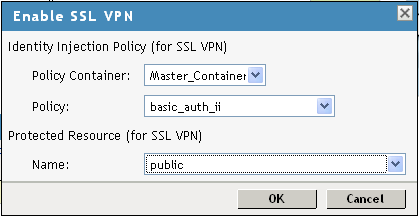
In the section, select the check box, then click . The Enable SSL VPN pop-up is displayed.
-
Fill in the following fields:
-
Policy Container: Leave the default value unchanged.
-
Policy: Select from the drop-down list. A policy pop-up appears. Click in the pop-up, then click .
The default SSL VPN policy injects both the username and password in the authentication header. If you do not want the password to be pushed to the authentication header, configure a policy with a username and a string constant. For more information on configuring policies, see
Creating Identity Injection Policies
in the Novell Access Manager 3.0 SP4 Administration Guide.You can also configure the SSL VPN policy to inject the client IP address, so that the IP address can then be included in log entries. For more information, see
Configuring the Default Identity Injection Policy
in the Novell Access Manager 3.0 SP4 Administration Guide. -
Name: Select from the drop-down list.
-
-
Click to close the pop-up.
-
Click the tab.
-
Specify 8080 in the field, then click .
-
In the section, click the name of the parent proxy service of the newly created SSL VPN proxy service. This host does not have a multi-homing value.
-
Select the tab.
-
Select from .
-
Select an authentication contract from the drop-down list. Make sure you select as the authentication contract.
-
In the section, ensure that the URL is .
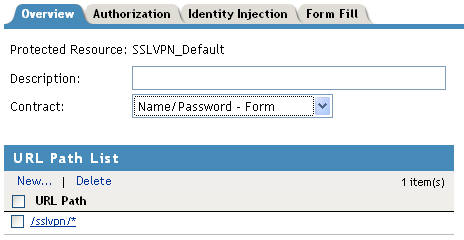
IMPORTANT:Make sure that you configure the URL as given above. Any variation leads to the failure of SSL VPN service.
-
Click then click .
-
On the page, click.
-
On the Access Gateways page, click .
-
To update the Identity Server, click > .
-
Click .