1.2 Installing the JBoss Agent
The agent needs to be installed on the same machine as your JBoss server, and your JBoss server needs to be installed on a machine without any other Access Manager components. For other requirements, see JBoss Agent Requirements.
1.2.1 JBoss Server Prerequisites
You must know the following about your JBoss installation:
-
The base directory for the JBoss server.
-
The server configuration set you have selected for your JBoss server.
For information on these items, please consult the JBoss documentation.
1.2.2 Linux Installation
To install the agent on a Linux JBoss server:
-
Verify that the machine meets the minimum requirements. See Section 1.1.1, JBoss Agent Requirements.
-
If JBoss is running, stop JBoss.
-
Download the agent from Novell.
-
Untar the file.
-
Change to the Novell Access Manager Agent directory.
-
At the command prompt, enter the following:
./install.sh
-
Press Enter to review the License Agreement, then accept the License Agreement.
-
Enter the IP address of the Administration Console machine.
-
Enter the name of the administrator for the Administration Console.
-
Enter and re-enter the password of this administrator.
The installation starts as soon as you enter the password the second time.
-
Enter the base directory for the JBoss server. The installation program expects JBoss to be installed in /opt/jboss. If you have installed it in another location, enter the path.
-
Enter the JBoss server configuration set. Standard values are , , or . If you have created a custom configuration, enter its name.
-
When the installation completes, start JBoss.
The agent is not imported into the Administration Console until the JBoss server is running.
-
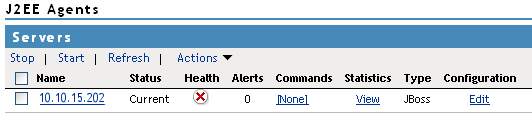
(Optional) To verify the installation of the agent, log in to the Administration Console, then click > .
If the installation was successful, the IP address of your agent appears in the list. The import into Administration Console can take a few minutes, so if your agent does not appear in the list, wait a few minutes, then refresh the screen.
If an agent starts to import into the Administration Console but fails to complete the process, the following message appears:
Server agent-<name> is currently importing. If it has been several minutes after installation, click repair import to fix it.
If you have waited at least ten minutes, but the message doesn’t disappear and the agent doesn’t appear in the list, click the link. If the agent isn’t in the list and you don’t receive a repair import message, verify that you have restarted the J2EE server after installing the agent. The J2EE server must be running for the import process to begin. For additional help, see Section 8.1, Troubleshooting the J2EE Agent Import.
-
The agent must be configured before its status turns green. See Section 2.0, Configuring the Agent for Authentication.
1.2.3 Windows Installation
To install the agent on a Windows JBoss server:
-
Verify that the machine meets the minimum requirements. See Section 1.1.1, JBoss Agent Requirements.
-
If JBoss is running, stop JBoss.
-
Download the agent from Novell.
-
Execute the file.
-
Read the welcome information, then click .
-
Note where additional information can be found, then click .
-
Review the License Agreement, accept it, then click .
-
Select the installation directory for the Server Communications module, then click .
-
Select , then click .
-
Select the directory where you have installed the JBoss server, then click .
-
Select the server configuration folder, then click .
-
Enter the information required for server communication between the agent and the Administration Console. Fill in the following fields and carefully review your information:
Administration Console Admin Username: Specify the username of the admin user of the Administration Console.
Administration Console Admin Password: Specify the password for the admin user of the Administration Console. Confirm the password by re-entering it.
Administration Console IP Address: Specify the IP address of your Administration Console.
IP Address of the Application Server: Review the entered address. If your server is configured for more than one IP address, make sure the one you want to use is specified in this box.
-
Click , then review the installation summary.
-
To install the agent, click .
-
When the installation finishes, start JBoss.
The agent is not imported into the Administration Console until the JBoss server is running.
-
To exit the installer, click .
-
(Optional) To verify the installation of the agent, log in to Administration Console, then click > .
If the installation was successful, the IP address of your agent appears in the Server list. The import into Administration Console can take a few minutes, so if your agent does not appear in the list, wait a few minutes, then refresh the screen.
If an agent starts to import into the Administration Console but fails to complete the process, the following message appears:
Server agent-<name> is currently importing. If it has been several minutes after installation, click repair import to fix it.
If you have waited at least ten minutes, but the message doesn’t disappear and the agent doesn’t appear in the list, click the link. If the agent isn’t in the list and you don’t receive a repair import message, verify that you have restarted the J2EE server after installing the agent. The J2EE server must be running for the import process to begin. For additional help, see Section 8.1, Troubleshooting the J2EE Agent Import.
-
The agent must be configured before the Server Status turns green. See Section 2.0, Configuring the Agent for Authentication.