6.4 Authenticating with a Managed Card
To use a managed card, you need both a relying party and an identity provider as illustrated in Figure 6-2. The following scenario explains how to set up a second Identity Server to be the identity provider. It also explains how to configure a trusted relationship between the relying party, so that a user can authenticate to the relying party with a managed card.
These sections describe only a few of options available for configuring the Identity Server as a CardSpace identity provider. For information about all the available options, see Section 6.7, Configuring the Identity Server as an Identity Provider.
6.4.1 Prerequisite
For CardSpace and managed cards, you need to make sure that the SSL certificate and the signing certificate of the Identity Server use the same name for the certificate’s subject name. When you configured the Identity Server for SSL, you replaced the default SSL certificate with a certificate that uses the DNS name of the Identity Server as the subject name. For CardSpace, you need to replace the default signing certificate. You can use the same certificate for signing as you did for SSL.
-
In the Administration Console, click > > > .
-
In the section, click .
-
Click .
-
In the Replace pop-up, click the icon, select the certificate you created for SSL, then click .
-
When the certificate appears in the Certificate box, click , then click .
-
Update the Identity Server.
-
Complete these steps for both Identity Servers: the relying party and the identity provider.
6.4.2 Configuring a CardSpace Identity Provider
When you configure an Identity Server to be a CardSpace identity provider, you need to create a managed card template. Users can then use the template to create and install a managed card in their card selector.
-
In the Administration Console, click > > > .
-
Click > , then fill in the following fields:
Name: Specify a display name for the template.
Description: Specify the text to be displayed on the card. This can contain information about how the card can be used or the type of resource that can be accessed with the card.
Image: Specify the image to be displayed on the card. Select the image from the drop-down list. To add an image to the list, click . The default image is the Novell Card.
Require Identification of Relying Party in Security Token: Select this option to require the relying party to provide identification when it requests a security token. For this scenario, do not enable this option because the instructions haven’t explained how to configure this option for the relying party.
Allow Users to Back a Managed Card Using a Personal Card: Select this option to allow users to back a managed card with a personal card. If this option is not selected, you cannot complete the steps in Section 6.5, Authenticating with a Managed Card Backed by a Personal Card.
-
Click , then fill in the following fields:
Attribute set: From the list of available sets, select the CardSpace attribute set.
Selected claims: From the list of available claims, select the attributes for the managed card and move them to the list of selected claims.
Do not remove the claim. Add theclaim.
-
Click .
-
Click > .
-
Move the method to the list.
-
Click .
-
Update the Identity Server.
-
Continue with Section 6.4.3, Creating and Installing a Managed Card
6.4.3 Creating and Installing a Managed Card
The following instructions assume you are on a Windows client. The procedure is very similar to what is required on a Linux client and should be easily adapted.
-
In Internet Explorer on the client machine, enter the base URL of the Identity Server acting as the identity provider.
-
Select the Secure Name/Password card, then log in to the Identity Server.
-
Click , then click the e.
The card displays the required claims.
-
Specify a name for the card, then click .
-
Click
CardSpace opens.
-
Click .
The managed card is installed.
-
Log out and close the browser.
-
Continue with Section 6.4.4, Configuring the Relying Party to Trust an Identity Provider.
6.4.4 Configuring the Relying Party to Trust an Identity Provider
To configure a trusted relationship, you need to create a trusted provider configuration for the identity provider. You also need to either modify an existing authentication profile or create a profile that includes the trusted provider as an issuer of security tokens.
To create a trusted provider configuration for the Identity Server acting as the identity provider, you need to know the base URL of the Identity Server and have a file containing the public key of the signing certificate of the Identity Server.
-
To obtain the public key certificate of the identity provider, log in to the Administration Console of the identity provider.
-
Click > .
-
Click the certificate you have created for the Identity Server to use for SSL and signing.
-
On the certificate page, click > , then save the certificate to a file.
-
Copy this file to a location available to the Administration Console for the relying party.
-
-
To create a trusted provider configuration for the identity provider, log in to the Administration Console for the relying party.
-
Click > > > .
-
Click > , then fill in the following fields:
Name: Specify a display name for the identity provider. This name appears in the list of trusted providers that you can select for an authentication card profile. You might want to use part of the DNS name of the identity provider.
Source: This line specifies that the Provider ID is entered manually.
Provider ID: Specify the issuer ID of the trusted provider. For an Identity Server cluster configuration, the issuer ID is the base URL of the Identity Server plus the following path:
/sts/services/Trust
For example, if the base URL is https://test.lab.novell.com:8443/nidp, the Provider ID is the following value:
https://test.lab.novell.com:8443/nidp/sts/services/Trust
Identity Provider: Click to browse for and find the certificate that you exported for the identity provider.
-
Click > to confirm the signing certificate.
-
-
To create a profile that allows this trusted provider to be an issuer of security tokens, click .
The following steps explain how to create a new profile for the trusted provider. This allows you to see how a CardSpace authentication card can be configured for multiple profiles.
-
Click , then fill in the following fields:
Name: Specify a display name for the profile that indicates which trusted provider is going to use the profile.
ID: (Optional) Leave this field blank.
Text: Specify the text that is displayed on the card to the user for this profile. If the user knows about the identity provider, this should help the user identify the provider.
Issuer: From the drop-down list, select the name of the trusted provider.
Token Type: SAML 1.1 is displayed as the token type for the assertion.
-
Click , then specify the attributes for the personal card.
Attribute set: Select the attribute set.
Required attributes: From the list, move the attributes that you want the card to return to the list.
For this scenario, move and to the list. The attribute should always be in the required list.
Optional attributes: From the list, move the attributes that the card can return, but is not required to return, to the list. For this scenario, do not select any optional attributes.
-
Click , then specify the user identification method.
Satisfied contract: (Optional) For this scenario, do not select a contract.
Allow federation: Enable this option so that the managed card can be linked with the user’s account. If you do not enable this option, the user is always prompted for credentials.
Authenticate: Select for the user identification method. This prompts the user for a name and a password the first time the card is used for authentication.
-
-
To add a Trusted Root to a Trust Store, click > .
The Certificates page is displayed.
-
Click > .
In the pop-up dialog box, fill in the following fields:
Server IP/DNS: Specify the server IP address or DNS name for the identity provider.
Server Port: 8443 is the server port number.
Certificate name: Specify a name for the certificate.
-
Click .
-
Select the imported certificate, then click .
-
In the Trust store(s) field, click the icon.
-
Select , then click > .
-
-
Update the Identity Server.
-
Continue with Section 6.4.5, Logging In with the Managed Card.
6.4.5 Logging In with the Managed Card
-
In the browser on the client machine, enter the base URL of the Identity Server acting as the relying party.
-
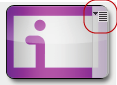
On the CardSpace card, click the icon in the top right corner.
-
Select the profile option for the managed card.
-
When the CardSpace application opens, select the managed card you imported, then click .
-
In the CardSpace application, enter the password for the user, then click .
-
When prompted by the Identity Server, enter the name and password.
On subsequent logins, CardSpace prompts you for a password, but the Identity Sever uses the card for authentication. For single sign-on with the managed card, you need to back it with a personal card. Continue with Section 6.5, Authenticating with a Managed Card Backed by a Personal Card.
Managed cards can be used to access resources protected by the Access Gateway. For configuration information, see Section 6.8, Using CardSpace Cards for Authentication to Access Gateway Protected Resources.