14.1 Configuring Policies to Check the Integrity of Client Machine
You can configure a client integrity check policy to verify if the prescribed software (such as firewall and antivirus software) is installed on the client machine. You can configure different policies for Windows, Linux, and Macintosh machines, then specify applications that must be present in the client machines in order to pass the client integrity check. To configure the client integrity check policy:
-
Select the operating system.
-
Configure the category.
-
Configure applications for a category.
-
Configure attributes for each of these applications.
A category that you have configured can be deleted only if it is not assigned to any of the security levels. This section has the following information:
14.1.1 Selecting the Operating System
-
In the Administration Console, click > .
-
Select from the section. The Client Integrity Check Policies page is displayed.

-
Select the operating system.
Next, you must configure a category of software that needs to be present in the client machine.
-
Continue with Section 14.1.2, Configuring the Category.
14.1.2 Configuring the Category
A category is a group of similar software. For example, a firewall category can contain a list of firewalls such as the Windows firewall and ZoneAlarm* firewall. You can configure multiple software categories for a single client integrity check policy.
-
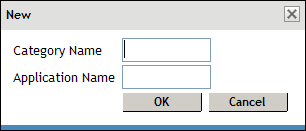
To add a new category, click . The New dialog box is displayed.
-
Specify a name for category and a name for the application in the and the fields respectively, then click .
-
To enable the newly added category, select the category, then click .
-
To disable a category that is already enabled, select the category, then click .
-
To delete a category, select the category, then click .
-
Click to save your modifications, then click on the Configuration page.
-
Continue with Section 14.1.3, Configuring Applications for a Category.
14.1.3 Configuring Applications for a Category
A category consists of group of applications. You can add more than one application under a category. A client workstation is checked for the presence of any one of the software items in the category.
-
To configure or add applications to a category, click the category. The Client Integrity Check - Category page is displayed.

-
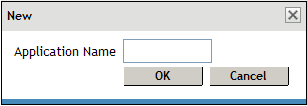
To add a new application click . The new dialog box is displayed.
-
Specify an application name, then click .
-
Select the newly added application, then click .
-
To disable an application that is already enabled, select the application, then click .
-
To delete an application, select the application, then click .
-
Click to save your modifications, then click on the Configuration page.
-
Continue with Section 14.1.4, Configuring Attributes for an Application.
14.1.4 Configuring Attributes for an Application
After you have added an application to a category, you must configure the attributes to each of these applications. These attributes can be in the form of RPMs, processes, registry keys or executable files. The Client Integrity checks detects the presence of these attributes. For example, if you have specified in the client integrity check that
-
To add a new attribute, click , specify an attribute name, then click .
-
Click the application to add application details and attributes. The Application Details and Attributes page is displayed.

-
Specify details for the attributes. The following table lists the attributes for applications on different operating systems:
-
To delete an attribute, select the attribute, then click .
-
Click to save your modifications, then click on the Configuration page.
-
To continue with configuring a connection and traffic policy for a client, proceed with Section 14.2, Configuring Client Security Levels.
14.1.5 Exporting and Importing Client Integrity Check Policies
-
In the Administration Console, click > .
-
Select from the section. The Client Integrity Check Policies page is displayed.
-
Select the policies that you want to export, then click .
-
Specify a filename for the XML document that saves the configuration.
-
Specify a location to save the XML file.
-
To import the exported XML file, select the server into which you want to import the client integrity check policies.
-
Click in the Client Integrity Check policies page.
-
Browse and select the XML file that contains the saved client integrity check policies.
-
To save your modifications, click , then click on the Configuration page.