5.4 Load Balancing
Before you configure load balancing check whether you have bound the desired NIC. If not, go to Section 3.6, Binding Protocols to do so.
5.4.1 Using Novell Remote Manager
-
Log in to Novell Remote Manager, then click Configure TCPIP > Start TCP/IP Configuration > Configure TCP/IP.
-
In the TCP/IP Protocol Configuration window, set Load Balancing to Enabled.
This switch is for the complete system. You still need to configure load balancing on your network.
-
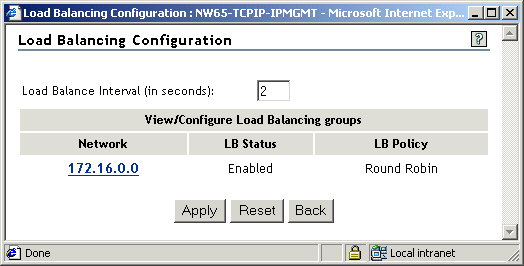
Click the View/Modify button to the right of Load Balancing Configuration.
Figure 5-9 Load Balancing Configuration Window
-
Type a Load Balancing Interval value in seconds.
-
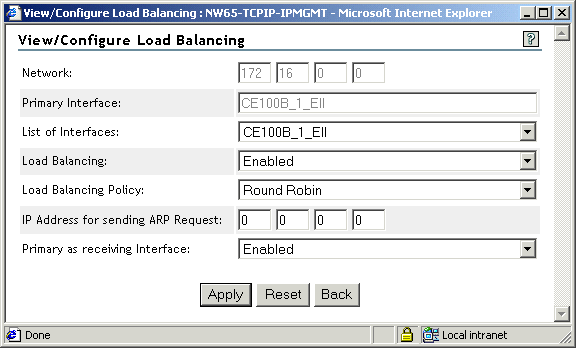
Click the entry under Network to configure Individual Groups.
Figure 5-10 View/Configure Load Balancing Window
-
Set Load Balancing to Enabled.
-
To save your changes, click Apply > Apply > Save.
The system displays a TCP/IP Configuration Successful message.
-
Click OK to return to the TCP/IP Configuration Menu window.
-
If you want these changes to take effect immediately, click Reinitialize Options.
5.4.2 Using INETCFG
-
Load INETCFG, then select Protocols.
-
Select TCP/IP from the list of protocols.
-
Select Load Balancing and enable it.
This switch is for the complete system. You still need to configure load balancing on your network.
-
Select Load Balancing Configuration.
-
Configure the Load Balancing Interval and configure Individual Groups.
-
In Configure Individual Groups, select the network listed and enable load balancing.