9.1 Novell iManager and Storage-Related Plug-Ins
Novell iManager is a Web browser-based tool used for configuring, managing, and administering Novell eDirectory™ objects on your network. The Storage plug-in is the primary tool used to manage NSS devices, software RAIDs, pools, and volumes.
Novell iManager gives you the ability to assign specific tasks or responsibilities to user accounts and to present the user with only the tools (with the accompanying rights) necessary to perform those sets of tasks.
NOTE:The storage-related plug-ins do not support Mobile iManager.
This section describes the following:
9.1.1 Understanding Storage-Related Plug-Ins
Storage-related plug-ins share some management code in common. It is necessary to manage these plug-ins together when installing or updating any of the plug-ins.
Storage-Related Plug-Ins for iManager
Table 9-1 identifies the storage-related plug-ins for Novell iManager 2.7.2 in OES 2 SP1 and later.
Table 9-1 Storage-Related Plug-Ins for iManager
IMPORTANT:The storage-related plug-ins share code in common in the storagemgmt.npm file. If you use more than one of these plug-ins, you should install, update, or remove them all at the same time to make sure the common code works for all plug-ins. If you remove only one of the plug-ins, it removes the common code and breaks the remaining installed plug-ins.
Archive Versioning Management
The Archive Versioning Management (arkmgmt.npm) file contains the Archive Versioning plug-in for Novell Archive and Version Services. This plug-in requires the NSS Storage Management plug-in and the Storage Management plug-in.
For information about using this plug-in, see the following:
Cluster Services Management
The Cluster Services Management (ncsmgmt.npm) file contains the Clustering plug-in for managing Novell Cluster Services. This plug-in requires the Storage Management plug-in. The NSS Storage Management plug-in is required for cluster-enabling NSS pools and volumes.
For information about using this plug-in, see the following:
Distributed File Services Management
Use the Distributed File Services plug-in to manage Novell DFS for NSS volumes. For information about using the DFS plug-in, see NW 6.5 SP8: Novell Distributed File Services Administration Guide.
The DFS plug-in also requires the NSS Storage Management and Storage Management plug-ins.
File Protocols
In OES 2 SP1, the File Protocols plug-in for the Native File Access Protocols for NetWare services has been replaced by two plug-ins: Novell AFP (afpmgmt.npm) and Novell CIFS (cifsmgmt.npm). These plug-ins support AFP and CIFS services for NSS volumes on both Linux and NetWare.
The AFP and CIFS plug-ins also require the NSS Storage Management (nssmgmt.npm) and Storage Management (storagemgmt.npm) plug-ins.
IMPORTANT:Make sure to uninstall the existing File Protocols plug-in, NSS plug-in, and Storage Management plug-in before you upgrade to these new plug-ins.
For information about managing these services, see the following guides:
-
NW 6.5 SP8: AFP, CIFS, and NFS (NFAP) Administration Guide (formerly titled the Native File Access Protocols for NetWare Administration Guide).
NSS Management
The Novell Storage Services Management (nssmgmt.npm) plug-in allows you to manage NSS services (devices, software RAIDs, pools, and volumes) on NetWare 6.5, OES 1, and OES 2. Information about using this plug-in is the focus of this guide.
Storage Management
The Storage Management (storagemgmt.npm) file contains common code that is shared by the storage-related plug-ins. If you use more than one of these storage-related plug-ins, you should install, update, or remove the storagemgmt.npm file and all installed storage-related .npm files at the same time.
IMPORTANT:If you remove any one of the installed storage-related plug-ins, it removes the common code (storagemgmt.npm) file, which breaks the remaining installed plug-ins.
Downloading and Installing Plug-In Updates
For information, see Downloading and Installing Plug-Ins During Installation
in the Novell iManager 2.7 Installation Guide.
Prerequisites for Using the Storage-Related Plug-Ins
The requirements in this section apply to the storage-related plug-ins for iManager 2.7 that are described in Storage-Related Plug-Ins for iManager.
EVMS (Linux)
NSS for Linux uses the Enterprise Volume Management Service (EVMS) version 2.5.5-24.54.5 or later to manage devices that contain NSS pools and volumes and Novell Cluster Services cluster resources. For information about upgrading EVMS, see EVMS Requirements.
NSS tools work transparently with EVMS to manage your devices, pools, and volumes.
IMPORTANT:You cannot run the EVMS graphical user interface (evmsgui), ncurses, or console commands at the same time that iManager or NSSMU is running. If you use EVMSGUI to manage NSS devices, close any instance of iManager or NSSMU, and vice versa.
NSS does not recognize devices that are being managed by non-EVMS volume managers. Only unconfigured devices or EVMS-managed devices with free unconfigured space are available to you when you create or expand NSS pools and software RAID devices.
For information about how to make EVMS the volume manager for your existing non-EVMS devices, see Section D.4, Making Devices Available to EVMS.
Web Browser Language Setting
The iManager plug-in might not operate properly if the highest priority Language setting for your Web browser is set to a language other than one of iManager’s supported languages. To avoid problems, in your Web browser, click , then set the first language preference in the list to a supported language.
Protocols for iManager Communications
Table 9-2 provides information about the protocols needed to use iManager to manage storage in a heterogeneous environment. A protocol annotated with an asterisk (*) is the default and is configured automatically on the servers. The protocols that you use must be loaded and running on both the iManager server and the target server that you want to manage.
Table 9-2 Interoperability of Protocols Used to Connect the iManager Server and Target Servers
WBEM
Where WBEM is the default protocol, WBEM is loaded and runs automatically when you start the server. Otherwise, you must start WBEM to use the protocol.
For OES 2 Linux, the storage-related plug-ins for iManager require CIMOM connections for tasks that transmit sensitive information (such as a username and password) between iManager and the _admin volume on the OES 2 Linux that server you are managing. Typically, CIMOM is running, so this should be the normal condition when using the server. CIMOM connections use Secure HTTP (HTTPS) for transferring data, and this ensures that sensitive data is not exposed.
If CIMOM is not currently running when you click or for the task that sends the sensitive information, you get an error message explaining that the connection is not secure and that CIMOM must be running before you can perform the task.
IMPORTANT:If you receive file protocol errors, it might be because WBEM is not running.
To check the status of WBEM on Linux:
-
As root in a console shell, enter
rcowcimomd status
To start WBEM on Linux:
-
As root in a console shell, enter
rcowcimomd start
To check the status of WBEM on NetWare:
-
As the Administrator user or equivalent, enter the following at the server console:
modules owcimomd
To start WBEM on NetWare:
-
As the Administrator user or equivalent, enter the following at the server console:
openwbem
For information about installing WBEM, see Setting Up OpenWBEM
in the NW 6.5 SP8: OpenWBEM Services Administration Guide.
CIFS (NetWare)
Where it is available, CIFS must be configured before you can use it. An additional CIFS setup requirement for Field Patch 2B is noted where it is required. For information, see the NW 6.5 SP8: AFP, CIFS, and NFS (NFAP) Administration Guide.
NCP
NetWare Core Protocol™ (NCP) is the default protocol when the iManager server and target server are NetWare 6.5 SP3 or SP2.
Files for Storage-Related Plug-Ins
File Locations on Linux
The module files (see Table 9-1) are located in the /var/opt/novell/iManager/nps/portal/modules/ directory.
The Java* JAR files are located in the /var/opt/novell/iManager/nps/WEB-INF/lib/ directory.
The Tomcat TLD files are located in the /var/opt/novell/iManager/nps/WEB-INF/ directory.
File Locations on NetWare
The module files (see Table 9-1) are located in the \sys\tomcat\4\webapps\portal\modules\ directory.
The Java JAR files are located in the \sys\tomcat\4\webapps\WEB-INF\lib directory.
The Tomcat TLD files are located in the \sys\tomcat\4\webapps\WEB-INF\ directory.
Java and Tomcat Files
Table 9-3 Java and Tomcat Files for Storage-Related Plug-Ins
9.1.2 Accessing Novell iManager
-
Launch a Web browser.
-
Click , then enter
https://server-IP-address/nps/iManager.htmlThe URL is case sensitive. Replace server-IP-address with the actual server DNS name or IP address. For example:
https://192.168.1.1/nps/iManager.htmlThe iManager Login page opens.
-
Use your administrator username and password to log in to the eDirectory tree that contains the server you want to manage.
In Novell iManager, you can access only the roles and tasks you are authorized to manage. For full access to all available Novell iManager features, you must log in as Supervisor of the tree.
9.1.3 Accessing Roles and Tasks in iManager
-
Access iManager, then log in to the eDirectory tree where the server you want to manage resides.
For information, see Section 9.1.2, Accessing Novell iManager.
-
In click the role to expand its main tasks
As you work in the storage-related plug-ins, use the navigation links at the top of the page, referred to as “breadcrumbs,” to return to pages you recently visited, or use the links in . If you use the and features of your Web browser to navigate, iManager returns you to the initial page you encountered after login.
-
To activate the options on the selected page, select a server to manage.
For information, see Section 9.1.4, Selecting a Server to Manage.
9.1.4 Selecting a Server to Manage
Before you can access the management options on a selected task page, you must select a server to manage that is in the same Novell eDirectory tree where you are currently logged in.
-
Use one of the following methods to select a server in the tree where you are logged in:

-
Type the Novell eDirectory distinguished server name for the server you want to manage, then press or click somewhere on the page outside of the field to enter your selection. For example:
svr1.company
-
Click the icon to open the eDirectory Object Selector. Browse or search the list to locate the server you want to manage, then click the server name.
-
Click the icon to select a server you have recently managed.
-
-
Wait for iManager to retrieve information about that server and display the appropriate information to the task page you are in.
It might take several seconds to retrieve the information, depending on the size and complexity of your storage solution.
9.1.5 Storage Plug-In Quick Reference
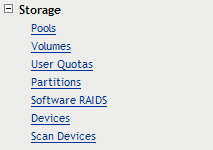
The Storage role comprises seven key tasks:
Pools
You can create and manage storage pools to efficiently use all free space. For NetWare, you can also enable the Pool Snapshot feature to preserve point-in-time views of data pools and to support data backup and recovery.
Table 9-4 Pool Management Tasks
|
Task |
Description |
Reference |
|---|---|---|
|
|
Displays a list of all pools on the selected server. |
|
|
|
Displays information about a selected pool. |
|
|
|
Creates a new pool on the selected server. |
|
|
|
Deletes a selected pool and all of its volumes and their data. |
|
|
|
Renames a selected pool. |
|
|
|
Mounts and activates a selected deactive or unmounted pool. |
|
|
|
Deactivates a selected active pool. |
|
|
|
Allows you to select one or more partitions from available devices in order to expand the size of a pool. |
|
|
|
Opens the Pool Snapshots page where you can create and manage pool snapshots. This option is disabled for online snapshot pools, because you cannot create a snapshot of a snapshot. |
|
|
|
Updates (replaces) the eDirectory object for a selected pool. Use only if a storage object is not recognized or has been lost. |
|
|
|
Displays a list of deleted volumes in a pool, and allows you to salvage or purge them. You can also pause and resume the autopurging of deleted volumes. |
Viewing, Salvaging, or Purging Deleted NSS Volumes in a Pool |
|
|
For a pool snapshot that is online as an active pool, takes it offline. This does not delete the pool snapshot. |
|
|
|
Displays a list of the partitions comprising the pool’s storage space. |
|
|
|
Lists all volumes on a selected pool. |
|
|
|
Displays a list of the devices that contribute space to a selected pool. |
Volumes
You can create and manage NSS volumes, including their key attributes.
Table 9-5 Volume Management Tasks
|
Task |
Description |
Reference |
|---|---|---|
|
|
Displays a list of all volumes on the selected server. |
|
|
|
Displays information about a selected volume. |
|
|
|
Creates a new unencrypted volume. To create an encrypted NSS volume, use NSSMU. |
|
|
|
Deletes a selected volume and all of its contents. |
|
|
|
Renames a selected volume. |
|
|
|
Mounts and activates a deactive or unmounted volume. |
|
|
|
Deactivates an active volume. |
|
|
|
Mounts an unmounted volume. A volume must be mounted to view its details. |
|
|
|
Dismounts a mounted volume. |
|
|
|
Moves a selected NSS volume for the purpose of reorganizing and redistributing storage on the same server (or to other servers) in response to changing business needs. |
For requirements, guidelines, and procedures for splitting volumes, see |
|
|
Splits a selected NSS volume for the purpose of reorganizing and redistributing storage on the same server (or to other servers) in response to changing business needs. |
For requirements, guidelines, and procedures for splitting volumes, see |
|
|
Displays a list of volume attributes, and allows you to set the attributes and name space to use for a volume. It also displays usage statistics for a volume. |
|
|
|
Displays user quotas and space consumed for users of the volume. Administrators can view and manage user quotas. Users can view their own user space quotas. |
|
|
|
Takes a selected snapshot volume offline, where it remains active in the background. |
|
|
|
Updates (replaces) the eDirectory object. Use only if a storage object is not recognized or has been lost. |
User Quotas
The User Quotas task (see Table 9-6) allows managers to view and manage user space restrictions. It can be specified as an iManager role-based task for administrators. An individual user can log in to iManager under his or her own username to view the user’s user space restrictions.
Partitions
NSS creates and deletes partitions for you when you work with software RAIDS and pools in iManager and NSSMU. To delete partitions manually, use the NSSMU Partitions page.
Software RAIDs
You can create and manage software RAID 0, 1, and 5 devices to improve storage performance and reliability. You can use NSSMU on NetWare to create a software RAID 10 or 15 device.
Table 9-8 Software RAID Management Tasks
Devices
You can configure, mount, and maintain a wide selection of storage devices, including direct-attached-storage devices, network-attached storage devices, networked storage devices in a Fibre Channel or iSCSI storage area network (SAN), and hardware device arrays.
Table 9-9 Device Management Tasks
|
Task |
Description |
Reference |
|---|---|---|
|
|
Displays a list of all local and external devices available on the selected server. |
|
|
|
Displays information about a selected device. |
|
|
|
Initializes a selected device by erasing its partition table, effectively destroying all of its data. If devices are present but not showing up for creating pools and volumes, you should initialize the disk. |
|
|
(NetWare) |
For network configurations with multiple paths between network devices and your NetWare server, opens the Multipath page where you can set the primary path and path failover priorities for fault tolerance of connections between host bus adapters and storage devices. You can also bring paths up and down. |
|
|
|
Sets the connection to selected device to its user-defined default primary path. |
|
|
|
Resets the multipath priority settings for a selected device in the server registry to its user-defined defaults. |
Resetting the Server Registry with Default Priority Settings for a Device |
|
|
Enables device sharing to support high-availability server clusters. |
|
|
|
Displays a list of the pools on a device. |
|
|
|
Displays information about partitions that are configured on a device. |
9.1.6 Files and Folders Plug-In Quick Reference
The Files and Folders plug-in for iManager 2.7 provides the Files and Folders role for Linux and NetWare. It is also integrated in iManager as the option in the iManager toolbar. File browsing in iManager is available for file systems that have a Volume object defined in eDirectory, such as for NSS volumes on Linux and NetWare and for NCP volumes on Linux.
The Files and Folders Manager NPM file (filemanager.npm) is automatically installed in iManager. For information about manually installing NPM files for iManager, see the Novell iManager 2.7 Installation Guide.
Click the role to select tasks first, then search for the file or folder you want to manage. Click the icon to view the Tree, Browse, and Search view of a server’s eDirectory objects in the left pane. In the Tree view, click a Volume object to see the hierarchical file system tree view of the volume's folders and files. Click the plus (+) or minus (-) icon next to a directory name to expand or collapse the view of its subdirectories. Locate the file or folder you want to manage, then specify the action you want to perform for it.
The Files and Folders plug-in for Novell iManager 2.7 provides the tasks described in this section. All of the tasks and actions that are available under the role are also available from the tree view.
Delete
Deletes a file or folder on an NSS volume or an NCP volume (NCP share on a Linux POSIX file system). For information, see Section 28.2, Deleting a File or Folder on an NSS Volume.
Deleted Files
Salvages or purges deleted files on an NSS volume. Salvage and purge of deleted files and directories is available only for NSS volumes where the volume’s Salvage attribute is enabled. Other NSS settings determine how long deleted files and directories are available.
For information about configuring salvage and purge behavior for NSS volumes, see Section 26.0, Salvaging and Purging Deleted Volumes, Directories, and Files.
For non-NSS volumes, the Deleted Files report is empty (no deleted files).
Download
Downloads a selected file from an NSS volume or NCP volume to a specified location on your local drive or mapped network drive. For information, see Section 28.4, Downloading Files from an NSS Volume.
New Folder
Creates a folder on an NSS volume or NCP volume. For information, see Section 28.1, Creating a Folder on an NSS Volume.
Properties
Adds, removes, or modifies file system trustees, trustee rights, inherited rights filters, and file system attributes for files and folders on NSS volumes and NCP volumes. See Table 9-11 for a complete list of tasks you can perform from the Properties page.
Table 9-11 Properties Tasks
|
Properties Tab |
Task Description |
|---|---|
|
Information |
Displays or modifies a directory quota for the selected folder. Directory quotas management is available only for NSS volumes where the volume’s Directory Quotas attribute is enabled. For information, see Section 25.3, Managing Directory Quotas. Displays information about a selected file or folder, such as:
Displays or modifies the owner of a selected file or folder. Displays or modifies the file system attributes for a file or folder. For information, see Section 22.1.3, Configuring File or Folder Attributes. |
|
Rights |
Displays, adds, or removes file system trustees for a selected file or directory. Displays, grants, or revokes file system trustee rights for trustees of the selected file or directory. Displays or modifies the inherited rights filter for a selected file or directory. For information, see Section 22.1, Configuring File System Trustees, Trustee Rights, Inherited Rights Filters, and Attributes. |
|
Inherited Rights |
Displays or modifies the inherited rights filters at every level of the path for a selected file or directory. For information, see Configuring the Inherited Rights Filter for a File or Directory. Displays the effective rights for the selected file or directory. For information, see Section 22.1.5, Viewing Effective Rights for a Trustee. |
Upload
Uploads a specified file from your local drive or a mapped network drive to a specified location on an NSS volume or NCP volume. For information, see Section 28.3, Uploading Files to an NSS Volume.