18.2 Cross-Forest Trust Relationships
Administrators must configure trust relationships manually to access resources in a different forests. Every trust relationship between each domain in the different forests must be explicitly configured.
18.2.1 Creating a Cross-forest Trust between Active Directory and Domain Services for Windows Forests
This section describes how to create a cross-forest trust between Active Directory and DSfW.
In this example, win2003ad.com is the domain name of the Active Directory forest and dsfw.com is the domain name of the DSfW forest.
Configuring the DNS Forwarders on the Domain Services for Windows Server
You need to configure a DNS forwarder on the DSfW DNS server to forward any DNS queries for the Active Directory domain to the Active Directory domain's DNS server.
-
Active Directory domain name: win2003ad.com
-
DSfW domain name: dsfw.com
-
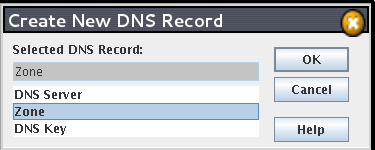
In the DNS Service window of the DNS/DHCP Java-based Management Console utility, click Create on the tool bar.
-
Select from the Create New DNS Object dialog box, then click .
-
Select and specify the DNS configuration parameters as follows:
-
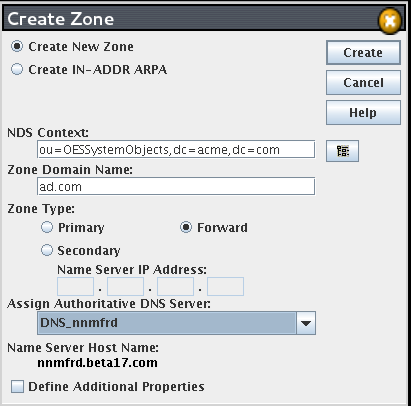
Specify the eDirectory context for the zone or browse to select it; that is, the container containing the DNS related objects.
-
Specify a name for the zone; that is, the domain name of the Active Directory forest.
-
Select the Zone Type as Forward.
-
Select a DNS server from the drop-down list. This is the name of the DNS server object.
-
Click . A message indicates that the new forward zone has been created.
-
-
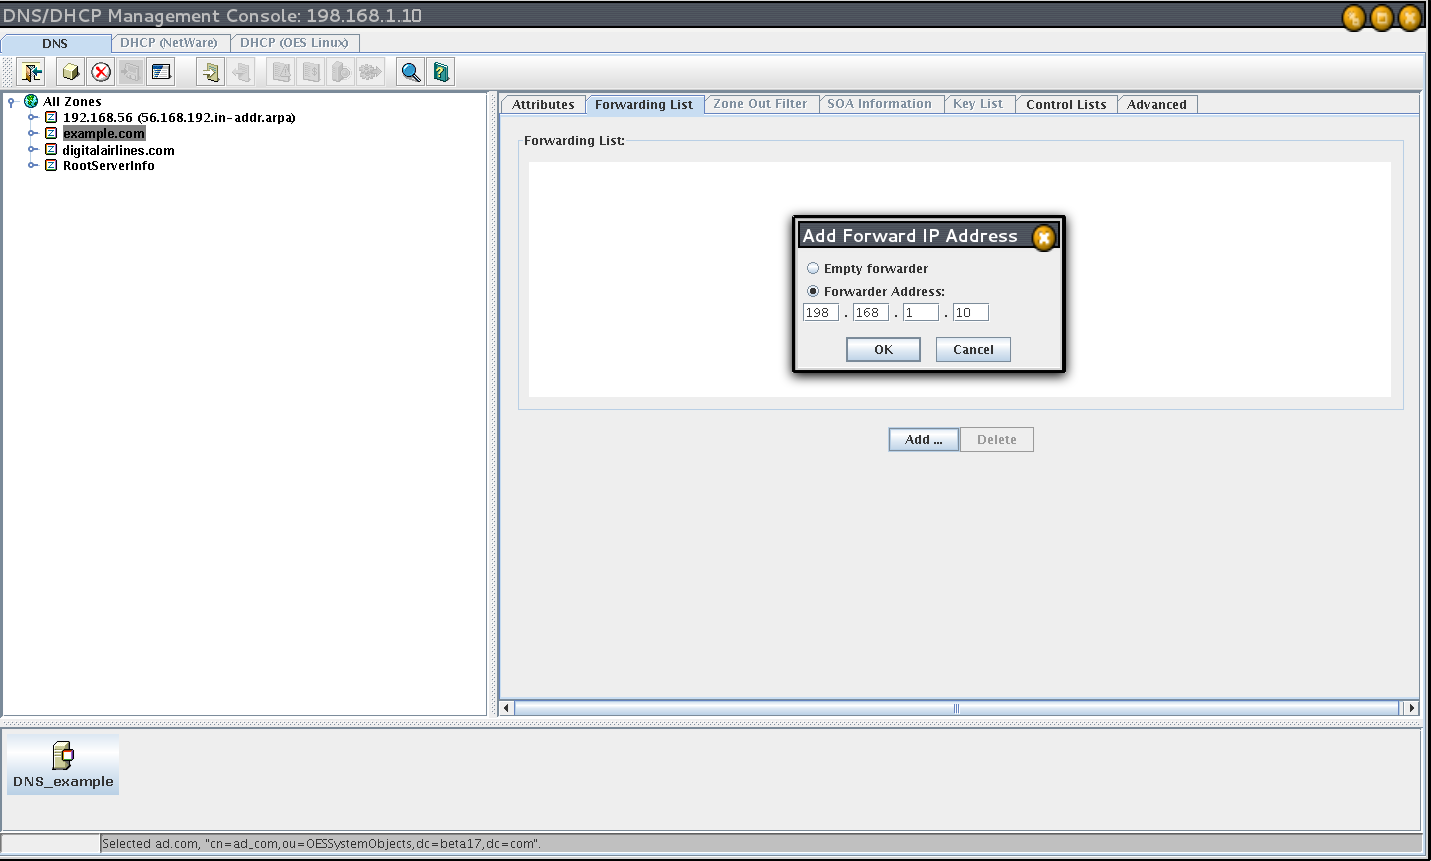
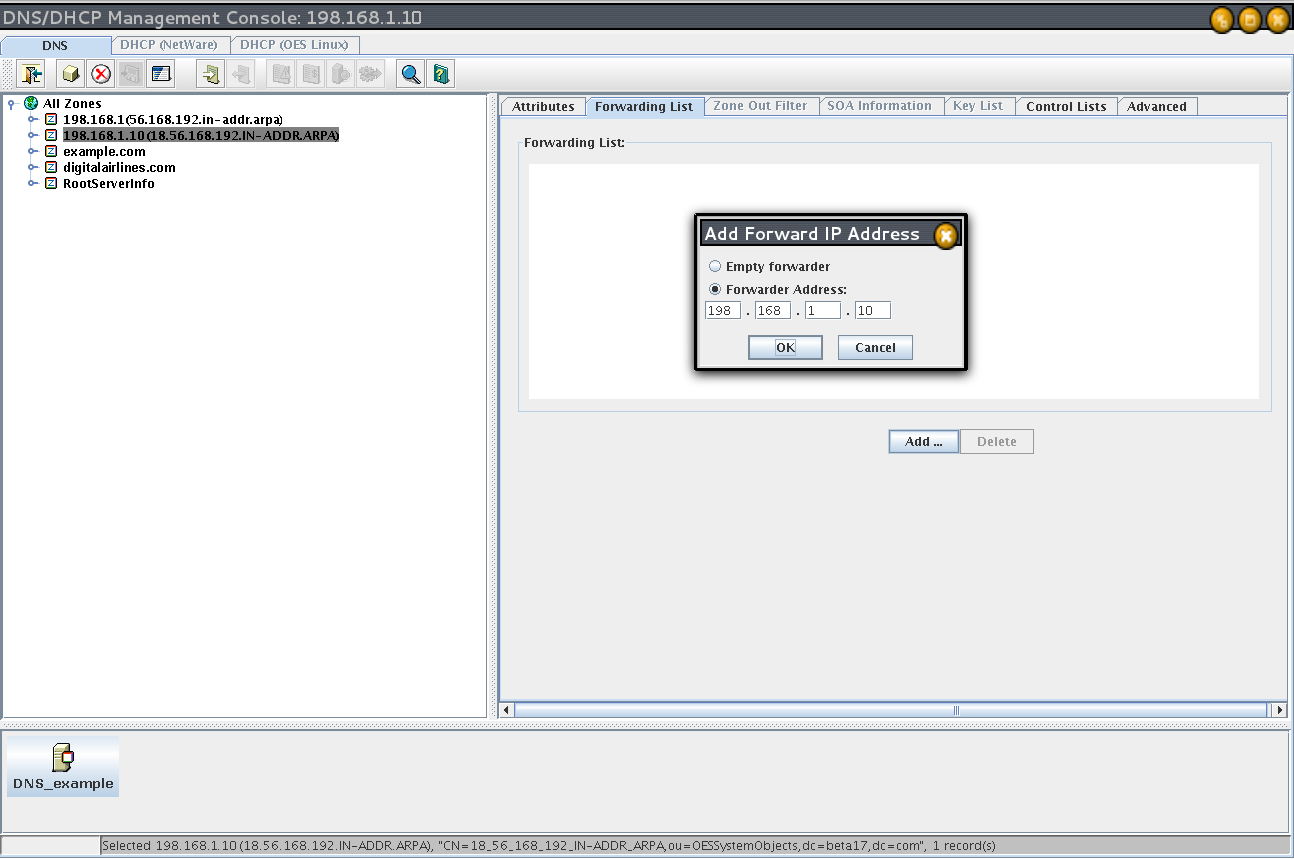
Select the zone that is created.
-
Click the Forwarding List tab. This tab displays a list of all forwarding IP addresses. To add an address to the list, click , select the option and specify the IP address of the Active Directory forest's DNS server. Click .
-
Restart DNS by using the rcnovell-named start command.
-
To save the changes done to the nds, click the button.
Configuring the Reverse Lookup Zone Forwarder
You need to configure a DNS reverse lookup zone for DSfW for a Windows domain.
-
In the DNS Service window of the DNS/DHCP Java-based Management Console utility, select click .
-
Select Zone from the Create New DNS Object dialog box, then click .
-
Specify the DNS configuration parameters:
-
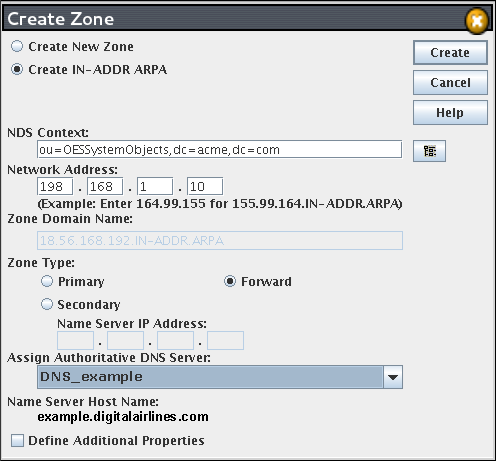
Select .
-
Specify the network address. This is the IP address of the Active Directory forest's DNS server.
-
Select as the Zone Type.
-
Select a DNS server from the drop-down list. This is the name of the DNS server object.
-
Click . A message indicates that the zone has been created.
-
-
Select the zone that is created.
-
Click the Forwarding List tab. This tab displays a list of all forwarding IP addresses. To add an address to the list, click , select the option and specify the IP address of the Active Directory forest's DNS server. Click .
-
To save the changes done to the nds, click the button.
-
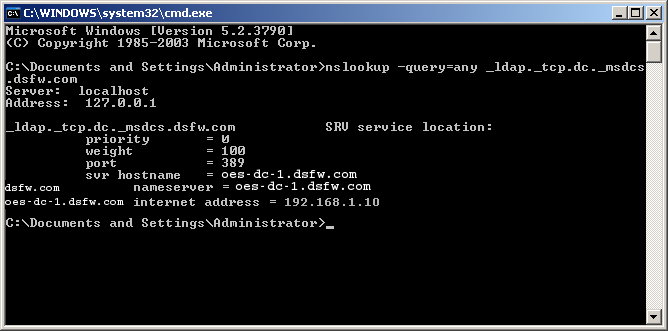
Verify the DNS configuration by trying to resolve the Active Directory domain and its DNSSRV records using nslookup, as follows:
nslookup -query=any _ldap._tcp.dc._msdcs.<AD domain name>
For example:
# nslookup -query=any _ldap._tcp.dc._msdcs.win2003ad.com
Server: 192.168.1.10
Address: 192.168.1.10#53
Non-authoritative answer:
ldap._tcp.dc._msdcs.win2003ad.com service = 0 100 389 osg-dtsrv22.
win2003ad.com.
Authoritative answers can be found from:
osg-dt-srv22.win2003ad.com internet address = 192.168.1.20
Configuring the DNS Forward Lookup Zone on the Active Directory Server
To resolve the DSfW forest from the Active Directory forest, you must either create a forward lookup stub zone or a forwarder on the Active Directory forest's DNS server.
-
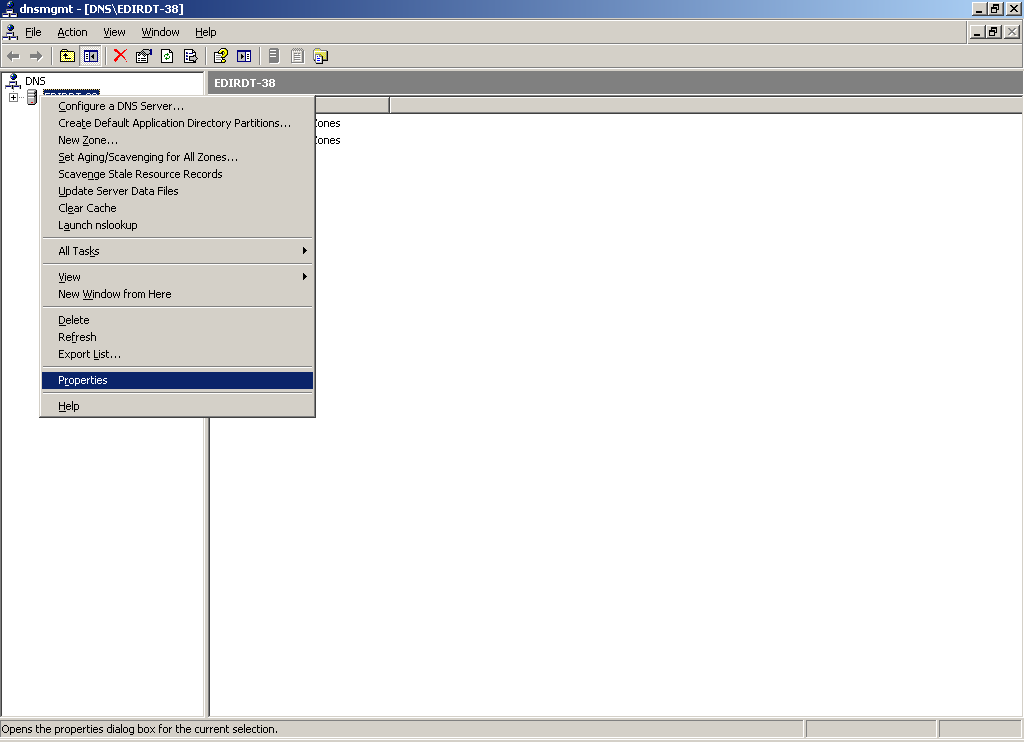
At your Windows management workstation, click , enter mmc in the text field and click .
-
Click snap-in, click and select DNS snap-in, then click . Click to close the window and then click .
-
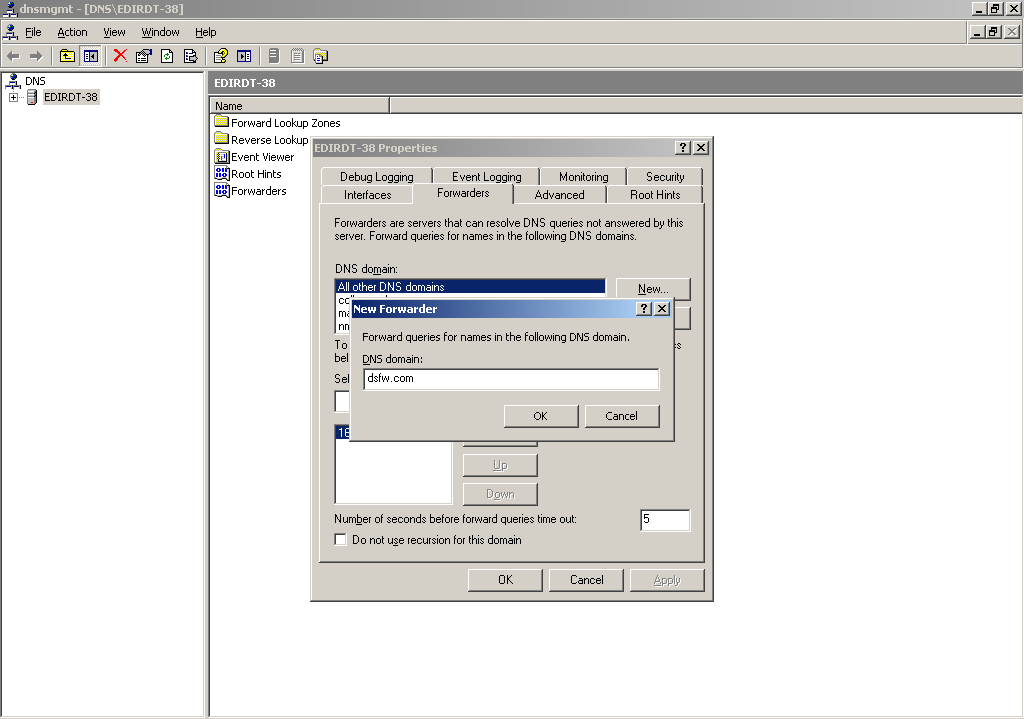
Select the tab, then click New and add a new forwarder for the DSfW domain. Specify the DSfW domain name and click OK.
-
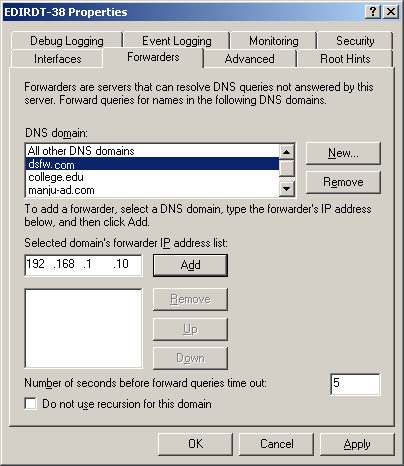
Select the new forwarder, specify the IP address of the DNS server of the DSfW domain, then click Add.
-
Verify the DNS configuration by using nslookup to resolve the Active Directory domain and its DNS SRV records, as follows:
nslookup -query=any _ldap._tcp.dc._msdcs.<DSfW domain name>
-
-
Right-click , select .
-
Select . Deselect the option.
-
Specify the Network IP and click . The zone is now created.
-
Right-click the newly created zone to create a PTR record and enter the required details.
-
-
If the Active Directory domain's Domain Functional Level is not Windows Server 2003, do the following to raise it:
-
Open Active Directory Domains and Trusts snap-in from the MMC.
-
Right-click the icon representing the Active Directory domain, select l from the menu, then set it to .
-
-
If the Active Directory forest's Forest Functional Level is not Windows Server 2003, do the following to raise it:
-
Right-click the Active Directory Domains and Trusts snap-in from MMC.
-
Select from the menu and set it to .
-
Creating the Trust
-
At your Windows management workstation, click , enter mmc in the text field and click .
-
Click snap-in, click and select Active Directory Domains and Trusts snap-in, then click .
-
Click , then click .
-
Right-click the DSfW domain, then select .
-
Select from the tab, then click OK.

-
Click to start creating a new trust.
-
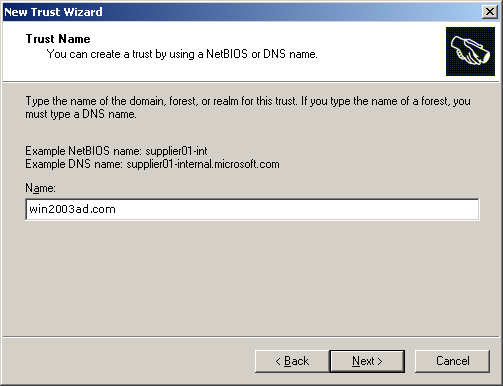
Specify the DNS name (or NetBIOS name) of the Active Directory forest, then click Next.
-
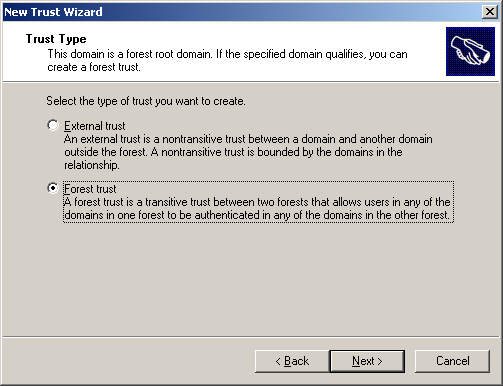
Select , then click Next.
-
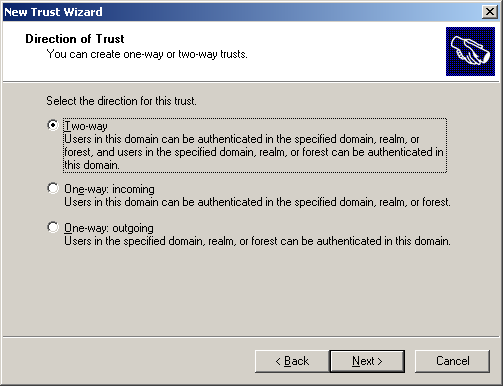
To select the direction of trust, do one of the following:
-
Click Two-way to create a two-way forest trust.
-
Click One-way:incoming to create a one-way incoming forest trust.
-
Click One-way:outgoing to create a one-way outgoing forest trust.
-
-
Click
-
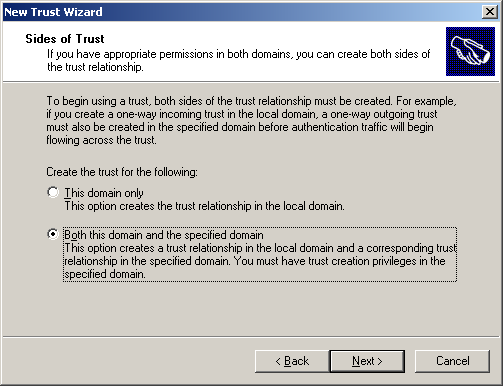
Select and click Next.
-
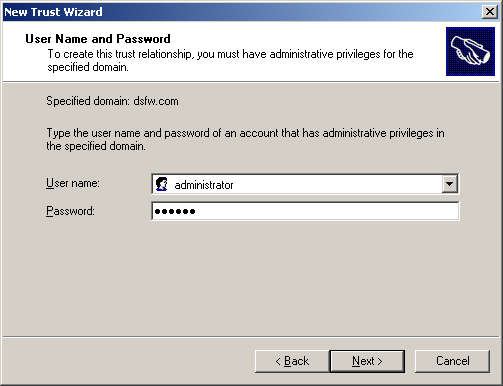
Specify the user name and password of the Active Directory domain administrator, then click Next.
-
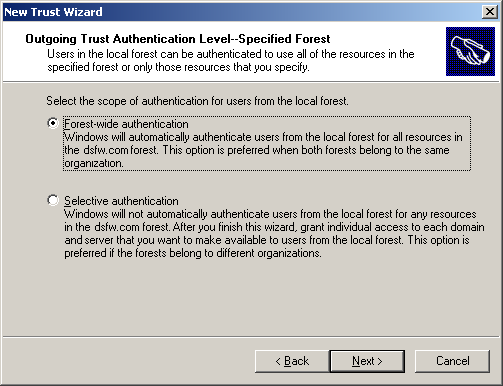
Select to authorize users to use resources in the local forest or those identified by the administrator, then click Next.
-
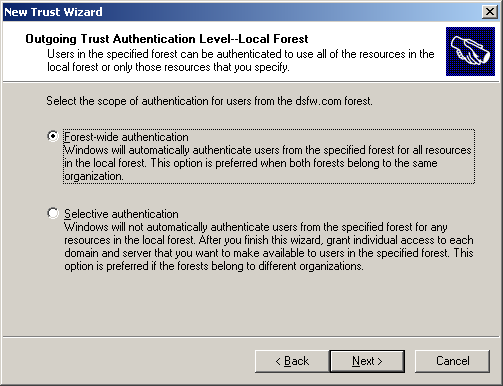
Select to authenticate Active Directory forest users to use resources in the dsfw.com forest or those identified by the administrator, then click Next.
-
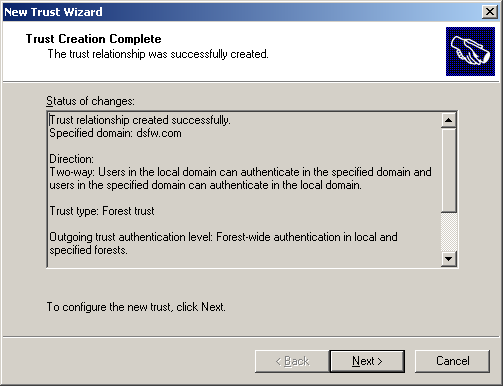
Review the trust settings and complete the creation of trust by clicking .
-
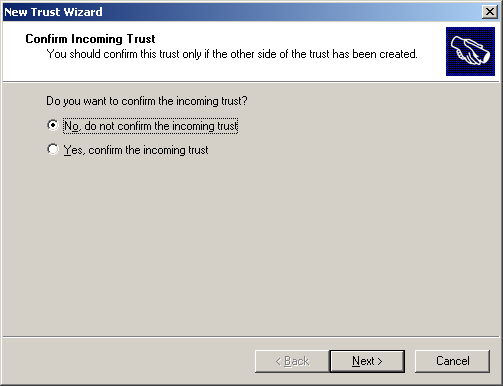
Click any option depending on your choice, then click .

-
Click any option depending on your choice, then click .
-
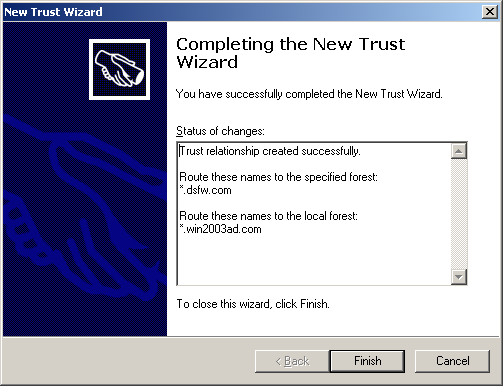
Complete the trust creation by clicking .
-
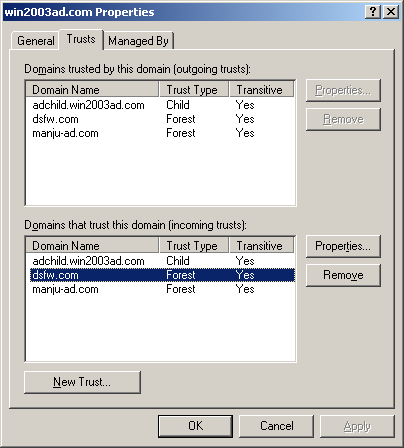
The new domain summary appears in the Trusts page.
Verifying the Trust
To verify that the DNS configuration is correct:
-
Verify that the drop-down list in the Login window of a Windows XP machine that is joined to the Domain Services for Windows domain has an entry for the Active Directory domain. For other higher versions of Windows like Windows 7 and Windows 8, follow the instructions in Step 2.
-
Try to log on to the Windows machine that is joined to the Domain Services for Windows domain with an Active Directory domain user principal name.
-
Verify that the field in the Login window of a Windows XP machine that is joined to the Active Directory domain has an entry for the Domain Services for Windows domain. For other higher versions of Windows like Windows 7 and Windows 8, follow Step 4.
-
Try to log on to the Windows machine that is joined to the Active Directory domain with a Domain Services for Windows domain user principal name.
18.2.2 Creating a Cross-forest Trust between two Domain Services for Windows Forests
This section describes how to create a cross-forest trust between two DSfW forests.
In this example, there are two DSfW forests: dsfw1.com and dsfw2.com.
Configuring the DNS Forwarders on the Domain Services for Windows Server
You need to configure a DNS forwarder on the first DSfW DNS server (dsfw1.com) to forward any DNS queries for the second DSfW domain(dsfw2.com). The queries are forwarded to the DNS server of the second domain.
-
In the DNS Service window of the DNS/DHCP Java-based Management Console utility, click Create on the tool bar.
-
Select from the Create New DNS Object dialog box, then click .
-
Select and specify the DNS configuration parameters as follows:
-
Specify the eDirectory context for the zone or browse to select it; that is, the container containing the DNS related objects.
-
Specify a name for the zone; that is, the DSfW domain name with which you want to create trust (second domain).
-
Select the Zone Type as Forward.
-
Select a DNS server from the drop-down list. This is the name of the DNS server object.
-
Click . A message indicates that the new forward zone has been created.
-
-
Select the zone that is created.
-
Click the Forwarding List tab. This tab displays a list of all forwarding IP addresses. To add an address to the list, click , select the option and specify the IP address of the DNS server of the DSfW domain with which you want to create trust (second domain). Click .
-
Restart DNS by using the rcnovell-named start command.
-
To save the changes done to the nds, click the button.
Repeat steps Step 1 to Step 7 to create forwarder for the first DSfW domain (dsfw1.com) in the DNS server of the second DSfW domain (dsfw2.com).
Configuring the Reverse Lookup Zone Forwarder
You need to configure a reverse lookup zone for the second DSfW domain on the DNS server of the first DSfW domain.
-
In the DNS Service window of the DNS/DHCP Java-based Management Console utility, select click .
-
Select Zone from the Create New DNS Object dialog box, then click .
-
Specify the DNS configuration parameters:
-
Select .
-
Specify the network address. This is the IP address of the DNS server of the DSfW domain with which you want to create a trust.
-
Select as the Zone Type.
-
Select a DNS server from the drop-down list. This is the name of the DNS server object.
-
Click . A message indicates that the zone has been created.
-
-
Select the zone that is created.
-
Click the Forwarding List tab. This tab displays a list of all forwarding IP addresses. To add an address to the list, click , select the option and specify the IP address of the Active Directory forest's DNS server. Click .
-
To save the changes done to the nds, click the button.
-
Verify the DNS configuration by trying to resolve the DSfW domain with which you want to create trust and its DNS SRV records using nslookup, as follows:
nslookup -query=any _ldap._tcp.dc._msdcs.<AD domain name>
For example:
# nslookup -query=any _ldap._tcp.dc._msdcs.dsfw2.com
Server: 192.168.1.10
Address: 192.168.1.10#53
Non-authoritative answer:
ldap._tcp.dc._msdcs.dsfw2.com service = 0 100 389 osg-dtsrv22.
dsfw2.com.
Authoritative answers can be found from:
osg-dt-srv22.dsfw2.com internet address = 192.168.1.20
Repeat steps Step 1 to Step 7 to create forwarder for the reverse lookup zone of the first DSfW domain (dsfw1.com) in the DNS server of the second DSfW domain (dsfw2.com).
Creating the Trust
-
At your Windows management workstation which is joined to the first DSfW domain, click , enter mmc in the text field and click .
-
Click snap-in, click and select Active Directory Domains and Trusts snap-in, then click .
-
Click , then click .
-
Right-click the first DSfW domain(dsfw1.com), then select .
-
Select from the tab, then click OK.
-
Click to start creating a new trust.
-
Specify the DNS domain name (or NetBIOS name) of the second DSfW forest(dsfw2.com), then click Next.
-
Select , then click Next.
-
To select the direction of trust, do one of the following:
-
Click Two-way to create a two-way forest trust.
-
Click One-way:incoming to create a one-way incoming forest trust.
-
Click One-way:outgoing to create a one-way outgoing forest trust.
-
-
Click
-
Select and click Next.
-
Specify the user name and password of the second DSfW domain administrator, then click Next.
-
Select to authorize users to use resources in the local forest or those identified by the administrator, then click Next.
-
Select to authenticate the second DSfW forest users to use resources in the first DSfW forest or those identified by the administrator, then click Next.
-
Review the trust settings and complete the creation of trust by clicking .
-
Click any option depending on your choice, then click .
-
Click any option depending on your choice, then click .
-
Complete the trust creation by clicking .
-
The new domain summary appears in the Trusts page.
Verifying the Trust
To verify that the trust creation is correct:
-
Verify that the drop-down list in the Login window of a Windows machine that is joined to the first DSfW domain has an entry for the second DSfW domain.
-
Try to log on to the Windows machine that is joined to the first DSfW domain with the second DSfW domain’s user principal name.
-
Verify that the field in the Login window of a Windows machine that is joined to the second DSfW domain has an entry for the first DSfW domain.
-
Try to log on to the Windows machine that is joined to the second DSfW domain with the first DSfW domain’s user principal name.