13.5 Performing Actions on Files from Custom Reports

After a custom report is generated, you can perform the following actions on the files listed in the report for the selected volume.

13.5.1 Moving Selected Files

  1. From the generated report, select the check box to the left of each file that you want to move. To move all files in the list, click the Check All button.

  2. Specify the path where you want to move the selected files in the field to the right of the Move Checked File To button.

    The target path must be to a location on the same volume.

  3. Click the Move Checked File To button.

13.5.2 Copying Selected Files

  1. From the generated report, select the check box to the left of each file that you want to copy. To copy all files in the list, click the Check All button.

  2. Specify the path where you want to copy the selected files in the field to the right of the Copy Checked File To button.

    The target path must be to a location on the same volume.

  3. Click the Copy Checked File To button.

13.5.3 Deleting Selected Files

  1. From the generated report, select the check box to the left of each file that you want to delete. To delete all files in the list, click the Check All button.

  2. Click the Delete Checked Files button.

13.5.4 Opening or Downloading a File

  1. From the generated report, select the file_name link for the file you want to open or download.

  2. From the resulting dialog box, select Open With or Save to Disk, then click OK.

13.5.5 Managing Individual Files

  1. From the generated report, click the File Information icon.

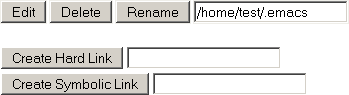
  2. To perform the desired action (edit, delete, rename, create hard link, or create symbolic link) for the file, specify the required information in the applicable field, then click the applicable button.

    The target path for the action must be to a location on the same volume.