12.3 Setting User Space Quotas on DST Volumes
User space restrictions limit the space available to a user of the NSS volumes across all directories and files owned by the user. In a DST volume pair, the user quota set on the primary volume is enforced separately from the user quota set on the secondary volume. Before you can add quotas using the ncpcon quotas command, you must enable the User Space Quotas attribute for the primary volume and the secondary volume.
In NSS, user quota information is stored in the volume’s /_admin/Manage_NSS/Volume/<vol name>UserInfo.xml file. You can add, modify, or delete user space quotas on the primary volume, and then use the ncpcon quotas sync command to synchronize the settings from the primary volume to the secondary volume. When a user space quota is deleted, NSS does not delete the quota entry for the user. Instead, NSS changes the user quota setting in the volume’s /_admin/Manage_NSS/Volume/<vol name>UserInfo.xml file from some restriction to unlimited. The command synchronizes the unlimited setting to the secondary volume, which effectively removes the space restrictions for the user.
-
Verify that the User Space Quotas attribute is enabled on each volume.
-
In iManager, select .
-
Click the icon, then browse to select a server to manage.
-
In the list, select the volume, then wait for the volume’s details to be displayed.
-
Click .
-
On the tab, verify that the check box is selected. If it is deselected, select it, then click .
-
Repeat Step 1.c to Step 1.e to verify that the User Space Quotas attribute is enabled on the secondary volume.
-
-
Add, modify, or delete user quotas on the primary NSS volume.
For more information, see
Managing User Space Quotas
in the OES 11 SP3: NSS File System Administration Guide for Linux.-
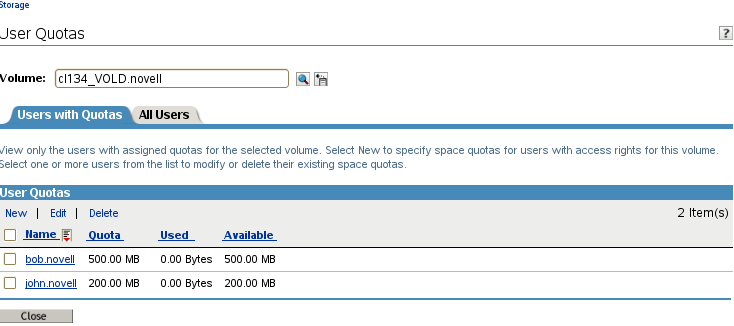
In iManager, select , click the icon, then browse to select the primary volume.
You can also click , select the server, select the primary volume, then click .
-
View the list.
-
Do one of the following:
-
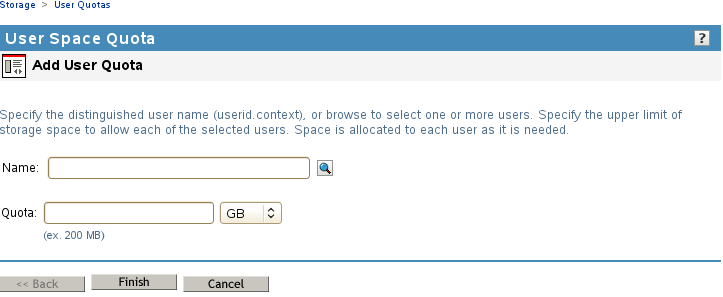
Add user quota: Click , browse to select the user, specify a quota, then click . The user name appears in the list with the user quota information for the volume.
-
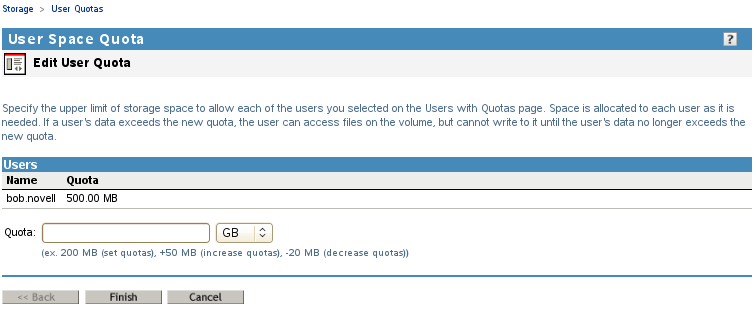
Edit user quota: Select the check box next to the user name, click , specify a quota, then click . The user name appears in the list with the modified user quota information for the volume.
-
Delete user quota: Select the check box next to the user name, click Delete, then click to confirm the quota deletion. The users quota is set to unlimited in the volume’s /_admin/Manage_NSS/Volume/<vol name>UserInfo.xml file.
-
-
Repeat Step 2.c for each user quota you want to manage on the primary volume.
-
-
Synchronize the user space quotas settings from the primary volume to the secondary volume.
-
Log in as the root user to the server, then open a terminal console.
-
Use the ncpcon quotas sync command to synchronize the user quotas to the secondary volume.
ncpcon quotas sync <ALL|MISSING|PERCENT> <primary_volume_name> [percent_value] u [q]
For example, using the ALL option synchronizes all user quotas settings from the primary volume to the secondary volume:
ncpcon quotas sync ALL VOLD u
Using the PERCENT option with a percent value of 200 assigns a quota for the user on the secondary volume that is twice the size of the quota set on the primary volume:
ncpcon quotas sync PERCENT VOLD 200 u
For command information and other examples, see Section 12.2, NCPCON Quotas Command.
-
-
(Optional) In iManager, modify the space quota for the user on the primary volume.
It is not required that the user be assigned the same space quota on the primary volume as on the secondary volume. However, if you change it, the next time you synchronize the user space restrictions, the modified user space quota is applied to the secondary volume if you use the ALL or PERCENT options. In order to synchronize user quotas only for users on the secondary volume that do not have a quota set, use the MISSING option.