3.2 Installing and Enabling MySQL
Before you configure MySQL with Novell Cluster Services, MySQL must be installed and configured properly on all servers in the cluster where you intend to run it. You can use the YaST Software Management tool to install the MySQL and the MySQL Client packages. Other MysQL packages are available that allow you to use MySQL with Perl, PHP, Postfix, or Python, but this guide does not cover their installation or use.
|
Package |
Description |
|---|---|
|
mysql |
Provides the MySQL software and database. |
|
mysql-client |
Provides the MySQL client command line program that acts as a text-based front end for the MySQL Server. It's used for issuing queries and viewing the results interactively from a terminal window |
|
mysql-Max |
Provides the MySQL software, database, and the following features for users that require transaction support:
These features provide transaction-safe tables to which locks are applied while a series of SQL queries is made. The series of queries is referred to as a transaction. |
|
perl-DBD-mysql |
Provides a MySQL database driver (DBD) to support a database-independent interface (DBI) for the Perl programming language. |
|
php5-mysql |
Provides a PHP plug-in that allows an Apache HTTP server to access a MySQL database. |
|
postfix-mysql |
Provides a Postfix plug-in that allows a Postfix mail system to access a MySQL database. |
|
python-mysql |
Provides a Python plug-in that allows you to execute SQL queries on a MySQL database through your Python application. |
Use the following procedure to install the mysql and mysql-client packages, and enable MySQL on each node in the cluster:
-
Log in to the server as the Linux root user, then open YaST.
-
Ensure that the SUSE Linux Enterprise Server 11 SPx installation CD is mounted on the server.
-
In YaST, select > , then click the tab.
-
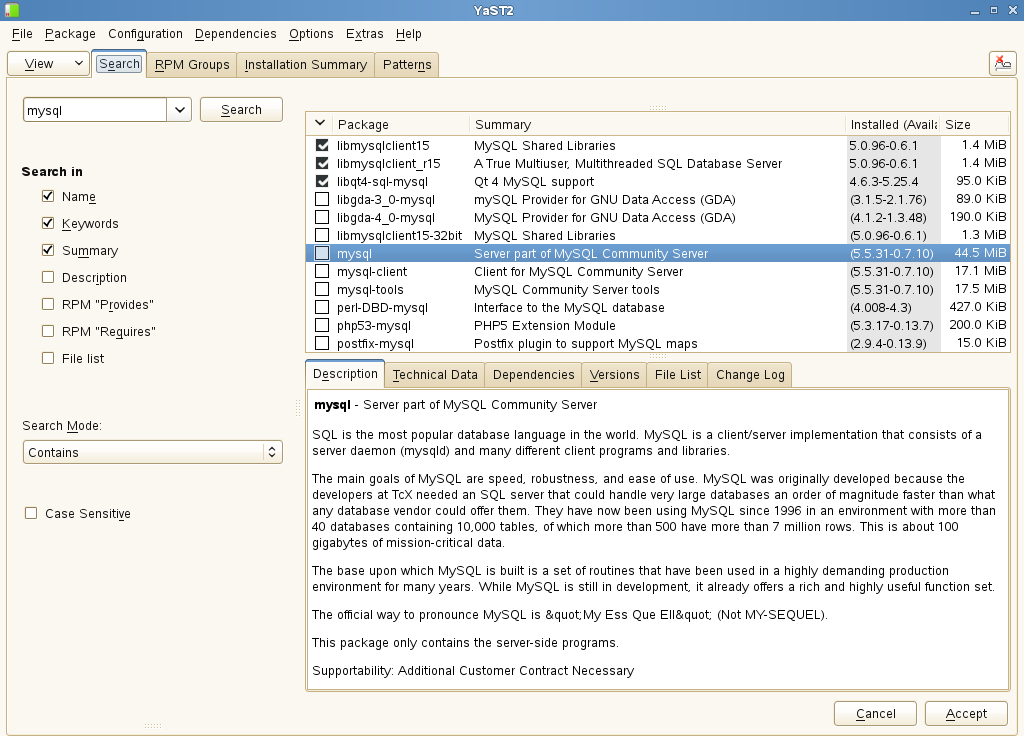
To find the components, type mysql in the field, then click .
-
In the list, select mysql and mysql-client.
-
Click , then click for each component to confirm that you want to install it.
YaST does the following:
-
Installs the MySQL Server and MySQL Client software.
The software is not enabled by default, and the MySQL daemon is not running at this time. No run levels are set.
-
Creates the MySQL root user (a user internal to the MySQL system) as a superuser that has access rights to perform any function in MySQL. Initially, this user has no password assigned.
-
Creates a default path /var/lib/mysql for storing databases that you create later. Initially, this directory is empty. It is populated later when you enable the MySQL service.
-
Creates the mysql user and group on the server and makes them the owners of the default data directory /var/lib/mysql and its contents.
-
Creates a default mount point /mnt/mysql for the database. This is where you will mount the LVM logical volume that you create for the database in Section 3.3, Creating an LVM Volume Group and Logical Volume.
-
Creates the default MySQL configuration file (/etc/my.cnf).
-
-
In YaST, enable the MySQL service:
-
Select > .
-
Select .
-
In the list, select the mysql daemon.
-
Click > .
Under , notice that the 2, 3, and 5 check boxes are selected by default. You don’t want the service to start on system boot because it starts when the cluster resource is brought online on a cluster node.

-
In the lower right corner, click .
-
When you are prompted to confirm the changes, click to save them.
-
Exit YaST.
-
-
Stop the MySQL daemon from running. In a terminal console, enter the following as the Linux root user:
/etc/init.d/mysql stop
Alternatively, you can use the rcmysql stop command.
-
Repeat Step 1 through Step 8 on each node in the cluster to install and enable MySQL.
-
After you have installed and enabled MySQL on all servers in the cluster, continue with Section 3.3, Creating an LVM Volume Group and Logical Volume.