3.2 Installing NCP Server
3.2.1 Preparing for the OES 2 Install
Table 3-1 identifies settings for the OES 2 Linux server that are used as the default settings for NCP Server at install time, and are written to the /etc/opt/novell/ncpserv.conf file. This file specifies parameters that enable file systems on Linux to be available to workstations that connect to it via the Novell Client or the Microsoft NCP Client. It helps enforce the Novell trustee model of file access for NCP users and CIFS/Samba users.
You can change the settings for these parameters as needed to ensure that workstations on the network can access the server. If you later modify the settings for the server, you must re-configure them for NCP Server, too.
Table 3-1 Server Settings Used by NCP Server
|
Linux Server Setting |
NCP Server Parameter Entry in ncpserv.conf |
Reference |
|---|---|---|
|
Server Hostname |
NCP_FILE_SERVER_NAME hostname
|
|
|
Server local code page |
LOCAL_CODE_PAGE code
|
|
|
SYS: volume mount point |
VOLUME sys /usr/novell/sys
|
3.2.2 Installing NCP Server at Install Time
NCP Server for Linux can be installed during the OES 2 Linux installation. For general install instructions, see the OES 2 SP3: Installation Guide.
-
During the YaST install, on the page, click to view details.
-
Select option from the OES options.
When you select , the following additional options are automatically selected:
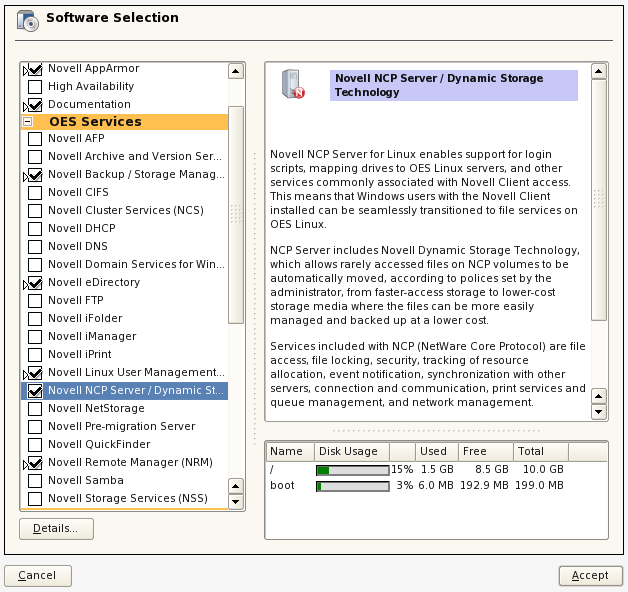
-
-
If you plan to use NSS volumes, select from the options.
IMPORTANT:In the initial release, DST shadow volumes are supported only for Novell Storage Services volumes.
-
If you plan to provide access for CIFS/Samba users to NSS volumes on Linux, NCP volumes on Linux POSIX file systems, or DST shadow volumes, select from the options.
-
Optionally select from the options.
You must install Novell iManager somewhere in your network, but it is not necessary to install it on every server.
-
If you plan to configure NSS volumes on Linux, NCP volumes on Linux POSIX file systems, or DST shadow volumes on a cluster node, select from the options.
-
Click to continue with the installation.
3.2.3 Installing NCP Server on an Existing OES 2 Linux Server
You can optionally install NCP Server for Linux at any time after the initial OES 2 Linux install. Make sure to select the following options, just as you would for a new install:
-
-
-
(This is required only when installing NCP Server on a cluster node.)
-
(If it is not installed on this server, you must install iManager 2.7 somewhere in the network.)
-
-
-
-
(This is required only for CIFS/Samba users.)
-
(This is required only where you are planning to use NSS volumes on Linux.)
For general instructions for installing and configuring OES 2 components on an existing OES 2 Linux server, see Installing or Configuring OES 2 SP3 on an Existing Server
in the OES 2 SP3: Installation Guide.