10.2 Creating NCP Volumes on Linux File Systems
Creating an NCP share on a Linux POSIX file system creates an NCP volume name and associates it to a path for its mount point. You must create one or multiple NCP volumes in order to make Linux POSIX file system files and directories on an OES 2 Linux server accessible to workstations running Novell Client software. Novell clients can then access files and folders on that NCP volume just like they do on NetWare.
IMPORTANT:The procedures in this section apply only to NCP shares on Linux POSIX file systems, not NSS volumes. For information about creating and managing NSS volumes on Linux, see Managing NSS Volumes
in the OES 2 SP3: NSS File System Administration Guide for Linux.
10.2.1 Using Novell Remote Manager to Create an NCP Volume on a Linux File System
-
In Novell Remote Manager, click > , then click .
-
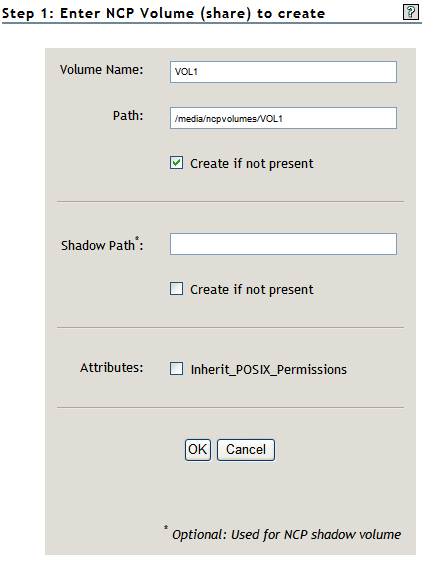
In , type the name of the NCP volume you want to create, such as VOL1.
The share name you specify is the volume name NCP clients will see. It is associated to a path on your Linux server. Names can be up to 14 alphanumeric characters. Underscores are allowed.
-
In , specify the path on a Linux POSIX file system (Ext3, XFS, or Reiser) to the NCP share name, then select check box beneath it if the directory in the path does not already exist.
For example, type /media/ncpvolumes/VOL1 as the share path.
IMPORTANT:You should not create an NCP share on NSS file systems. NSS volumes are by default NCP shares.
-
In , leave the field blank and do not select the check box beneath it.
IMPORTANT:In the initial release of Dynamic Storage Technology (DST), the field is a placeholder for a future capability that will allow you to create a DST shadow volume when you create the NCP volume’s share. When this DST capability is supported, the NCP share is the primary storage location, and the shadow path is the secondary storage location that is also a share on Linux file systems. This capability is not supported in the initial release of OES 2 Linux and DST.
-
(Optional) Enable or disable the option by selecting or deselecting the check box.
The option is disabled (deselected) by default. This setting applies only for the specified NCP volume on Linux POSIX file systems (that is, for Ext3, XFS, or Reiser file systems, and not for NSS).
IMPORTANT:We recommend that the option be disabled (deselected). For information about the security implications of enabling this option, see Section 10.8, Configuring Inherit POSIX Permissions for an NCP Volume.
-
Click .
This creates a mount point to the volume (share) name you specified, and mounts it to make it accessible to NCP clients.
-
Verify that the share was created successfully by clicking > to see a list of NCP shares.
The NCP volume should appear in the list, and be mounted. Mounted volumes appear with the name hyperlinked, and an button next to it.

10.2.2 Creating an NCP Volume with NCPCON
-
Open a terminal console on the Linux server that you want to manage, then log in as the root user.
-
Use one of the following methods to create an NCP share on a Linux POSIX volume:
-
At the terminal console prompt, enter ncpcon to open the NCPCON utility, then enter
create volume ncp_volume_name path -
At the terminal console prompt, enter
ncpcon create volume ncp_volume_name pathFor example, if the volume name is vol1 and the path is /home/novell, enter
ncpcon create volume vol1 /home/novell
Replace ncp_volume_name with the name you want to assign to the new volume. Volume names are not case sensitive. Replace path with the path to the directory on your Linux server where you want the mount point to be created.
-