A.2 Configuring the System Device to Use EVMS
Beginning in OES 2 SP3, the Partitioner in the YaST install offers the option. For unpartitioned devices over 20 GB in size, this option creates a boot partition and a system partition for the container that holds the swap and / (root) volumes.
A.2.1 Understanding the EVMS–Based Partitioning Scheme
Using EVMS to manage the system device allows you to later add NSS pools and volumes on any unpartitioned free space on it. You must modify the partitioning scheme to use EVMS during the install. It is not possible to change the volume manager for the system device after the install.
Beginning in OES 2 SP3, the Partitioner in the YaST Install offers the option to automatically create an EVMS solution for the system device. For unpartitioned devices over 20 GB in size, this option creates a boot partition and a container for the swap and / (root) volumes in up to the first 20 GB, and leaves the remainder of the space on the device as unpartitioned free space.
Table A-1 shows the default proposed setup for a machine with 768 MB RAM. The default swap size is 1 GB or larger, depending on the size of the RAM on your machine. The remainder of the device is left as unpartitioned free space.
Table A-1 Default EVMS Proposal for Devices over 20 GB in Size
|
Device |
Size |
Type |
Mount Point |
|---|---|---|---|
|
/dev/sda1 |
70.5 MB |
Ext2 |
/boot |
|
/dev/sda2 |
14.9 GB |
Linux LVM |
|
|
/dev/evms/lvm2/system |
14.9 GB |
EVMS lvm2/system |
|
|
/dev/evms/lvm2/system/root |
10.0 GB |
EVMS |
/ |
|
/dev/evms/lvm2/system/swap |
1.1 GB |
EVMS |
swap |
A.2.2 Prerequisites
This setup assumes that you have a single device in your physical server and you want to add NSS pools and volumes on the device after the install.
-
The device must be unpartitioned.
If the device has existing partitions, you can remove them all or specify which ones to keep during the install as described in Step 3.
-
The device must be over 20 GB in size.
A.2.3 Modifying the Installation Settings
The procedure in this section describes how to use the option in the YaST Partitioner to modify the partitioning settings during the install of OES 2 SP3 or later.
IMPORTANT:The procedure assumes SCSI devices and refers to device node names with the sdn notation. Other device drivers use different notation for device node names. For example, IDE drives use the hdn notation.
-
Begin the SLES 10 SP4 install for OES 2 SP3.
For information, see Installing OES 2 SP3 as a New Installation.
-
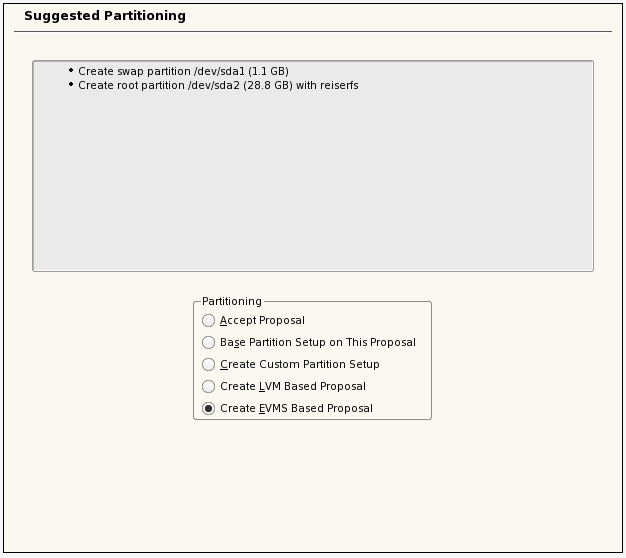
When the installation reaches the Installations Settings page, select to open the Partitioner and modify the default device setup.
For example, a default device setup might look like the one below:

-
If the device is already partitioned, you must remove some or all of the partitions before you use the EVMS-based partitioning proposal. If the device is unpartitioned, skip to Step 4.
-
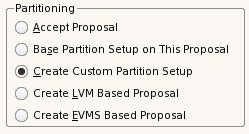
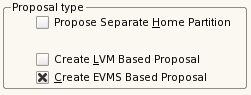
On the Suggested Partitioning page under , select .
-
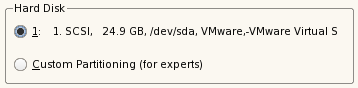
On the Preparing Hard Disk: Step 1 page, select the disk, then click .
-
On the Preparing Hard Disk: Step 2 page under , do one of the following to specify which partitions can be deleted:
WARNING:The data on the deleted partitions will no longer be available.
-
Keep One or More Partitions: Select only those partitions that can be deleted; deselect (clear the check box) the partitions that you want to keep.
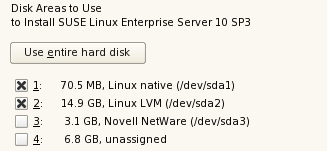
This allows you to keep partitions if they have data on them that you don’t want to be deleted. This is very important if the disk was used previously, and has an NSS partition with pools that you want to keep.
-
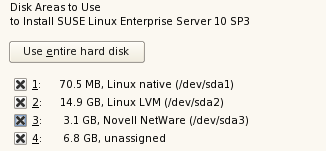
Remove All Partitions: Click . All of the partitions on the disk are selected for deletion.
-
-
On the Preparing Hard Disk: Step 2 page under , select .
-
Skip to Step 5.
-
-
If the device is unpartitioned, on the page under , select .
-
Click to create the default EVMS-based partitioning scheme.
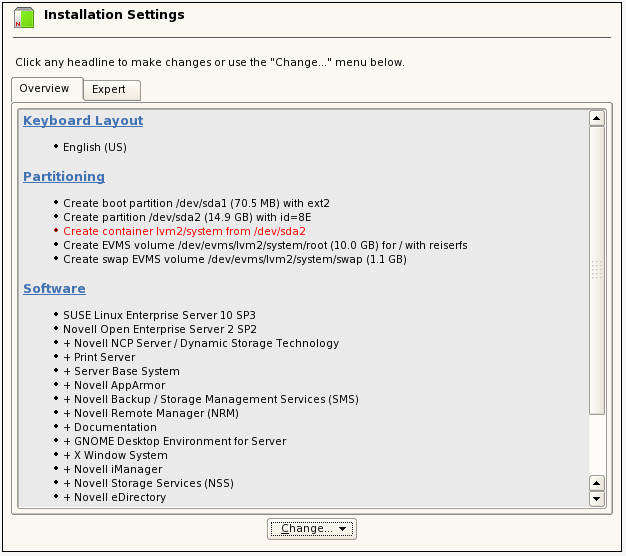
This deletes the LVM2 proposed partitions and the related partition table on the disk and replaces them with the EVMS proposed partitions and setup described in Section A.2.1, Understanding the EVMS–Based Partitioning Scheme.
On the Installation Settings page, the new EVMS partitioning scheme is displayed.

-
Modify the software settings to install NSS.:
IMPORTANT:This step describes essential services for NSS. You can optionally install other OES 2 services on the same server. For information, see Section 2.7, Deciding What Patterns to Install.
-
On the Installations Settings page, click to go to the Software Selections and System Tasks page.
-
Select from the available options.
Novell Distributed File Services is part of NSS, so it is automatically installed whenever you install NSS. When you select , the following additional OES services are automatically selected:
-
Novell Backup / Storage Management Services
-
Novell eDirectory
-
Novell Linux User Management
-
Novell NCP Server / Dynamic Storage Technology

-
-
(Optional) Select to be installed on the server.
You must install iManager somewhere in the same tree as the server. If you install iManager and NSS on the same server, the storage-related plug-ins are automatically installed.
If you install iManager on a different server, make sure you install the storage-related plug-ins that you need to manage NSS file system and services. For information about installing storage-related plug-ins on an existing server, see
Novell iManager and Storage-Related Plug-Ins
in the OES 2 SP3: NSS File System Administration Guide for Linux. -
Click to return to the Installation Settings page.
-
-
If you are prompted to accept proprietary modules being installed, accept them.
-
Continue with the OES 2 installation.
Refer to the product documentation for information about configuring OES Services that are being installed. For general information about the install, see Installing OES 2 SP3 as a New Installation.