B.6 Completing the Server Reconfiguration
Some OES services require reconfiguration steps to be done manually.
Complete the steps in the following sections as they apply to the server you are changing.
B.6.1 QuickFinder
-
If the IP address you have changed is listed as an alias for the virtual search server, modify the list by deleting the entry for the old address and adding an entry for the new one.
For instructions, see
Deleting a Virtual Search Server
andCreating a Virtual Search Server
in the OES 2 SP3: Novell QuickFinder Server 5.0 Administration Guide. -
Regenerate the QuickFinder™ index by completing the instructions in see
Creating Indexes
in the OES 2 SP3: Novell QuickFinder Server 5.0 Administration Guide.
B.6.2 DHCP
-
Make sure the DHCP configuration in eDirectory has a subnet declared for the new IP address.
For instructions, see
Administering and Managing DHCP
in the OES 2 SP3: Novell DNS/DHCP Administration Guide.
B.6.3 DSfW
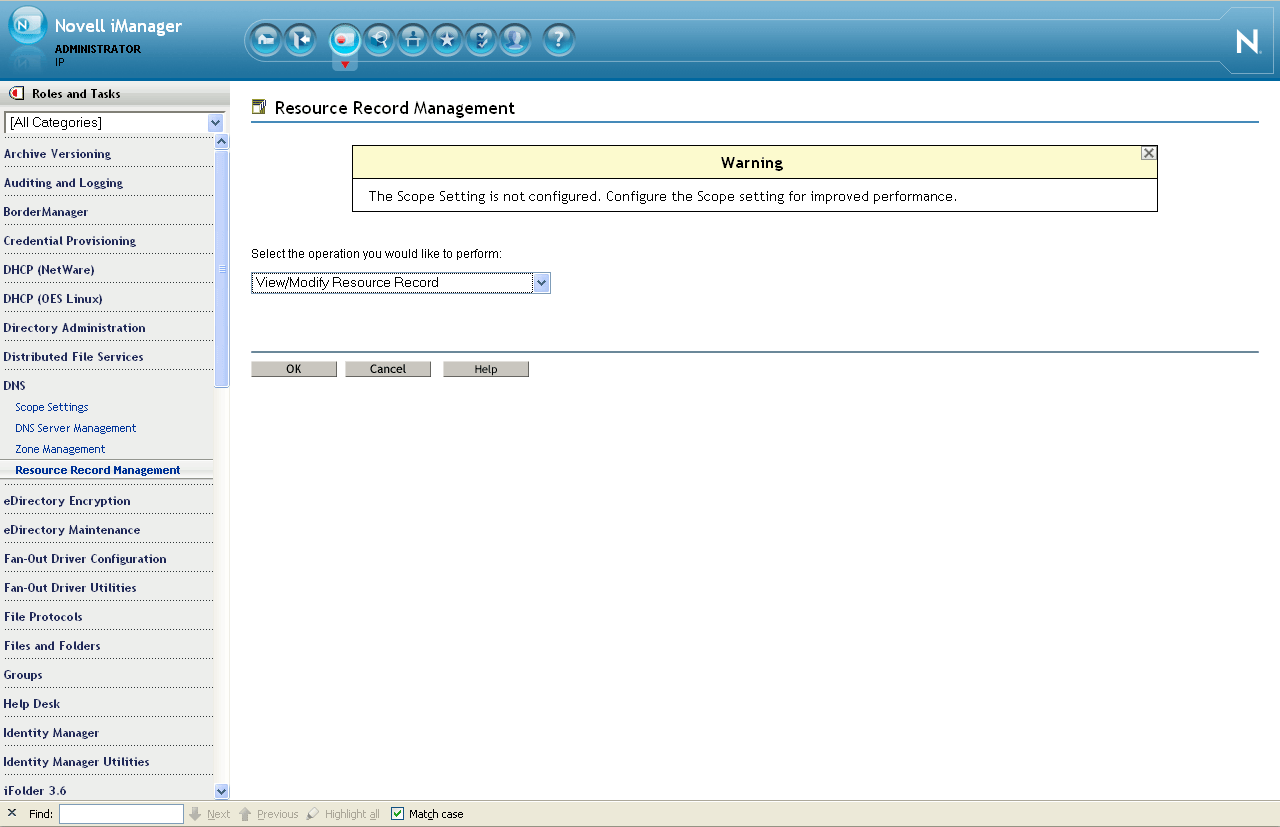
After the IP address is changed, execute the following instructions:
-
Open . Select from the drop-down list, then click to open the Modify Resource Record window.
-
Select the domain name from the drop-down list, then click . This is the domain name whose IP address is to be changed (In this example, it is the ‘A’ record).
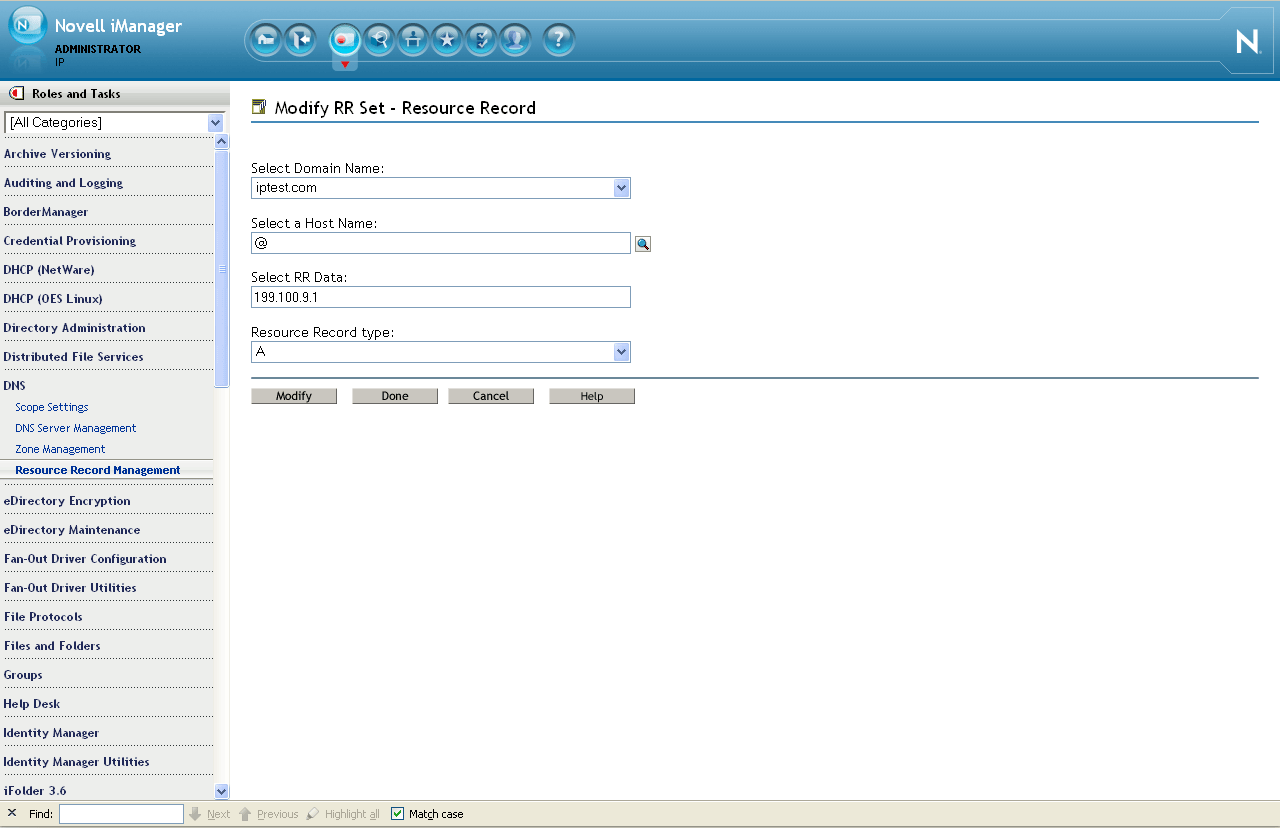
-
Specify the using the search feature.
-
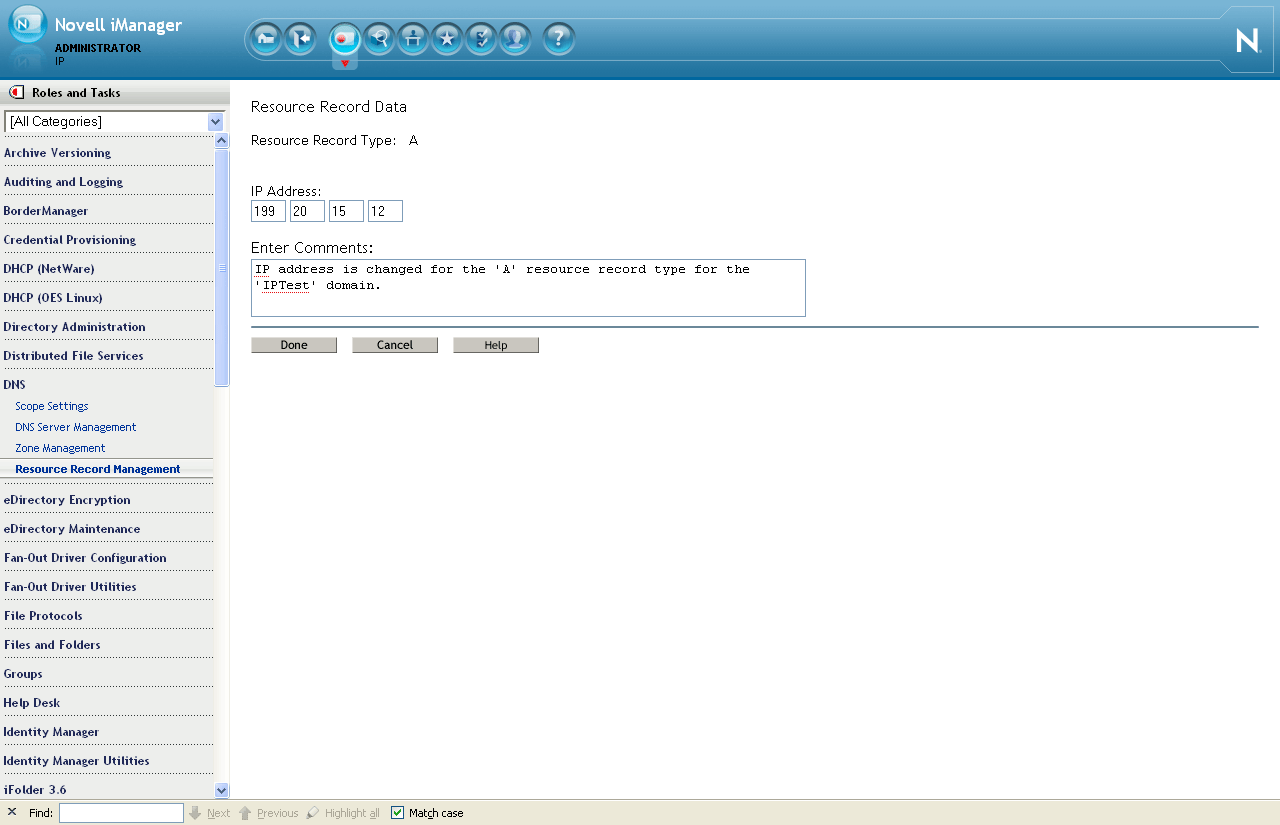
Select the '@ ' record and click to change the IP address with the new IP address.Select the hostname A record and click to change the IP address with the new IP address.
-
Click . A message indicates that the A record has been successfully modified.
-
-
Execute the following steps to rename and move the Reverse Lookup object:
-
Click . Search and select the Reverse Lookup object from eDirectory.
-
In the New Object Name field, specify the name of the Reverse Lookup object with the new IP address.
For example: If the object name is 135_103_92_100_in-addr_arpa.OESSystemObjects.nmfrd, rename it with the new IP address. So if the new IP address is 100.92.103.136, the new name of the Reverse Lookup object will be 136_103_92_100_in-addr_arpa.OESSystemObjects.nmfrd.
-
Click . Search and select the Reverse Lookup object from eDirectory.
-
From the tab, select the valued attribute named dnip:zonedomainname and change the value to new name of the Reverse Lookup object. Click .
-
-
Restart the DNS server.
-
Change the following:
-
Update the /etc/resolve.conf file if the server was acting as the DNS server for the domain.
NOTE:If you are performing the IP address change on the Forest Root Domain that is hosting the DNS server, make sure you update the /etc/resolve.conf file for all the servers referencing this domain controller.
-
B.6.4 iFolder
See Managing Server IP Change
in the Novell iFolder 3.8.4 Administration Guide.
B.6.5 iPrint
-
Using your favorite text editor, open the following configuration file:
/etc/opt/novell/iprint/conf/DN_of_PSMipsmd.conf.
where DN_of_PSM is the name of the Print Manager in eDirectory.
-
Change any entries that list the old IP address to the new IP address.
-
Restart the Print Manager by entering the following command at a terminal prompt:
rcnovell-ipsmd restart
IMPORTANT:Users that have accessed printers through the modified Print Manager will lose access to their printers.
If you have set up iPrint Client Management on the server, you can automate the reconfiguration process. If not, users must reinstall the printers.
For more information on iPrint Client Management, see
Using iPrint Client Management
in the OES 2 SP3: iPrint for Linux Administration Guide.
B.6.6 NetStorage
-
At a terminal prompt, enter the following commands:
- /opt/novell/xtier/bin/xsrvcfg -D
- /opt/novell/xtier/bin/xsrvcfg -d newip -c AuthenticationContext
- where newip is the new IP address used throughout this section and AuthenticationContext is the eDirectory context for NetStorage users. NetStorage searches the eDirectory tree down from this container. If you want NetStorage to search the entire eDirectory tree, specify the root context.
- rcnovell-xregd restart
- rcnovell-xsrvd restart
- rcapache2 restart