9.2 Creating a DST Shadow Volume with NSS Volumes
A DST shadow volume links two existing NSS volumes. Typically, one of the volumes contains data and one is newly created. For information about how to create NSS volumes, see the OES 2 SP3: NSS File System Administration Guide for Linux.
This section describes how to create unshared DST shadow volumes. For information about using shared NSS volumes to create a shared DST shadow volume in a cluster environment, see Section 13.0, Configuring DST Shadow Volume Pairs with Novell Cluster Services.
IMPORTANT:The following procedures use VOL1 for the primary storage area, and ARCVOL as the secondary storage area. Ensure that you substitute the actual names of the NSS volumes you are using in each of the steps.
9.2.1 Preparing the NSS Volumes for Use in the Shadow Volume
-
Open Novell Remote Manager for Linux in a Web browser, then log in to the DST server as the root user.
-
Select to view a list of mounted volumes.
-
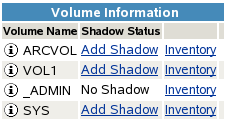
On the Dynamic Storage Technology page, ensure that the NSS volume that you want to use as the primary volume appears in the list with a status of . If it is not listed, the NSS volume might be unmounted, or its NCP/NSS bindings might be disabled.
-
Select to view a list of active volumes.
-
If the NSS volume is in the list but it is not mounted, the volume’s name is not hyperlinked and a button is located next to it.

To mount the volume, click the button next to the volume name. Continue with Step 4.
-
If the NSS volume does not appear in the list of active volumes, click to view the list. If the NSS volume is in the list, check the NCP/NSS Bindings parameter to see if it is disabled.
If the value is set to No, the volume’s NCP/NSS binding is disabled. The most likely reason is that the volume is already being used as the secondary volume in another shadow volume. In that case, you must choose another volume to use as a primary volume.
If you are certain that the volume is not being used in another shadow volume, you can enable the NCP/NSS Bindings setting:
-
Select in the column for the NSS volume, then click to save and apply the change.
-
If the volume is not automatically mounted, select to view the list, then click the button next to the volume name to mount it.
-
-
If the volume does not appear in the list of active volumes, and it does not appear on the NCP/NSS Bindings page in the list, the volume probably is not mounted in NSS.
Exit Novell Remote Manager, then use NSSMU or the storage plug-in for Novell iManager to mount the volume in NSS. These tools automatically mount the volume for NSS and for NCP. When the volumes are mounted, return to Step 1 and begin again.
-
-
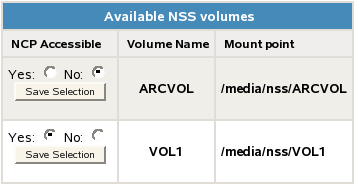
On the Dynamic Storage Technology page, ensure that the NSS volume that you want to use as the secondary volume appears in the list with a status of .
The secondary volume must be mounted in NCP in order to perform the next step.
For example, the volume ARCVOL is the NSS volume that is planned to be used for the secondary volume. The volume is in the list with a value of .
-
(Optional) If the secondary volume contains data and the primary volume is a newly created volume, copy the trustee database file on the secondary volume to the primary volume before you create the shadow volume relationship.
Any existing file system trustee and rights settings on a secondary volume that contains data are not automatically re-used by DST for the shadow volume. Copying the existing trustee database allows you to leverage the current settings. Otherwise, you must reconfigure file system access rights from the merged view after you create the shadow volume.
For information, see Section 9.5, Copying a Trustee Database to the Primary NSS Volume.
-
Continue with Section 9.2.2, Disabling the NCP/NSS Bindings for the Secondary Volume.
9.2.2 Disabling the NCP/NSS Bindings for the Secondary Volume
-
Open Novell Remote Manager for Linux in a Web browser, then log in to the DST server as the root user.
-
Select to view a list of mounted volumes.
-
Select , click .
-
In the list, select in the column for the NSS volume that you want to use as the secondary volume.
-
Click to save and apply the change.
-
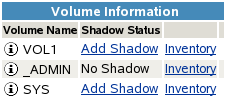
Go to the Dynamic Storage Technology page, and verify that the secondary volume (for example, ARCVOL) is no longer listed.
-
Continue with Section 9.2.3, Adding a Shadow to the Primary NSS Volume
9.2.3 Adding a Shadow to the Primary NSS Volume
-
Open Novell Remote Manager for Linux in a Web browser, then log in to the DST server as the root user.
-
Use one of the following methods to go to the volume’s Share Information page of the NSS volume that you want to use as the primary storage area.
-
Select to go to the Dynamic Storage Options page, then click the link next to the volume name of the NSS volume.
For example, click the link for VOL1.
-
Select to open the Manage Shares page, then click the (i) icon next to the volume name of the NSS volume.

-
-
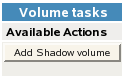
On the volume’s Share Information page, scroll down to the area, then click .
-
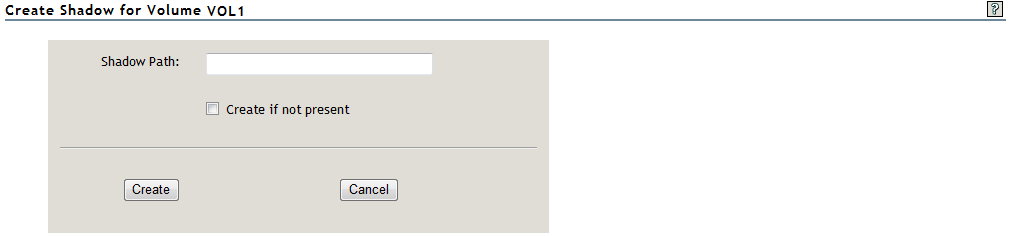
Specify the following information for the secondary storage area for the DST shadow volume, then click to define the shadow volume.
-
Shadow Path: Type the Linux path for the NSS volume that you want to use as the secondary storage area. The default Linux path where NSS volumes are mounted is /media/nss/volumename.
For example, to specify the NSS volume named ARCVOL as the secondary storage area, type /media/nss/ARCVOL in the field.
-
Create If Not Present: For NSS volumes, the volume must already exist. Make sure this option is deselected (not checked) when shadowing NSS volumes.
IMPORTANT:This option is a placeholder for future capabilities to support shadow volumes for NCP volumes on Linux POSIX file systems (such as Ext3, Reiser, and XFS).
-
-
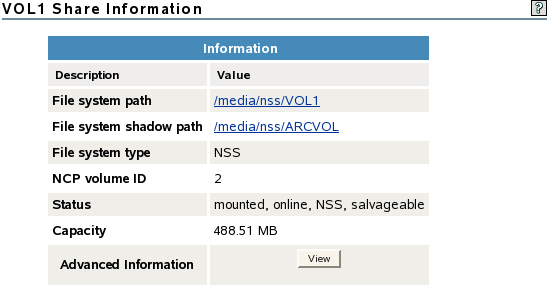
On the volume’s Share Information page, ensure that the information shows the shadow path you specified in Step 4.
-
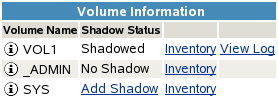
Select to go to the Dynamic Storage Options page, then verify that the for the volume is set to and the link is available.
-
Continue with Section 9.2.4, Moving Data between the Two Volumes.
9.2.4 Moving Data between the Two Volumes
-
In Novell Remote Manager, select to go to the Dynamic Storage Options page, then create one or multiple shadow volume policies for the shadow volume.
Shadow volume policies can be configured to move files according to the time since the file was last modified, accessed, or changed; by file names; by file types; or by file size. You can schedule policies to run automatically, or you can run them on demand.
For information about creating and scheduling shadow volume policies, see Section 10.0, Creating and Managing Policies for Shadow Volumes.
-
(Optional) Move selected data on demand by running customized inventory reports, then using the inventory detail reports to move selected files to either volume according to the time since the file was last modified, accessed, or changed; by file names; by file types; or by file size.
For information, see Section 11.4, Using Inventory Detail Reports to Move, Copy, or Delete Files on the Shadow Volume.