11.6 Removing a Clustered DST Shadow Volume
Removing a clustered DST shadow volume removes the relationship between the primary and secondary storage area and decouples the load and unload scripts for the clustered pools that contain the two volumes. It does not remove the underlying volumes themselves. The files remain on whichever storage area they are on at the time when you remove the shadow relationship.
11.6.1 Preparing to Remove a Shadow Volume
Before you remove a shadow volume relationship, make sure that you shift data between the two volumes that make up the shadow volume, according to where you want the data to reside after the DST shadow volume relationship is removed. In order for the data to be shifted to the primary storage area or to the secondary storage area, it is up to you to make that happen.
-
In Novell Remote Manager for Linux, log in as the root user.
-
Select , locate the volume in the list, then click the link next to it.
View the volume inventory for the shadow volume to determine the space in use and the available space for both the primary and the secondary areas of the shadow volume. Make sure there is sufficient fee space available in either location for the data that you plan to move to that location.
-
Use any combination of the following techniques to shift data between the two areas:
-
Shadow Volume Policies: Run an existing shadow volume policy by using the option in the area of the policy. You can also create a new shadow volume policy that moves specific data, and run the policy by using the and options in the area of the policy.
For information about configuring policies to move data between the primary and secondary areas, see Section 9.0, Managing Policies for Shadow Volumes.
-
Inventories: Use the detailed inventory reports or customized inventories to move specific files to either area.
For information about using the volume customized inventory options to move data between the primary and secondary areas, see Section 10.5, Generating a Custom Inventory Report.
-
11.6.2 Removing the Shadow Volume Relationship
-
If the cluster pool resource for the shadow volume is not running on the master node, cluster migrate it to the master node.
For information, see
Cluster Migrating Resources to Different Nodes
in the OES 2 SP2: Novell Cluster Services 1.8.7 for Linux Administration Guide. -
Offline the cluster pool resource that is managing the shadow volume.
This unloads the cluster resource and deactivates the cluster pools and their volumes so that the cluster is not controlling them.
For information, see
Onlining and Offlining (Loading and Unloading) Cluster Resources from a Cluster Node
in the OES 2 SP2: Novell Cluster Services 1.8.7 for Linux Administration Guide. -
In NSSMU or iManager, activate the shared pools and mount the two volumes.
-
In Novell Remote Manager for Linux, log in as the root user.
-
Select to go to the NCP Shares page.
-
Make sure that you know which NSS volume is being used as the secondary volume so that you can manage it independently later.
-
On the NCP Shares page, locate the primary NSS volume in the list, then click the icon next to the share name.
-
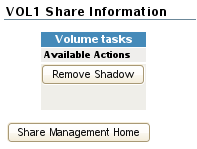
On the primary volume’s Share Information page, view the volume information in the .
In the following example, ARCVOL is an NSS volume that is the secondary storage area in the shadow volume.

-
-
On the NCP Shares page, locate the primary NSS volume in the list, then click the button next to the share name.

-
On the Manage Shares page, click the (i) icon next to the volume name of the NSS volume to access the .

-
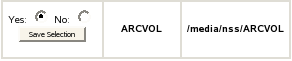
On the volume’s Share Information page, select .
When you enable , the data that currently resides on each volume remains where it is, so that the data on the secondary storage area is not shifted back to the primary volume.
The option is deselected by default. When this option is disabled and you click , all of the data that currently resides on the secondary volume is moved back to the primary storage location before the secondary volume is again available as an individual volume. It takes time to move the data back to the primary, depending on how much data there is to move.
IMPORTANT:In the OES 2 SP1 release for DST, if you disable the , the shadow volume is not removed. DST does not remove the shadow relationship until you enable the option to keep data where it is.
-
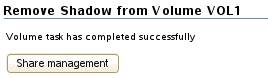
Click .
After the shadow volume is removed, the page refreshes to report a successful removal.
-
Select to go to the NCP Shares page, locate the volume that was the primary volume in the list, then click the button next to it.
-
Verify that the shadow volume was removed by using one of the following methods:
-
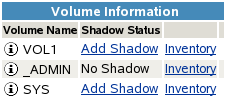
Select to go to the Dynamic Storage Options page. The former primary volume now has an link next to it instead of a link.
-
Select , then click the icon next to the former primary volume’s name. The field displays n/a (not applicable).

-
-
Mount the volume that was used as the secondary volume (for example, ARCVOL) as an independent volume.
-
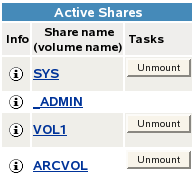
In the area of the NCP Shares page, click .
-
In the list, locate the former secondary volume (such as ARCVOL), click , then click .
The volume is mounted automatically, and now appears again in the list on the NCP Shares page.
-
-
In NSSMU, deactivate the cluster pool resources for both the primary and secondary volumes.
This automatically unmounts the shared volumes. This allows the cluster resources to be managed by their respective cluster resources after you modify the load and unload scripts in the next steps.
-
Modify the load script of the cluster pool resource that was managing the clustered shadow volume pair.
-
In iManager, select , then select .
-
Click the browser, then locate and select the cluster server node to view a list of cluster resources.
-
On the Cluster Manager page, click the name link of the primary cluster resource to view its Cluster Pool Properties page, then click the tab.
-
On the > page, comment out the activation command for the secondary pool, the sleep command you added for the pool activation, and the mount command for the shadow volume:
#exit_on_error nss /poolact=ARCPOOL1
#sleep 10
#exit on error ncpcon mount VOL1=254,shadowvolume=ARCVOL1
-
On the > page, uncomment the mount command for the primary pool’s volume that you commented out when you set up the clustered shadow volume. For example:
exit_on_error ncpcon mount VOL1=254
-
Click to save your changes.
The changes do not take effect until the cluster resource is onlined.
-
-
Modify the unload script of the cluster pool resource that was managing the clustered shadow volume pair.
-
On the > page, click the link.
-
On the > page, comment out or remove the deactivation command for the secondary pool:
#ignore_error nss /pooldeact=ARCPOOL1
-
Click to save your changes.
The changes do not take effect until the cluster resource is onlined.
-
-
Online the cluster pool resources for the two pools.
-
Select , then select to view the list of cluster resources.
-
Select the check boxes next to the two cluster pool resources, then click .
IMPORTANT:If you deleted the pool cluster resource for the secondary volume when you merged information from the two scripts into one, you must first cluster enable the shared pool again to create a new cluster pool resource for it, then online it.
-
Select the cluster node where you want the resources to load (such as server38), then click .
-
-
Verify that the cluster resources are running by going to the > page.
-
Verify that the two volumes (VOL1 and ARCVOL1) are mounted independently in NCP.
-
On the first node in the cluster, log in to Novell Remote Manager for Linux as the root user.
-
Select , then verify that the secondary pool ARCPOOL1 and the NSS volume ARCVOL1 are listed under .
-
Select > , then verify that both of the volumes are listed under , and that they no longer shadowed (the link is next to each one).
-
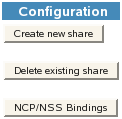
Select > , click NCP/NSS bindings, then verify that the NCP Accessible parameter is enabled for both of the volumes.
-