4.1 Adding VMDK Disk Across ESXi Guest Machines
-
Launch the vSphere Web Client.
-
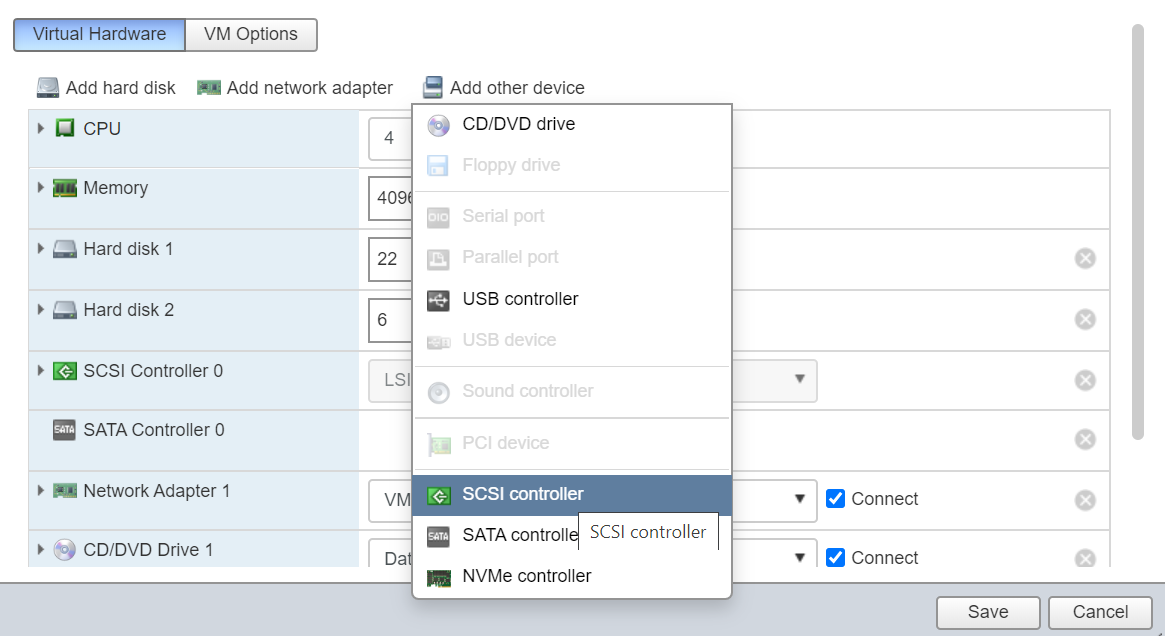
Right click the virtual machine (Node 1), and select .
-
Click > .
-
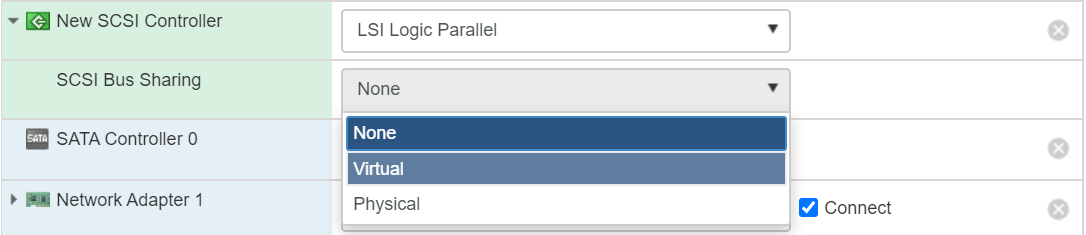
Expand and in , select or depending on your requirement.
-
Virtual: Select this option, if you want to share a virtual disk between VMs on the same ESXi host.
-
Physical: Select this option, if you want to share a virtual disk between VMs on different ESXi hosts.
-
-
-
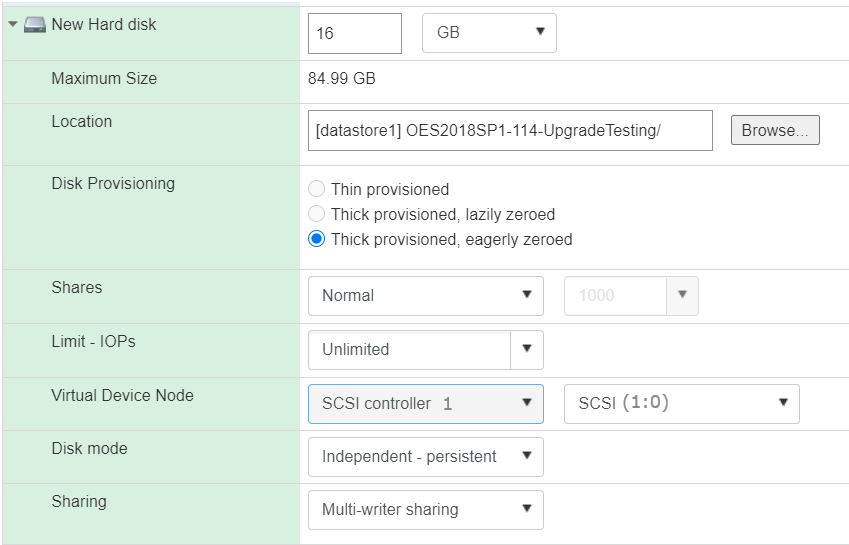
Click > with the following settings:
-
Location: Select a shared datastore, that will store the disk images of the VMs.
-
Disk Provisioning: Select . Other options are not recommended.
-
Virtual Device Node: Select existing SCSI controller that you created in Step 3 (or the default node value offered as appropriate if you have added multiple disks.)
-
Disk Mode: Select .
-
Sharing: Select .
-
-
Perform the following on all the nodes.