3.3 Installing iPrint Advanced Server During OES Installation
-
From the boot menu, select and press enter, then continue with the installation as desired until you get to the Installation Settings page.
For detailed instructions, see Installing OES 2018 SP2 as a New Installation in the OES 2018 SP2: Installation Guide.
-
On the page, click to open the Software Selection page.
-
Under , select , the and continue with the installation process.
The following additional services are automatically selected:
-
OES iPrint
-
NetIQ eDirectory
-
OES Linux User Management (LUM)
-
OES Remote Manager (NRM)
-
OES Backup / Storage Management Services (SMS)
-
-
Restart Mobile service (iPrint Tomcat service):
systemctl restart novell-iprint-tomcat.service
-
Configure iPrint, for more information, see Setting Up iPrint in the OES 2018 SP2: iPrint Administration Guide.
-
To configure mobility in a cluster environment, continue with Clustering on a NSS File System.
or
In a non-cluster environment, continue with the next step.
-
(Conditional) In a DSfW environment, do the following:
-
Modify the LDAP port parameters in the /etc/opt/novell/iprintmobile/conf/iprintmobile.conf as follows:
#LDAP Port
ldap_port = 1389

#LDAP Secure Port
ldap_secure_port = 1636
-
Restart mobile server:
systemctl restart novell-iprint-tomcat.service
-
-
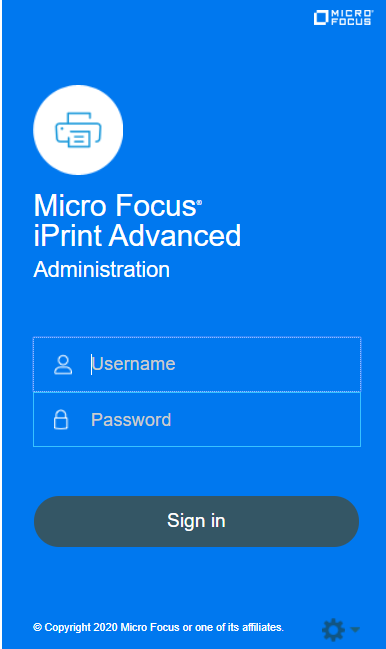
Launch in a web browser. You must login to the console the first time to complete the configuration of iPrint Advanced. No additional tasks needs to be performed in the console.
NOTE:Ensure that the Driver Store and Print Manager are running.
Specify https://<IP Address or host name of iPrint Advanced server>/ipcon/
-
Specify the name and password of the OES administrator who has rights to manage the print manager.
-
If the user is unique in the tree, then use CN to login. For example, admin.
-
If there are multiple users with the same name in different containers, then specify FQDN in LDAP format. For example, cn=admin,o=microfocus.
-
Using iPrint Console, you can manage email and mobile features of the printers.
For more information, see Section 6.0, Managing iPrint Advanced. Each of the page in iPrint Console includes an help icon
 . The help includes information for enabling the features.
 -
3.3.1 Installing iPrint Advanced After OES and Micro Focus iPrint Installation
Ensure to meet the following specific requirements along with prerequisites for OES 2018 SP2 and iPrint Advanced:
-
iPrint Advanced runs on OES 2018 SP2 servers. For information about installing and configuring OES 2018 SP2, see OES 2018 SP2: Installation Guide.
-
Micro Focus iPrint must be installed and configured on OES 2018 SP2 server. For information about installing and setting up iPrint, see the OES 2018 SP2: iPrint Administration Guide.
On installing OES 2018 SP2 and Micro Focus iPrint, continue with the following steps:
-
To launch YaST, run the command yast2.
-
Click .
-
Select the pattern , then click .
-
Continue with on-screen prompts.
-
iPrint Advanced is successfully installed.
-
(Conditional) In a DSfW environment, do the following:
-
Modify the LDAP port parameters in the /etc/opt/novell/iprintmobile/conf/iprintmobile.conf as follows:
#LDAP Port
ldap_port = 1389

#LDAP Secure Port
ldap_secure_port = 1636
-
Restart mobile server:
systemctl restart novell-iprint-tomcat.service
-
-
(Conditional) To configure mobility in a cluster environment, continue with the Clustering on a NSS File System.
or
In a non-cluster, continue with the next step.
-
Launch iPrint Console in a web browser. You must login to the console the first time to complete the configuration of iPrint Advanced. No additional tasks needs to be performed in the console. Using iPrint Console, you can manage email and mobile features of the printers.
NOTE:Ensure that the Driver Store and Print Manager are running.
Specify https://<IP Address or host name of iPrint Advanced server>/ipcon/
-
Specify the name and password of the OES administrator who has rights to manage the print manager.
-
If the user is unique in the tree, then use CN to login. For example, admin.
-
If there are multiple users with the same name in different containers, then specify FQDN in LDAP format. For example, cn=admin,o=microfocus.
-
For more information, see Section 6.0, Managing iPrint Advanced. Each of the page in iPrint Console includes an help icon
. The help includes information for enabling the features. -