2.4 System
System settings include the following:
2.4.1 Configuring Date and Time
To change your date and time configuration, for example to change your time zone or the way the date and time are displayed, click . This opens the YaST Date and Time module, which requires root privileges. Enter the root password and follow the instructions on the YaST pages.
2.4.2 Configuring Streaming Audio and Video
The GStreamer Properties application lets you set which audio and video plug-ins you want to use for streaming multimedia. To open this application, click .
In most cases, you should use the default selections. However, if you want to select other plug-ins, select the plug-in you want from the menus. The tab lists the plug-ins for audio input and output. The tab lists the video plug-ins.
Click when you are finished. The system is immediately configured to use the selected plug-ins.
2.4.3 Configuring Language Settings
openSUSE can be configured to use any of many languages. The language setting determines the language of dialogs and menus, and can also determine the keyboard and clock layout.
You can set the following language settings:
-
Primary language
-
Whether the keyboard language setting should depend on the primary language
-
Whether the time zone should depend on the primary language
-
Secondary languages
NOTE:You must have administrator (root) privileges to configure language settings.
To configure your language settings:
-
Click .
-
(Conditional) If you are not logged in as root or a user with administrator privileges, enter the root password.
If you do not know the root password, contact your system administrator. You cannot continue without the root password.
-
Specify the primary language, whether you want to adapt the keyboard layout or time zone to the primary language, and any secondary languages you need to support on the computer.
-
Click .
The language configuration settings are written to several configuration files. This process can take a few minutes. The new settings take effect immediately after they are written to the configuration files.
2.4.4 Configuring Network Proxies
The Network Proxy Configuration tool lets you configure how your system connects to the Internet. You can configure the desktop to connect to a proxy server and specify the details of the server. A proxy server is a server that intercepts requests to another server and fulfills the request itself, if it can. You can specify the Domain Name Service (DNS) name or the Internet Protocol (IP) address of the proxy server. A DNS name is a unique alphabetic identifier for a computer on a network. An IP address is a unique numeric identifier for a computer on a network.
Click .
Figure 2-36 Network Proxy Configuration Dialog
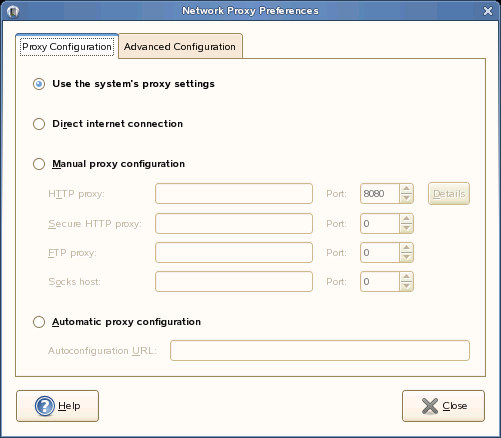
The following table lists the Internet connection options that you can modify.
Table 2-14 Internet Connection Options
2.4.5 Configuring Power Management
The Power Management module lets you manage your system’s power-saving options. It is especially useful for extending the life of a laptop’s battery charge. However, several options also help to save electricity when you are using a computer that is plugged in to an electricity source.
Click .
Specifying Sleep Mode Times
Sleep mode shuts down the computer when it is unused for a specified amount of time. Whether you are using battery or AC power, you can specify the amount of time that the computer remains unused before it is put to sleep.You can also put the computer’s display to sleep without shutting down the computer, saving the power required by the display.
Sleep mode is especially important when the computer is operating under battery power. Both the screen and the computer draw power from the battery, so you can save a significant amount of battery power by shutting down one or both. It is common to put the display to sleep after a shorter period of time. Then, if the computer remains unused for an additional amount of time, it is also put to sleep.
To specify your computer’s sleep settings:
-
Click .
-
Click the tab for the type of power you are using.
If your computer uses AC power, click .
If your computer runs on battery power, click .
If your computer operates on both AC and battery power, you can configure the settings on both tabs. The settings you choose are in effect no matter which power source you use.
-
Use the sliders to set the amount of inactive time that passes before the display and computer go into sleep mode.
When the display is in sleep mode, the computer continues to run. When the computer is in sleep mode, power to the display and hard disk is shut off and the computer uses only the power needed to maintain the contents of RAM.
-
Click .
The options you selected go into effect immediately.
Setting General Power Options
To set general power options, click , then click the tab. On this tab, you can choose:
-
The sleep type to use when the computer is inactive
-
How and when the icon displays
2.4.6 Setting Preferred Applications
The Preferred Applications module allows you to specify which applications to use for various common tasks:
To change any of these settings:
-
Click .
-
Click the tab for the type of application you want to set.
-
Select one of the available applications from the menu or enter the command used to start the application.
-
Click .
The changes take effect immediately.
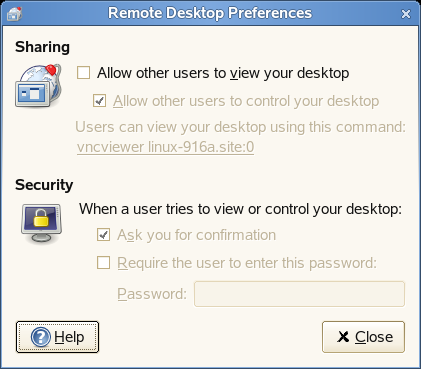
2.4.7 Setting Session Sharing Preferences
The Remote Desktop Preference dialog box lets you share a GNOME desktop session between multiple users and set session-sharing preferences. These preferences can have a direct impact on the security of your system.
-
Click .
-
Choose from the following options:
-
Click .
2.4.8 Configuring Beagle Search Settings
Beagle is the search engine used on the GNOME desktop. By default, Beagle is configured to start automatically and index your home directory. If you want to change these settings, specify the number of results displayed after a search or change the Beagle privacy settings, click .
For more information, see Setting Search Preferences and Preventing Files and Directories from Being Indexed.
2.4.9 Managing Sessions
This module lets you manage your sessions. A session occurs between the time that you log in to the desktop environment and the time that you log out. You can set session preferences and specify which applications to start when you begin a session. You can configure sessions to save the state of applications and then restore the state when you start another session.
You can also use this preference tool to manage multiple sessions. For example, you might have a mobile session which starts applications you use most frequently when traveling, a demo session that starts applications used to present a demonstration or slide show to a customer, and a work session that uses a different set of applications when you are working in the office.
Click .
This module consists of three tabbed pages:
-
Startup Programs: Lets you specify non-session-managed startup applications, which start automatically when you start a session.
-
Current Session: Lets you specify startup order values and select restart styles for the session-managed applications in your current session.
-
Session Options: Lets you remember running applications when logging out so they open the next time you log in.
Configuring Startup Applications
Use the Startup Programs tabbed page to specify non-session-managed startup applications.
Figure 2-37 Sessions Dialog—Startup Programs Page
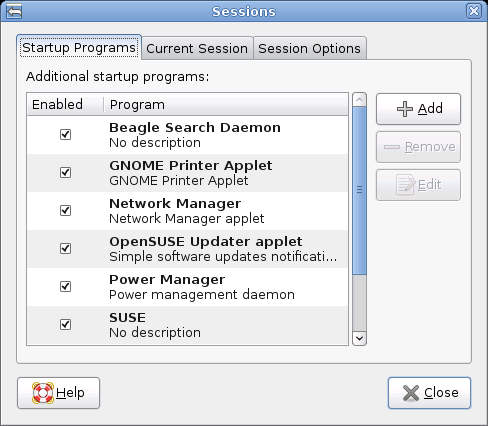
Startup applications are applications that start automatically when you begin a session. You specify the commands that run these applications and the commands execute automatically when you log in.
You can also start session-managed applications automatically. For more information, see Remembering Running Applications when Logging Out.
To add a startup application, click . The Add Startup Program dialog is displayed. Specify the command to start the application in the field. If you specify more than one startup application, use the box to specify the startup order of the each application.
To edit a startup application, select the startup application and then click . The Edit Startup Program dialog is displayed. Modify the command and the startup order for the startup application.
To delete a startup application, select the startup application and then click .
Deselect the checkbox in the column to disable the application but leave it in the list. Disabled applications do not start at startup but can easily be enabled to do so.
Setting Session Properties
Use the Current Session tabbed page to specify startup order values and to choose restart styles for the session-managed applications in your current session.
Figure 2-38 Sessions Dialog—Current Session Page
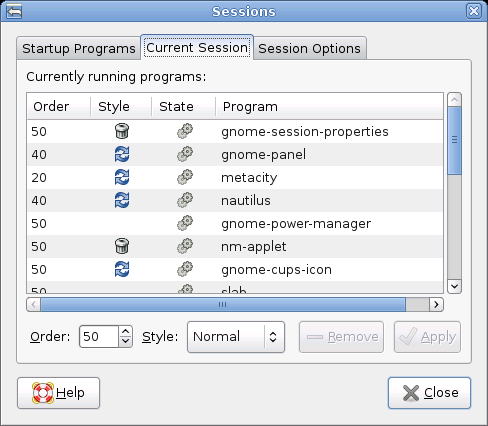
The following table lists the session properties that you can configure.
Table 2-15 Session Properties for Session-Managed Applications
Remembering Running Applications when Logging Out
Use the Session Options tab to automatically save the current state of your session. The session manager saves the session-managed applications that are open and the settings associated with the session-managed applications. The next time you start a session, the applications start automatically with the saved settings.
2.4.10 Setting Sound Preferences
The Sound Preferences tool lets you control when the sound server starts. You can also specify which sounds to play when particular events occur.
Click to open the Sound Preferences tool.
Setting Sound Devices
Use the tab to configure the application to use for various types of sounds.
Figure 2-39 Sound Preferences Dialog—Devices Page
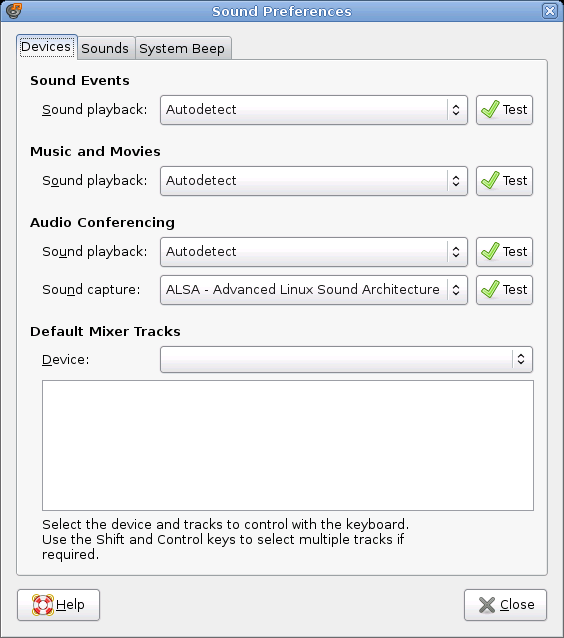
Click the drop-down list for each type of sound and select the application to use. In most cases, is the best choice, unless you want to use a specific application.
Setting General Sound Preferences
Use the tab to specify when to launch the sound server. You can also enable sound event functions.
Figure 2-40 Sound Preferences Dialog—General Page
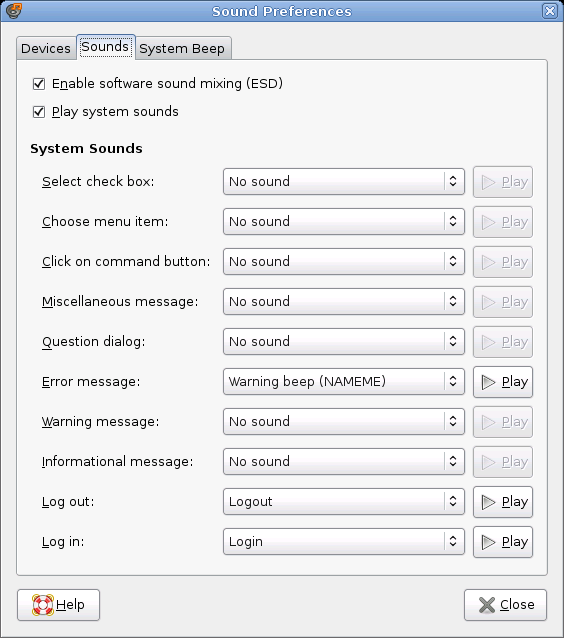
Click to start the sound server when you start a session. When the sound server is active, the desktop can play sounds.
Click to play sounds when particular events occur in the desktop.
Finally, select the sound to play at each of the specified events.
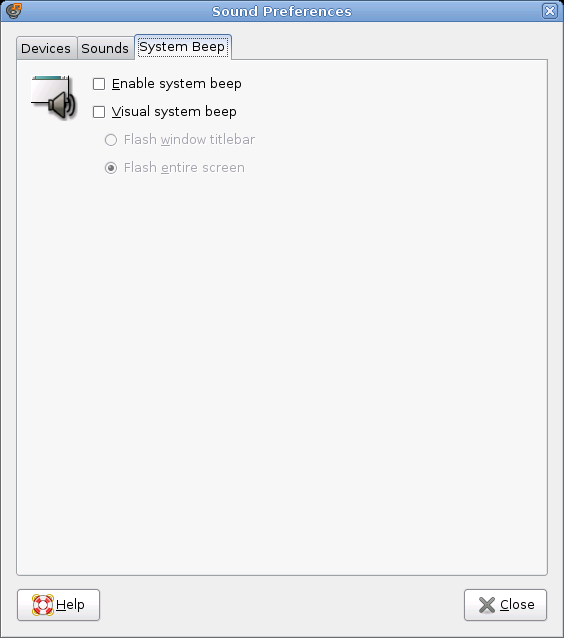
Setting System Beep Preferences
Some applications play a beep sound to indicate a keyboard input error. Use the tab to set preferences for the system beep.
Figure 2-41 Sound Preferences Dialog—System Beep Page
2.4.11 Managing Users and Groups
Use the tool to manage users and groups, including user and group names, group membership, password and password encryption, and other options.
Click . The tool opens the User and Group Administration module in YaST.
NOTE:Root privileges are required to manage users and groups.
Follow the directions in YaST for information on changing settings.
2.4.12 Configuring Administrative Settings with YaST
Use the YaST Control Center to change the installation and configuration of your whole system. Administrator (or root) permission is required to open YaST.
To open YaST, click , then enter the root password. If you do not know the root password, ask your system administrator.

YaST contains various modules you can use to adjust your system settings. These modules are divided into the following categories:
Hardware: Contains modules for configuring hardware components such as your monitor, keyboard, mouse, printer, and scanner.
Miscellaneous: The YaST Control Center has several modules that cannot easily be classified into the first six module groups. The modules in this category can be used for things such as viewing log files and installing drivers from a vendor CD.
Network Devices: Includes modules for configuring network devices such as network cards, ISDN, DSL, or modem.
Network Services: Contains modules for network services and for configuring clients such as LDAP and NFS.
Novell AppArmor: Use the modules of this category to configure the Novell® AppArmor™ access control system. This option is available only if the pattern is installed.
Security and Users: Use these modules to configure security details such as firewall options, and to create and manage users and groups.
Software: Use the modules of this category to set options for installation and updates, and to install or remove software packages.
System: Use these modules to change system settings such as the date, time, or language, and to perform tasks such as backing up or restoring files.
For information about using YaST, see System Configuration with YaST in the SLED 10 SP1 Deployment Guide.