1.6 Accessing Network Resources
This section describes how to access network resources:
1.6.1 Connecting to Your Network
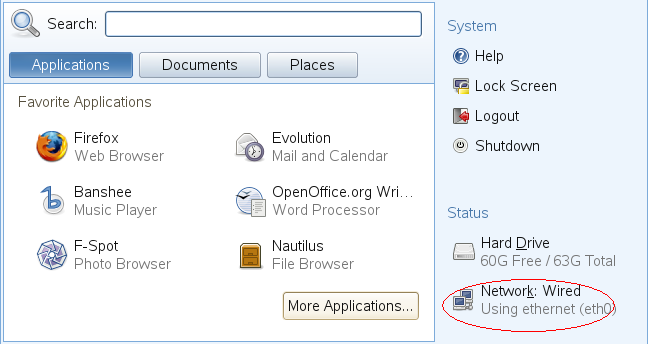
You can connect to a network with wired and wireless connections. To view your network connection status, click In the area of the main menu, The icon shows your network connection status. For example, in the following figure, the computer is connected to a wired network using an Ethernet connection.
Figure 1-7 Network Connections Icon in the Main Menu
Click the icon to open the YaST Network Settings module. You an use this module to configure your network setup method or edit your network card configuration.
1.6.2 Accessing Network Shares
Other network devices, like workstations and servers, can be set up to share some or all of their resources. Typically, files and folders are marked to let remote users access them. These are called network shares. If your system is configured to access network shares, you can use Nautilus File Manager to access them.
To access network shares, double-click your Home directory icon on the desktop, then click in the left pane. The view pane displays the network shares that you can access. Double-click the network resource that you want to access. You might be required to authenticate to the resource by providing a username and password.
Figure 1-8 Network File Browser
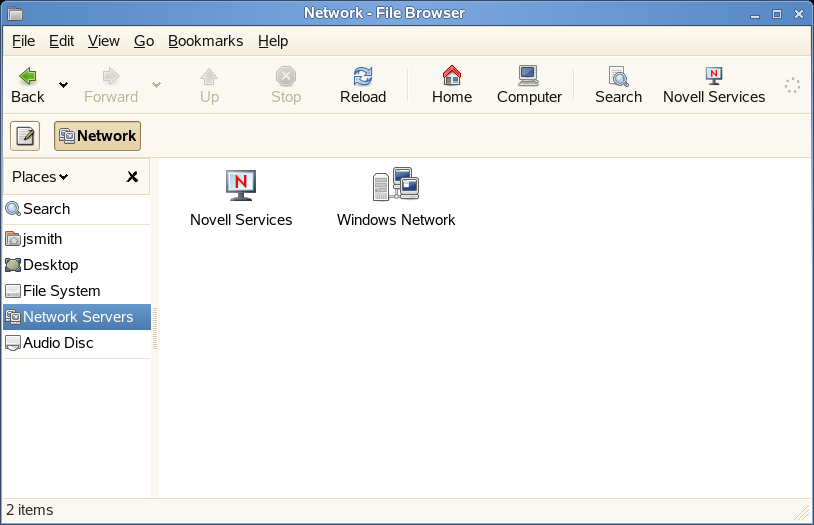
To access NFS shares, double-click the icon. A list of UNIX* shares available to you is displayed.
To access Windows shares, double-click the icon. The Windows shares available to you are displayed.
For more information, see Section 8.0, Accessing Network Resources.
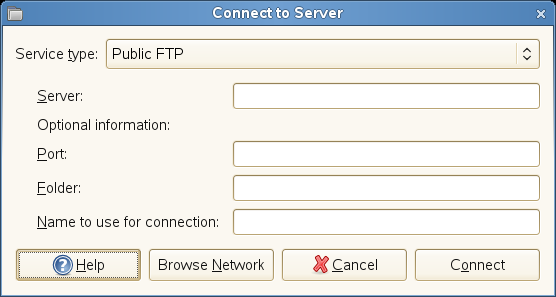
Adding a Network Place
-
Click .
-
Select a service type, then specify the required information for your type of service.
-
Specify the name you want displayed for this connection, then click .
An icon for the network place is added to the desktop.
1.6.3 Sharing Directories From Your Computer
You can make directories on your computer available to other users on your network.
Enabling Sharing
Use YaST to enable sharing on your computer. In order to enable sharing, you must have root privileges and be a member of a workgroup or domain.
-
Click .
-
In YaST, click .
-
In the Windows Domain Membership module, click .
-
Click .
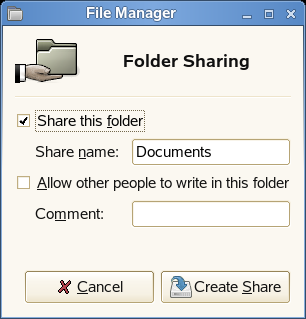
Sharing a Directory
If directory sharing is enabled on your computer, use the following steps to configure a directory to be shared.
-
Open the File Manager and browse to the directory you want to share.
-
Right-click the directory you want to share, then click .
-
Select the check box, then type the name you want to use for this share.
-
If you want other users to be able to copy files to your shared directory, select the check box.
-
(Optional) Type a comment, if desired.
-
Click .