23.1 Configuring a DHCP Server with YaST
In this version of openSUSE, the YaST DHCP module can be set up to store the server configuration locally (on the host that runs the DHCP server) or to have its configuration data managed by an LDAP server. If you want to use LDAP, setup your LDAP environment before configuring the DHCP server.
The YaST DHCP module allows you to set up your own DHCP server for the local network. The module can run in simple mode or expert mode.
23.1.1 Initial Configuration (Wizard)
When the module is started for the first time, a wizard starts, prompting you to make a few basic decision concerning server administration. Completing this initial setup produces a very basic server configuration that should function in essential aspects. The expert mode can be used to deal with more advanced configuration tasks.
- Card Selection
-
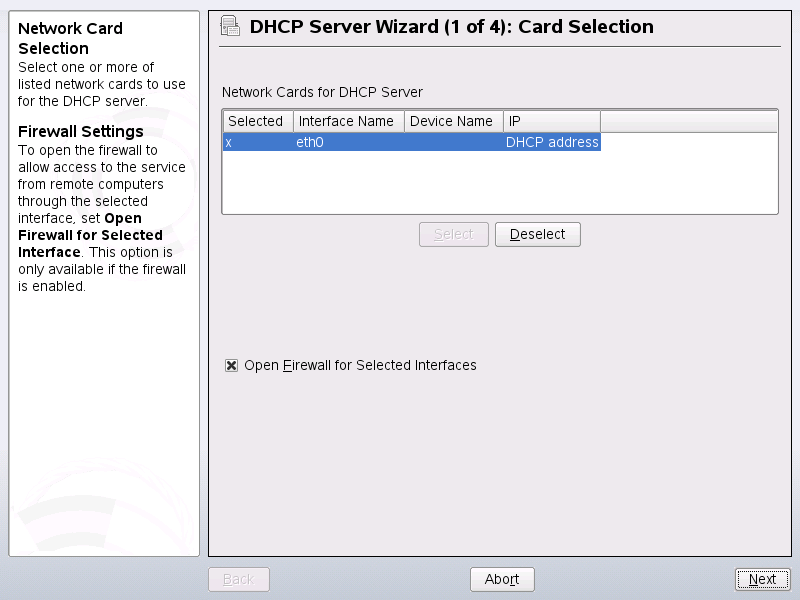
In the first step, YaST looks for the network interfaces available on your system then displays them in a list. From the list, select the interface on which the DHCP server should listen and click . After this, select to open the firewall for this interface. See Figure 23-1.
Figure 23-1 DHCP Server: Card Selection
- Global Settings
-
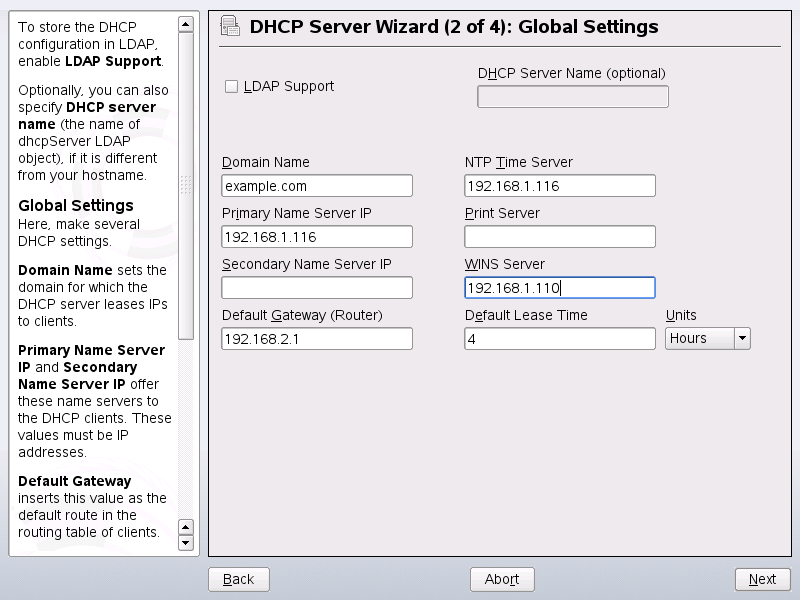
Use the check box to determine whether your DHCP settings should be automatically stored by an LDAP server. In the entry fields, provide the network specifics for all clients the DHCP server should manage. These specifics are the domain name, address of a time server, addresses of the primary and secondary name server, addresses of a print and a WINS server (for a mixed network with both Windows and Linux clients), gateway address, and lease time. See Figure 23-2.
Figure 23-2 DHCP Server: Global Settings
- Dynamic DHCP
-
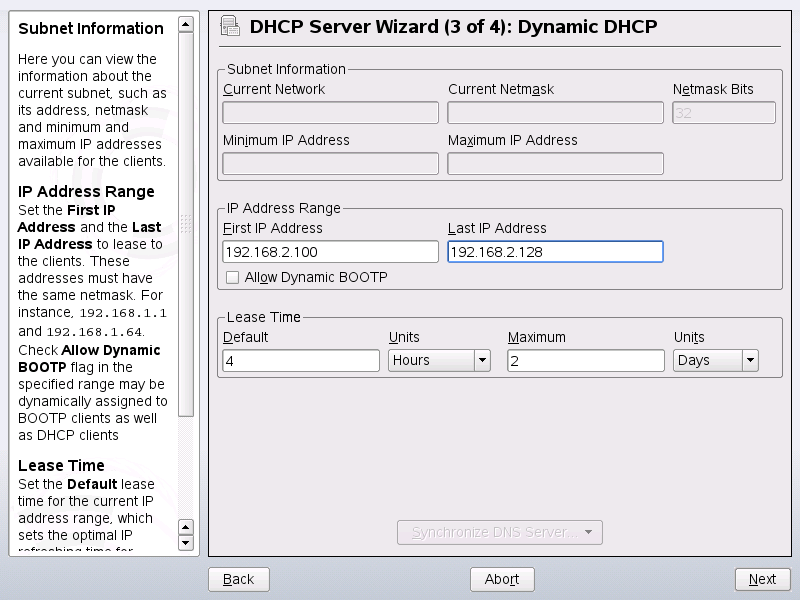
In this step, configure how dynamic IP addresses should be assigned to clients. To do so, specify an IP range from which the server can assign addresses to DHCP clients. All these addresses must be covered by the same netmask. Also specify the lease time during which a client may keep its IP address without needing to request an extension of the lease. Optionally, specify the maximum lease time—the period during which the server reserves an IP address for a particular client. See Figure 23-3.
Figure 23-3 DHCP Server: Dynamic DHCP
- Finishing the Configuration and Setting the Start Mode
-
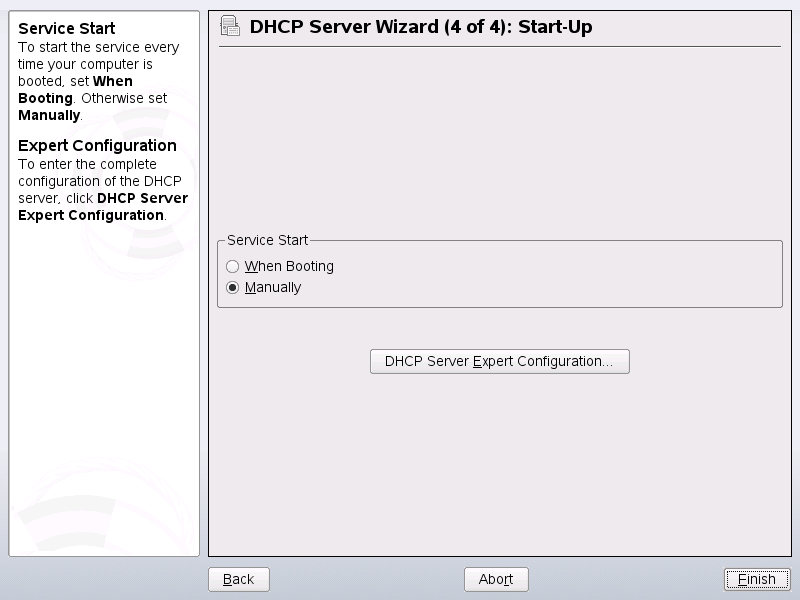
After the third part of the configuration wizard, a last dialog is shown in which you can define how the DHCP server should be started. Here, specify whether to start the DHCP server automatically when the system is booted or manually when needed (for example, for test purposes). Click to complete the configuration of the server. See Figure 23-4. Alternatively, you can select from the tree structure on the left to configure special host management features in addition to the basic configuration (see Figure 23-5).
Figure 23-4 DHCP Server: Start-Up
- Host Management
-
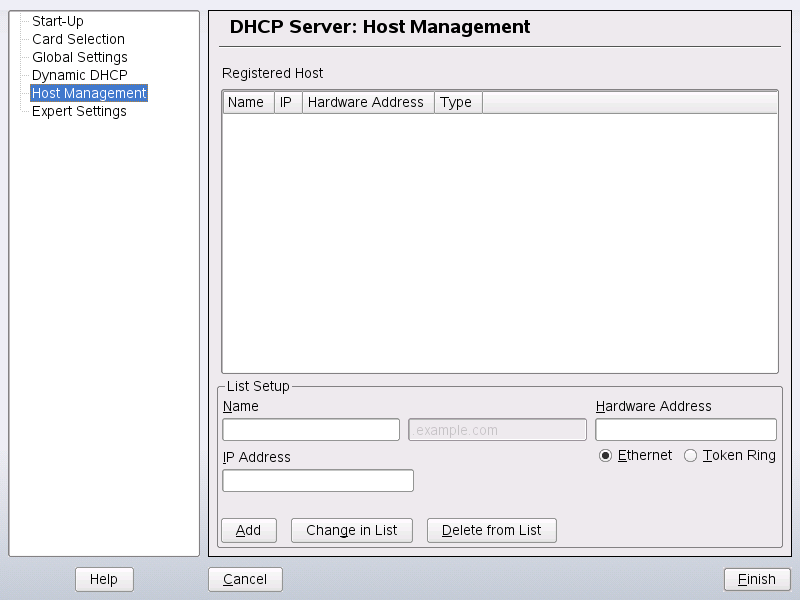
Instead of using dynamic DHCP in the way described in the preceding sections, you can also configure the server to assign addresses in quasi-static fashion. To do so, use the entry fields provided in the lower part to specify a list of the clients to manage in this way. Specifically, provide the and the to give to such a client, the , and the (token ring or ethernet). Modify the list of clients, which is shown in the upper part, with , , and . See Figure 23-5.
Figure 23-5 DHCP Server: Host Management
23.1.2 Expert Configuration
In addition to the configuration method discussed earlier, there is also an expert configuration mode that allows you to tweak the DHCP server setup in every detail. Start the expert configuration by selecting in the tree view in the left part of the dialog.
- Chroot Environment and Declarations
-
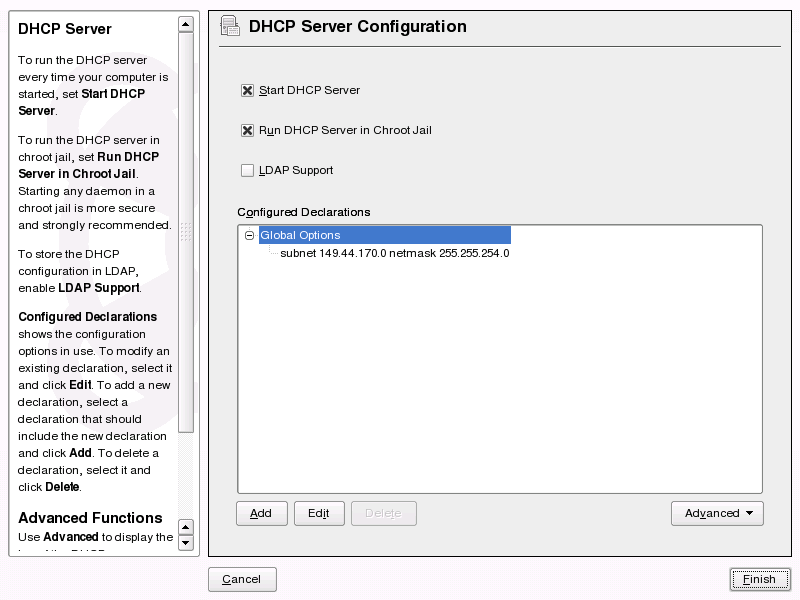
In this first dialog, make the existing configuration editable by selecting . An important feature of the behavior of the DHCP server is its ability to run in a chroot environment, or chroot jail, to secure the server host. If the DHCP server should ever be compromised by an outside attack, the attacker will still be behind bars in the chroot jail, which prevents him from touching the rest of the system. The lower part of the dialog displays a tree view with the declarations that have already been defined. Modify these with , , and . Selecting takes you to additional expert dialogs. See Figure 23-6. After selecting , define the type of declaration to add. With , view the log file of the server, configure TSIG key management, and adjust the configuration of the firewall according to the setup of the DHCP server.
Figure 23-6 DHCP Server: Chroot Jail and Declarations
- Selecting the Declaration Type
-
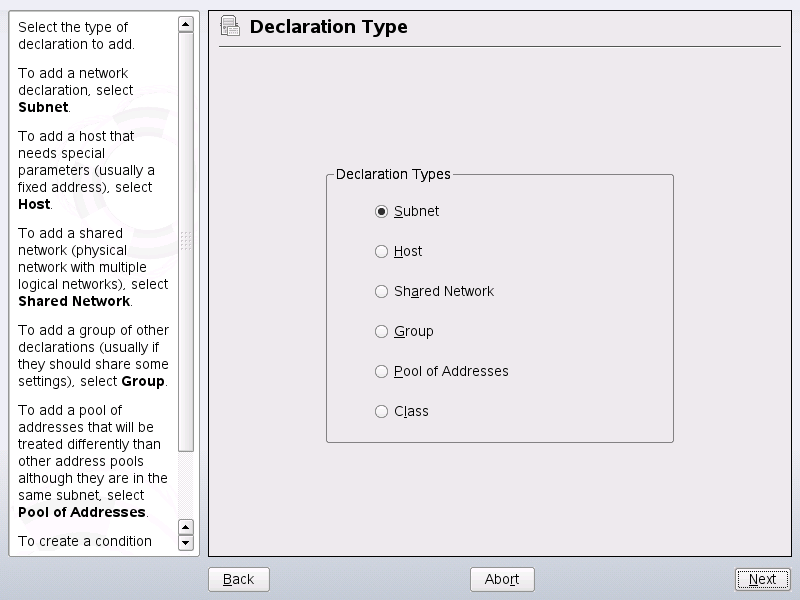
The of the DHCP server are made up of a number of declarations. This dialog lets you set the declaration types , , , , , and . This example shows the selection of a new subnetwork (see Figure 23-7).
Figure 23-7 DHCP Server: Selecting a Declaration Type
- Subnet Configuration
-
This dialog allows you specify a new subnet with its IP address and netmask. In the middle part of the dialog, modify the DHCP server start options for the selected subnet using , , and . To set up dynamic DNS for the subnet, select .
Figure 23-8 DHCP Server: Configuring Subnets

- TSIG Key Management
-
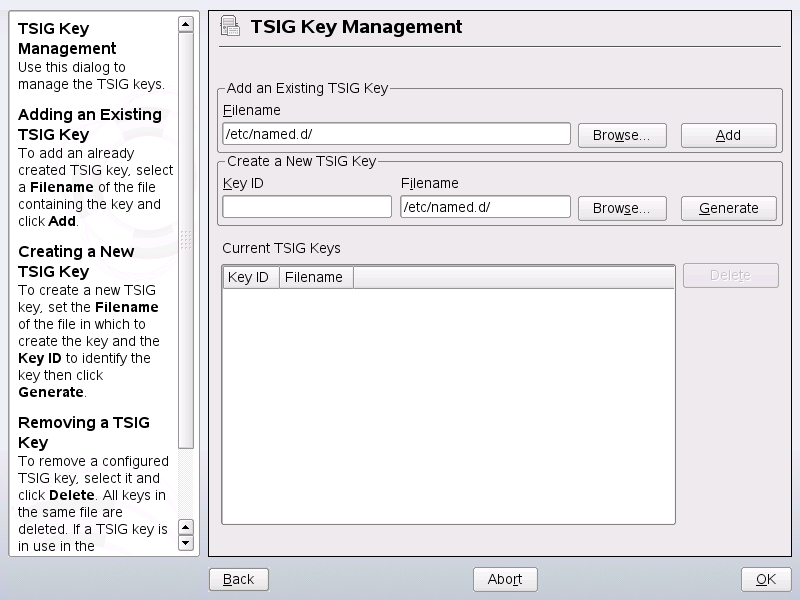
If you chose to configure dynamic DNS in the previous dialog, you can now configure the key management for a secure zone transfer. Selecting takes you to another dialog in which to configure the interface for dynamic DNS (see Figure 23-10).
Figure 23-9 DHCP Server: TSIG Configuration
- Dynamic DNS: Interface Configuration
-
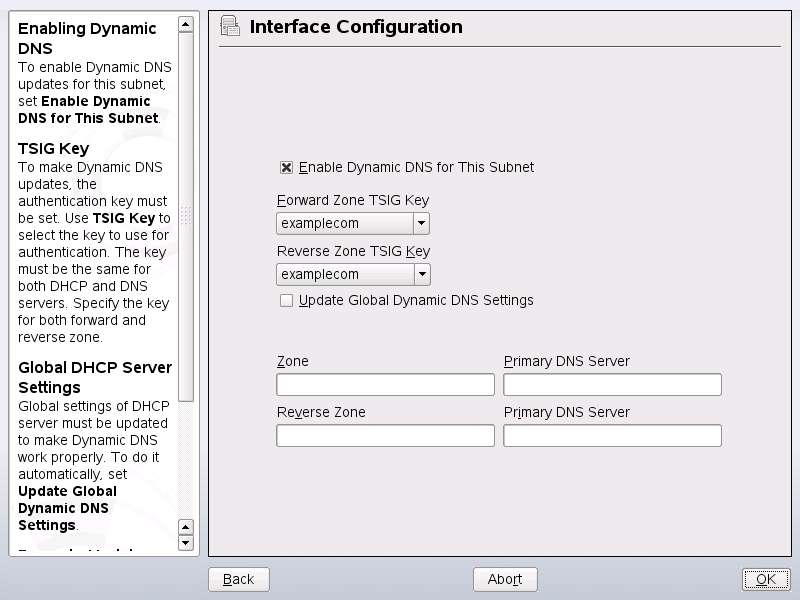
You can now activate dynamic DNS for the subnet by selecting . After doing so, use the drop-down list to choose the TSIG keys for forward and reverse zones, making sure that keys are the same for the DNS and the DHCP server. With , enable the automatic update and adjustment of the global DHCP server settings according to the dynamic DNS environment. Finally, define which forward and reverse zones should be updated per dynamic DNS, specifying the name of the primary name server for each of the two zones. If the name server runs on the same host as the DHCP server, you can leave these fields blank. Selecting returns to the subnet configuration dialog (see Figure 23-8). Selecting again returns to the original expert configuration dialog.
Figure 23-10 DHCP Server: Interface Configuration for Dynamic DNS
- Network Interface Configuration
-
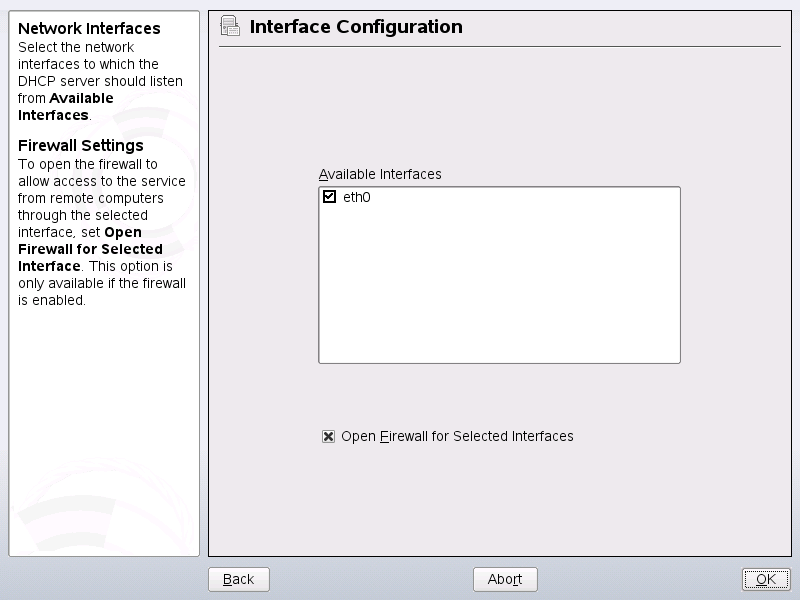
To define the interfaces where the DHCP server should listen and to adjust the firewall configuration, select from the expert configuration dialog. From the list of interfaces displayed, select one or more that should be attended by the the DHCP server. If clients in all of the subnets should be able to communicate with the server and the server host also runs a firewall, adjust the firewall accordingly. To do so, select . YaST then adjusts the rules of SuSEfirewall2 to the new conditions (see Figure 23-11), after which you can return to the original dialog by selecting .
Figure 23-11 DHCP Server: Network Interface and Firewall
After completing all configuration steps, close the dialog with . Now the server is started with its new configuration. configuration.