28.1 NFS Client Configuration
To configure your host as an NFS client, you do not need to install additional software. All packages needed to configure an NFS client are installed by default.
28.1.1 Importing File Systems with YaST
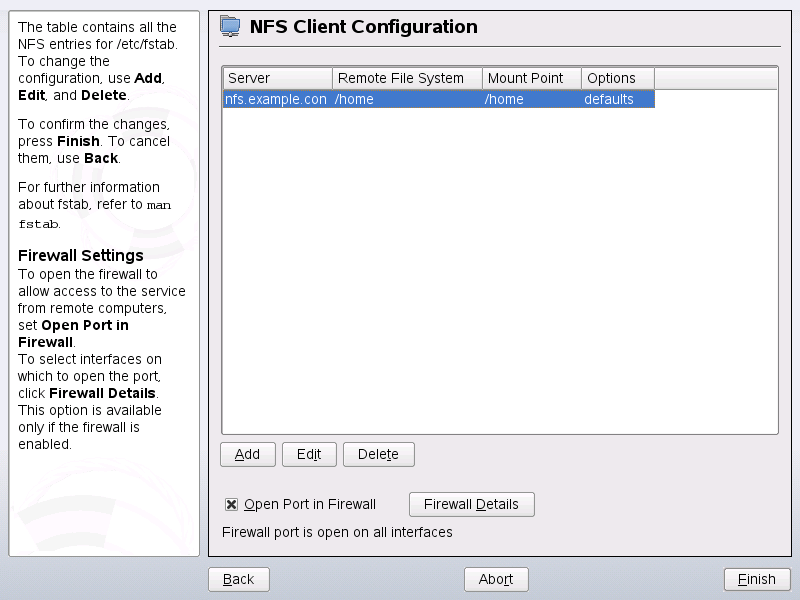
Users authorized to do so can mount NFS directories from an NFS server into their own file trees. This can be achieved most easily using the YaST module . Just enter the hostname of the NFS server, the directory to import, and the mount point at which to mount this directory locally. All this is done after is clicked in the first dialog. Activate to open the firewall to allow access to the service from remote computers. The firewall status is displayed next to the check box. Press to saves your changes. See NFS Client Configuration with YaST.
This saves the changes to /etc/fstab and imports the specified file systems. When you start the client at a later point in time, it reads the information from this file.
Currently, it is not possible to import NFSv4 file systems with YaST. NFSv4 file systems can be imported manually or with the automounter. This is explained in Section 28.1.3, Importing NFSv4 File Systems Manually and Section 28.1.4, Using the Automount Service.
Figure 28-1 NFS Client Configuration with YaST
28.1.2 Importing NFSv3 File Systems Manually
The only prerequisite to mount NFSv3 file systems is a running RPC port mapper. Start this service by entering rcportmap start as root. Once this prerequisite is met, remote exported file systems can be mounted in the file system just like local hard disks using the mount command in the following manner:
mount host:remote-path local-path
If the /home directory from the machine nfs.example.com, should be imported, first create a local directory /home and then use the following command:
mount nfs.example.com:/home /home
28.1.3 Importing NFSv4 File Systems Manually
The idmapd service must be up and running on the client to do an NFSv4 import. Start the idmapd service from the command prompt with rpc.idmapd. Use the command ps x | grep rpc.idmapd to check the status of idmapd.
The idmapd services get their configuration parameters from the file /etc/idmapd.conf. The value of the Domain parameter must be the same as on all NFSv4 servers and clients of this domain. For example, this may be localdomain . Ensure that the value specified is the same for both the NFS client and NFS server.
Make NFSv4 imports by giving a command from the shell prompt. To import NFSv4 remote file systems, use the following command:
mount -t nfs4 host:/ local-path
Replace host with the NFS server that hosts one or more NFSv4 exports and local-path with the directory location in the client machine where this should be mounted. For example, to import /home exported with NFSv4 on nfs.example.com to /local/home, use the following command:
mount -t nfs4 nfs.example.com:/ /local
Note, that the remote file system path that follows the server name and a colon is
always a slash /
. This is unlike the way it is specified for v3
imports, where the exact path of the remote file system is given. This
is a concept called pseudo file system, which is
explained in Exporting File Systems over NFS.
28.1.4 Using the Automount Service
As well as the regular local device mounts, the autofs daemon can be used to mount remote file systems automatically too. To do this, add the following entry in the your /etc/auto.master file:
/nfsmounts /etc/auto.nfs
Now the /nfsmounts directory acts as a root for all the NFS mounts on the client if the auto.nfs file is completed appropriately. The name auto.nfs is chosen for sake of convenience—you can choose any name. In the selected file (create it if it does not exist), add entries for all the NFS mounts as in the following example:
localdata -fstype=nfs server1:/data
nfs4mount -fstype=nfs4 server2:/
Make sure that auto.nfs is executable with the command chmod 755 auto.nfs. Then activate the settings with rcautofs start. For this example, /nfsmounts/localdata, the /data directory of server1, is then mounted with NFS and /nfsmounts/nfs4mount from server2 is mounted with NFSv4.
If the /etc/auto.master file is edited while the service autofs is running, the automounter must be restarted for the changes to take effect. Do this with rcautofs restart.
28.1.5 Manually Editing /etc/fstab
A typical NFSv3 mount entry in /etc/fstab looks like this:
nfs.example.com:/data /local/path nfs rw,noauto 0 0
NFSv4 mounts may also be added to the /etc/fstab file manually. For these mounts, use nfs4 instead of nfs in the third column and make sure that the remote file system is given as / after the nfs.example.com: in the first column. A sample line for an NFSv4 mount in /etc/fstab looks like this:
nfs.example.com:/ /local/pathv4 nfs4 rw,noauto 0 0
The noauto option prevents the file system from being mounted automatically at start up. If you want to mount the respective file system manually, it is possible to shorten the command for mounting and it is only needed to provide the mount point as in:
mount /local/path
Note, that if you do not enter the noauto option, the initialization scripts of the system will handle the mount of those file systems at start up.