3.7 Inventory and Discovery Methods
The following are the inventory and discovery methods available when adding servers to the Data Center Explorer.
3.7.1 Machines
Used to add physical and virtual servers.
To add machines, specify the . Multiple hostnames/IPs can be entered, but they need to all use the same credentials. Separate each entry with a comma.
Inventory is mandatory when adding machines, although you can use the Inventory drop-down to perform the inventory at a later, scheduled time.
To enable the button, you need to select credentials for the machines you’re adding. For more information, see Section 3.8, Inventory Credentials.
You can also start monitoring the machines when they are inventoried and/or add them to existing groups. For more information, see Section 3.10, Inventory Options.
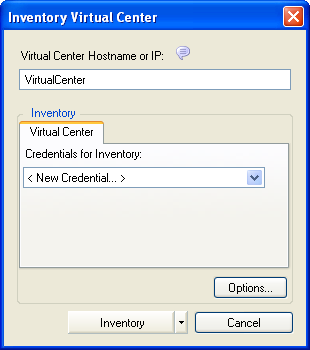
3.7.2 Virtual Center
Used to add Virtual Center servers.
To add Virtual Center servers, specify the . Inventorying a Virtual Center involves collecting information about all the servers and virtual machines in the Virtual Center. This is much more efficient than discovering and inventorying all the servers and virtual machines individually.
Inventory is mandatory when adding Virtual Center servers, although you can use the Inventory drop-down list to perform the inventory at a later, scheduled time.
To enable the button, you need to select credentials for the Virtual Center servers you’re adding.
Figure 3-1 Inventory Virtual Center Dialog Box
Virtual Center contents appear in the Data Center Explorer the same way they are organized in the Virtual Center, with all nodes, clusters, resource pools, and virtual machine nodes. The machines do not appear under in the Data Center Explorer until they are inventoried.
When using per core licensing, you must first inventory a Virtual Center before inventorying ESX Servers that belong to it, or the virtual machines on those ESX Servers. For more information, see Per Core:.
You can also start monitoring the servers when they are inventoried and/or add them to existing groups. For more information, see Section 3.10, Inventory Options.
3.7.3 From a CSV File
Used to add servers whose information resides in a comma-separated value file.
To inventory servers from a CSV file, type the path (or use the adjacent browse button) to locate a CSV file containing servers to inventory.
Figure 3-2 Inventory From CSV File Dialog Box
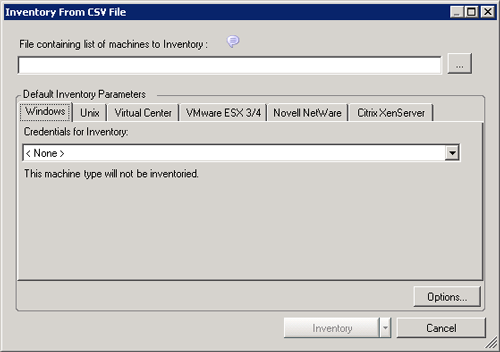
NOTE:The area is disabled if the CSV file contains credentials for all its machines.
Inventory is mandatory when adding servers from a CSV file, although you can use the Inventory drop-down list to perform the inventory at a later, scheduled time.
To enable the button, you need to select credentials for the machines you’re adding. For more information, see Section 3.8, Inventory Credentials.
Listings in the CSV file must use the following format: Address, [Username], [Password], [Description].
Table 3-7 CSV File Requirements
You can also start monitoring the machines when they are inventoried and/or add them to existing groups. For more information, see Section 3.10, Inventory Options.
3.7.4 Windows Domain
Used to add all the servers discovered in the specified Windows Domain.
Type a Windows Domain name and use the drop-down list to specify which machines to discover: , , or (NT4 Workstation, Windows XP, Windows Vista).
Figure 3-3 Domain Discovery and Inventory Dialog Box
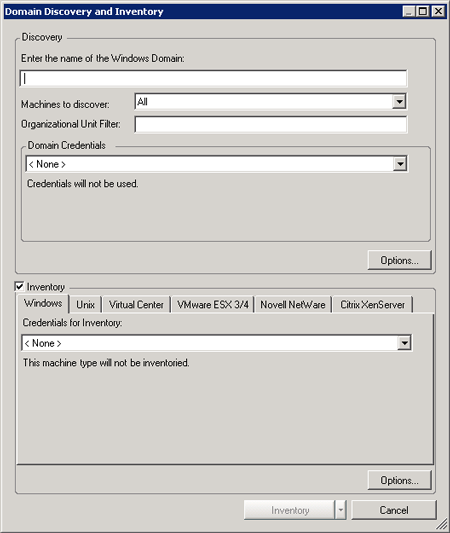
NOTE:Clear the check box to only discover machines.
Discovery options can be configured by clicking the button beneath the Domain Credentials drop-down list. For more information, see Section 3.10, Inventory Options.
An Organizational Unit (OU) filter can be used to focus discovery on a specific part of a domain. For more information, see Domain Discovery:.
To enable the button, you need to select credentials for the machines you’re adding. For more information, see Section 3.8, Inventory Credentials.
You can also start monitoring the machines when they are inventoried and/or add them to existing groups. For more information, see Section 3.10, Inventory Options.
3.7.5 IP Range
Used to add servers within a specified IP address range.
Enter the IP address range of the servers to discover.
Figure 3-4 IP Range Discovery and Inventory Dialog Box
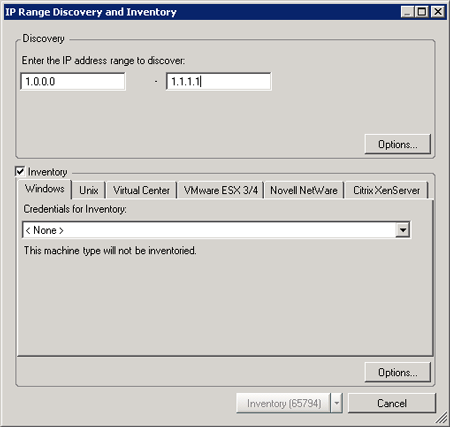
NOTE:Clear the check box to run a discovery operation without inventorying server details.
Discovery options can be configured by clicking the button in the Discovery area. For more information, see Section 3.10, Inventory Options.
To enable the button, you need to select credentials for the machines you’re adding. For more information, see Section 3.8, Inventory Credentials. The numbers that are displayed in the button indicate how many individual IP addresses that are contained within the range you entered.
You can also start monitoring the machines when they are inventoried and/or add them to existing groups. For more information, see Section 3.10, Inventory Options.
3.7.6 Subnet
Used to add servers discovered in the specified subnet.
Type the and the of the subnet to be discovered.
Figure 3-5 Subnet Discovery and Inventory Dialog Box
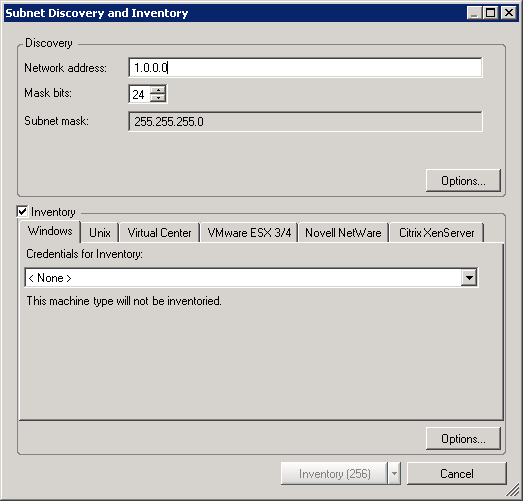
NOTE:Clear the check box to run a discovery operation without inventorying server details.
Discovery options can be configured by clicking the button in the Discovery area. For more information, see Section 3.10, Inventory Options.
To enable the button, you need to select credentials for the machines you’re adding. For more information, see Section 3.8, Inventory Credentials. The numbers that are displayed in the button indicate how many individual IP Addresses there are in the subnet you specified.
You can also start monitoring the machines when they are inventoried and/or add them to existing groups. For more information, see Section 3.10, Inventory Options.
3.7.7 SNMP
Used to discover machines by using Simple Network Management Protocol.
Type the and , then select the . Select whether to include .
Figure 3-6 SNMP Discovery and Inventory Dialog Box
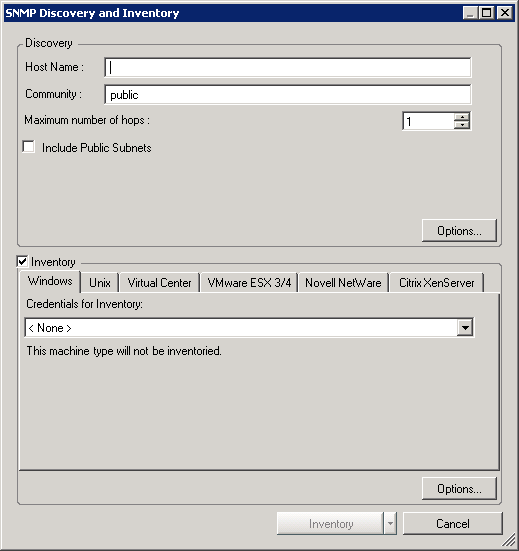
NOTE:Clear the check box to run a discovery operation without inventorying server details.
Discovery options can be configured by clicking the button in the Discovery area. For more information, see Section 3.10, Inventory Options.
To enable the button, you need to select credentials for the machines you’re adding. For more information, see Section 3.8, Inventory Credentials.
You can also start monitoring the machines when they are inventoried and/or add them to existing groups. For more information, see Section 3.10, Inventory Options.