7.3 Managing Raters
The Rater Explorer window is used to manage raters. You can add, edit, or delete raters, as well as attach or detach raters to or from discovered machines. The Rater Explorer also allows you to view current raters and their attachments.
A machine can have multiple raters and a rater can be used with multiple machines. Ratings are performed on a one machine to one rater basis (that is, a rater only considers data from one machine at a time).
7.3.1 Creating a Rater
-
In the Rater Explorer, click the button
 .
.
The New Rater dialog box is displayed.

-
Select a .
For more information on Rater types, see Section 7.2, Using Raters.
-
Type a .
-
(Optional) Type a .
-
Select a from the drop-down list.
These are also known as counters, because their purpose is to count usage of a resource. For more information on resources, see Section 7.2.1, Rater Resources.
-
Select the and to use, if they are not dimmed.
For , selecting Average means that the average value over the is used. Selecting Maximum means that out of all the averages within the , the maximum average is used. For example, there are 24 averages per day for hourly data and the maximum average out of all the 24 averages is used against the charge value.
-
Type a .
This is the multiple of the resource units selected that you want to use for the charge. For example, you could charge $2.00 per 3 GB of disk space used. In this case, the would be 3.
-
Type a monetary value and select a currency type from the drop-down list.
For more information, see Section 7.2.2, Rater Charges.
-
(Conditional) For Allocation raters (virtual machines only), select a from the drop-down list.
For more information, see Section 7.2.3, Virtual Server Rater Methods.
-
Click .
The new rater is displayed in the Rater Explorer window under the appropriate rater type.
7.3.2 Deleting a Rater
-
In the Rater Explorer window, select the rater you want to delete
-
Click the button
 .
.
7.3.3 Editing a Rater
-
In the Rater Explorer window, select the rater you want to edit.
-
Click the button
 .
.
The Edit Rater dialog box is displayed.
-
Edit the rater values as desired. Use the steps in Step 1 as a guide.
The Rater Type is not editable. To change a rater type, you need to delete the rater and then create a new rater with the same name that uses the desired type.
-
Click .
A confirmation prompt window is displayed.
-
Click .
The rater is removed from the Rater Explorer window.
Deleting a rater that is attached to a machine does not affect the machine, except to exclude it from any chargeback calculations unique to the deleted rater.
7.3.4 Attaching Raters to Machines
A machine needs to be inventoried and in most cases monitored to enable a rater to access its resources. You then need to attach the rater to the machine to have the machine cost calculated and made available for reporting.
To calculate a charge, PlateSpin Recon must have monitoring data for all counters except Total Processor, Total Memory, and Total Disk, which use inventory data.
-
In the Rater Explorer window, select the rater you want to attach to a machine.
-
Click the button
 .
.
The Select Raters dialog box is displayed.
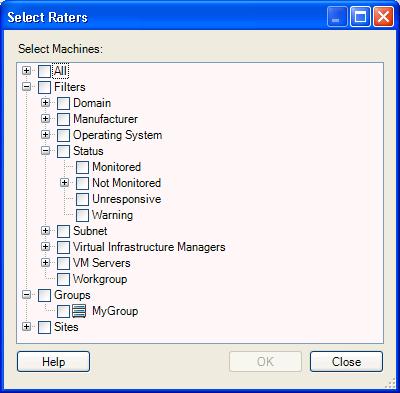
You can also use the Data Center Explorer window to attach a rater to a machine. Right-click the machine you want to add the rater to and click in the menu. The Raters for <machinename> window is displayed where you can add or remove raters by selecting them and using the and buttons. Adding and removing raters from here is the same as attaching or detaching them from the Rater Explorer window. It does not add or remove the raters from PlateSpin Recon.
-
Select the check box next to the machine you want to add the rater to.
You can select more than one machine, if desired. Raters can be attached to groups, sites, or filters by selecting them in the Select Raters dialog box.
-
Click .
The machines you attached the rater to are displayed in the Rater Explorer window beneath that rater.
7.3.5 Detaching a Rater from a Machine
-
In the Rater Explorer window, select the machine you want to detach the rater from.
-
Click the button
 .
.
The rater is immediately detached and the machine is no longer displayed beneath the rater in the Rater Explorer window.