1.8 Archiving Office 365
1.8.2 Creating Office 365 Modules
If your organization uses Office 365, you need to configure the Office 365 modules.
Creating an Office 365 Module
If your organization uses Office 365, use this section to configure your Office 365 module.
This section contains the following:
Providing Retain Users with Access Through Their Office 365 Accounts
Retain 4.10 and later lets users access Retain via a button.
IMPORTANT:You can require that Office 365 users only use the Login button. If you don’t do this, they can still enter a username and password, which is fine, but the password they use must be an assigned App Password. For more information, see Authentication Part 1: Username/Password or OpenID Connect
and When Google and Office 365 Systems Require an App Password
in the OpenText Retain CE 24.2: How Retain Works guide.

Retain redirects users to Office 365 and they then have 10 minutes to authenticate successfully and access Retain.
Enabling OpenID Access (Modern Authentication)
To enable this functionality you must do the following:
-
Complete the instructions in Configuring the Office 365 Module, making sure that you choose to populate the address book directly from Office 365.
IMPORTANT:Using a .csv file to populate the address book is not compatible with this functionality.
-
In Microsoft Azure, on the page in the menu, do the following:
-
Under > , add the URL of the openIdConnect.jsp file on the Retain Server that you are configuring.
For example, https://your-Retain-server/RetainServer/Server/openIdConnect.jsp
-
Under , enable the option.
-
Under , enable the option.
-
-
After you have created the module and verified (tested) the Office 365 connection, open the Retain Server Manager.
-
Click > and go to the panel.
-
Copy and paste the same Directory (tenant) ID and Application (client) ID as you used in the Authentication Tab.
-
Click the “Test login with office 365” button to verify that the Office 365 MFA sign-in works.
Enabling Multiple Retain Servers for OpenID Support
If you have multiple Retain servers archiving from the same Office 365 system, you must do the following on each of those Retain servers.
-
Edit the /opt/beginfinite/retain/RetainServer/WEB-INF/classes/config/misc.properties file.
-
Add the following line:
msopenid.redirecturi=https://your-Retain-server/RetainServer/Server/openIdConnect.jsp
-
Restart Tomcat.
Configuring the Office 365 Module
The Office 365 module must be configured in the Retain Server before any communication between Retain and an existing Office 365 message system can occur. Open the Retain management page on the Retain Server and select Module Configuration.
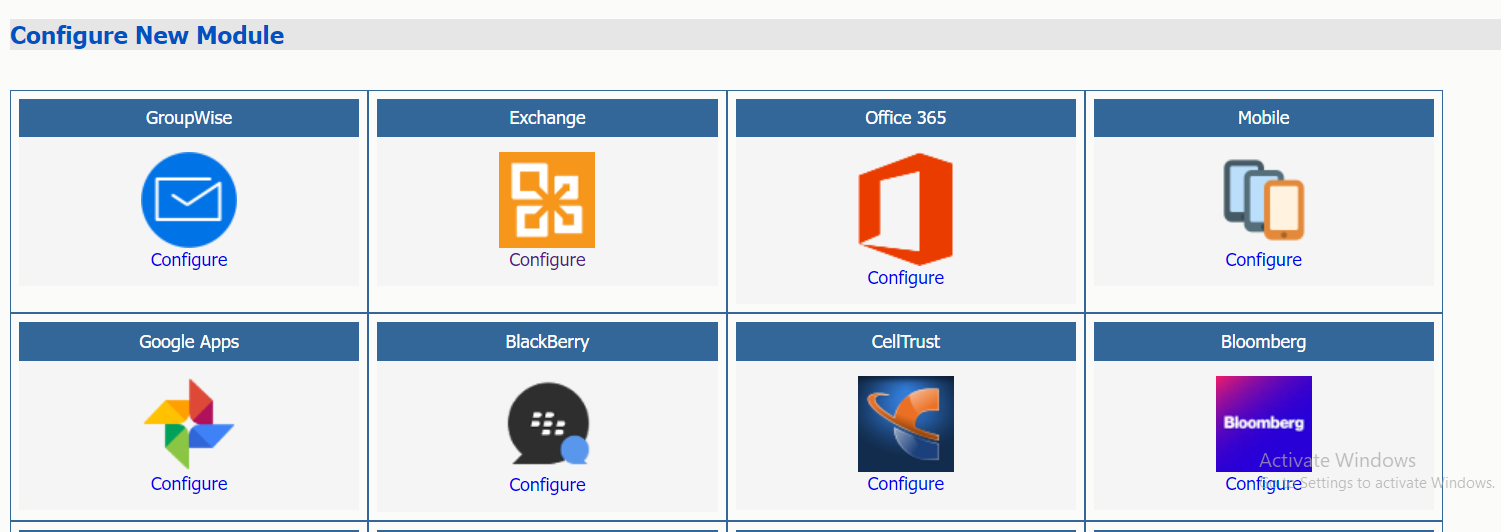
Select the ‘Configure’ option in the Office 365 module. A new window or tab opens with the module configuration.
Core Settings Tab
The Core Setting Tab allows you to disable all jobs and disable users logging into Retain.
The module needs to be enabled on this page to make it active in the Retain system.
The module can be given a name.
The Send Method lets you send Exchange items to an external system using FTP or SMTP.
In most cases this should be disabled so that items are archived in Retain.
To select the SMTP Forwarding or FTP features, you must first add and configure them in the Module Forwarding Tab on the Server Configuration page, otherwise the drop-down list is empty.
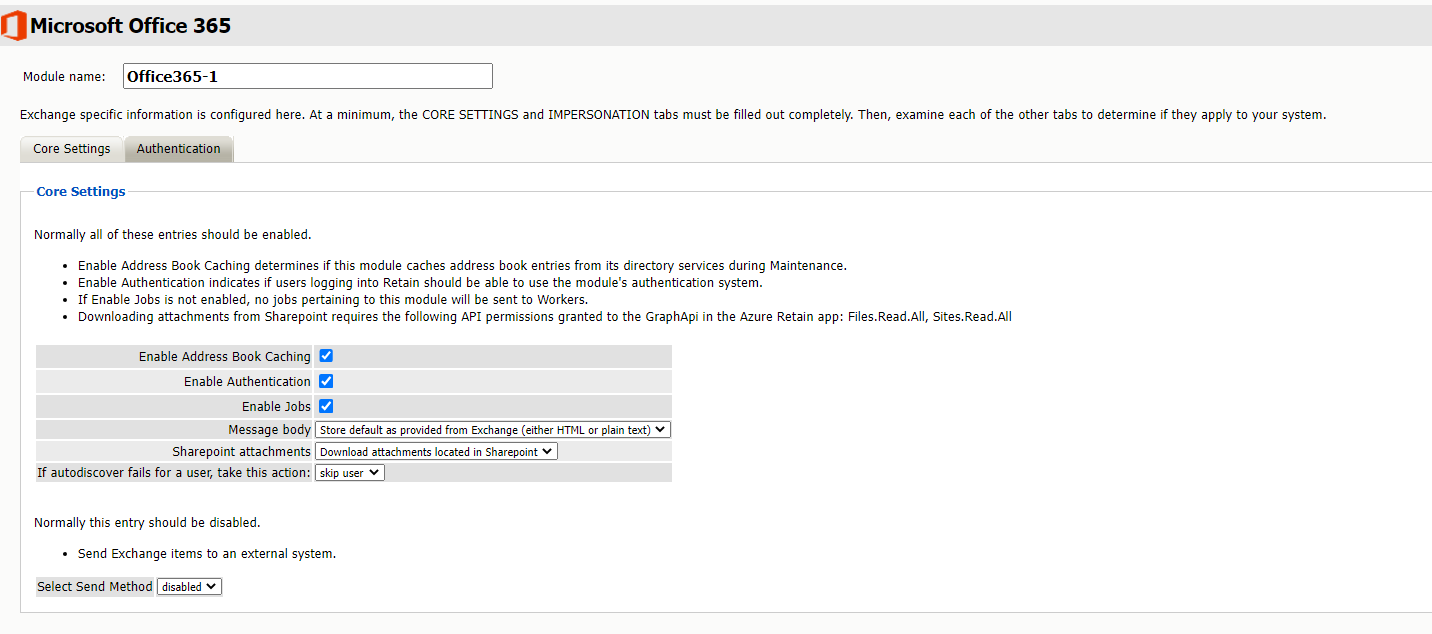
Normally all the checkbox options on this tab are enabled. It is rare that you would ever deselect any of them. Two cases where you might, would be: troubleshooting (as instructed by Technical Support), and retiring an old email system.
The Enable Address Book Caching function allows Retain to regularly cache the online email systems address book and synchronize it with Retain. This is critical for administration, authentication, and archiving purposes. It is recommended to cache the Address Book once every 24 hours to keep the Retain storage system up to date. By default, maintenance is set to cache the Address Book once every 24 hours.
The Enable Authentication checkbox determines if end-user authentication is performed when the user logs into Retain. If it is deselected, the Retain system cannot authenticate the user against the email system and the user cannot log in unless another authentication method is enabled.
The Enable Jobs checkbox determines if configured data retrieval jobs are ever passed to the Worker. Even if the individual job is fully configured and enabled, if this checkbox is switched off, no jobs configured for this module can be processed.
The Message body allows the administrator to decide whether to store either the HTML or plain text message body, or both.
The Sharepoint attachments lets you specify whether Retain downloads or doesn’t download attachments from Sharepoint. The default selection is to download attachments from Sharepoint.
If autodiscover fails for a user, take this action lets you specify what to do with users that fail autodiscover.
Send Method
The Send Method lets you send Exchange items to an external system using FTP or SMTP.
In most cases this should be disabled so that items are archived in Retain.
To select the SMTP Forwarding or FTP features, you must first add and configure them in the Module Forwarding Tab on the Server Configuration page, otherwise the drop-down list is empty.
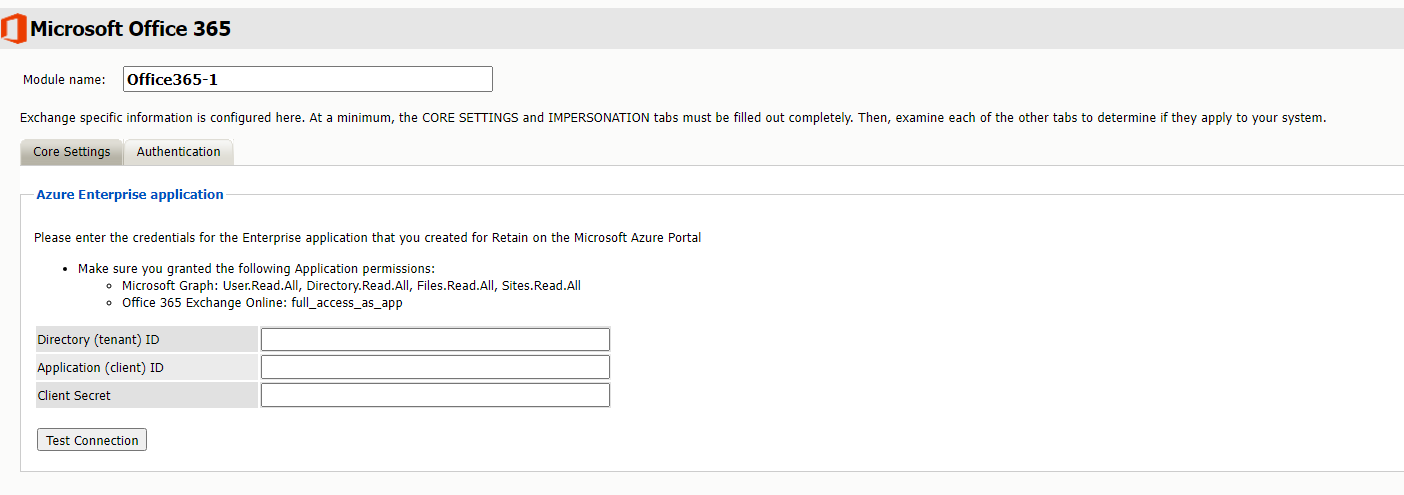
Authentication Tab
If the Authentication and Core Settings tabs are not completely configured with the correct information, the hosted system cannot be archived correctly.
IMPORTANT:The Application (client) ID specified here must be valid in both O365 as well as in the Sharepoint system.
-
Enter the Azure application credentials using the table below:
Option, Field, or Sub-panel
Information and/or Action
field
This information is exposed when you complete the procedures described in Synchronizing the Address Book Using Office 365 (Microsoft GraphAPI).
field
This information is exposed when you complete the procedures described in Synchronizing the Address Book Using Office 365 (Microsoft GraphAPI).
field
This information is exposed when you complete the procedures described in Synchronizing the Address Book Using Office 365 (Microsoft GraphAPI).
-
Then click to verify that both the user and password are entered correctly. The connections to both Graph API and EWS (if using OAuth) are verified and reported separately.
Refresh the Address Book
After saving changes, return to the Retain Server's Module Configuration page, and trigger a refresh of the Address Book.
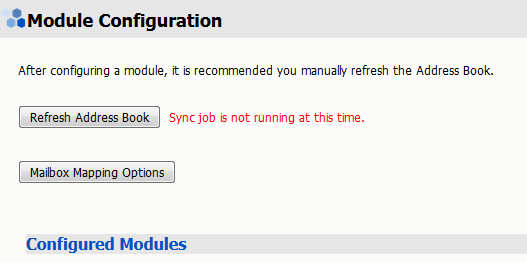
Depending on the size of the address book, it may take several minutes to return with information, but a successful configuration returns a correct address book cache date and no errors. The date should reflect the date when the address book refresh was triggered.
The Status may show “Address Book Cache Never Run” or may list commonly mis-configured or missed items if the Refresh job fails.
Once the status is configured and the Address Book has been cached, Retain can connect to and archive messages from the Exchange server. The system is ready to have workers, schedules, profiles, and jobs configured, and those options now appear on the main administrative interface.
The Address Book is refreshed whenever the button is pressed, during the nightly maintenance cycle, and before each job.
1.8.4 Specifying an Office 365 Profile
The job will need an Exchange profile set up to connect to the email system properly.
This requires that an appropriate module be configured a documented in one of the following sections:
After the Office 365 Module has been configured, the Exchange Profile will be available for configuration. If an Exchange Profile is not configured, jobs cannot be run against the Exchange system.
Click on “Add Profile” and provide a profile name, or select an already existing profile to access the configuration tabs. All changes made on this page must be saved by selecting the “save changes”, disk icon, at the top right of the page. Tabs may be changed and navigated through without affecting new settings, but any move to another page will require saving, or abandoning the changes made.
Skype for Business
With Office 365, Retain also archives Skype for Business conversations. They are saved to the Conversation History folder of the user.
Core Settings Tab
The core settings consist of an enabled/disabled option which must be enabled for any jobs based on this profile to archive anything.
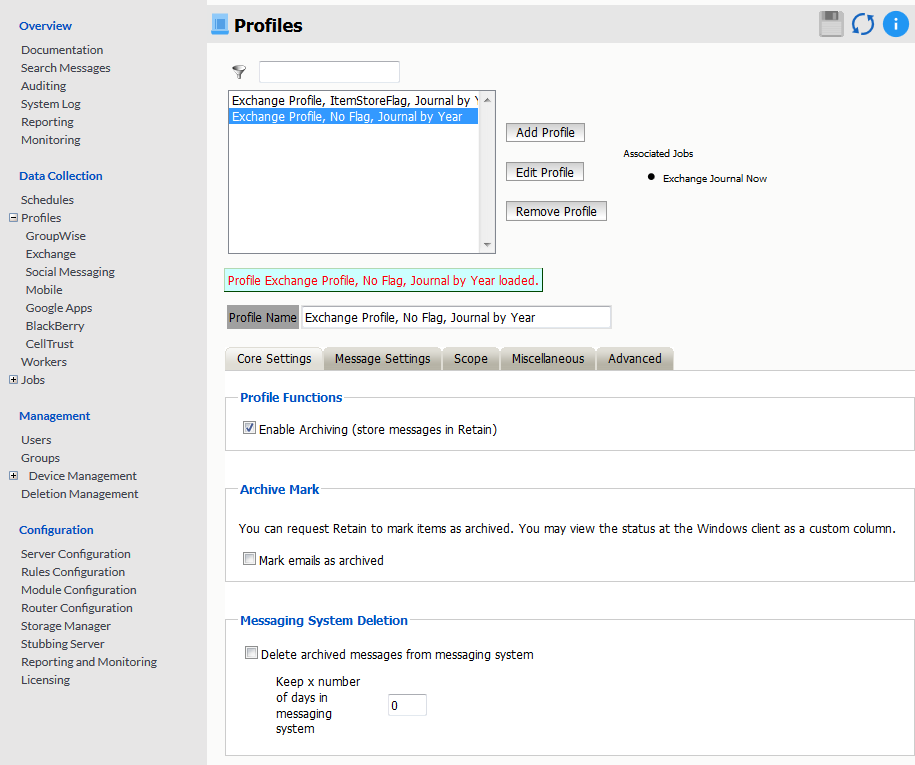
Profile Functions
The Profile Functions tell the Retain Server what to do with the mail it archives from the messaging system. If Archiving is not enabled, mail will not be archived by Retain.
Archive Mark
Some users may opt to use the Archive Mark for messages that have been archived by Retain. The archive mark is a custom flag and may be modified, therefore is not secure and should not be used for compliance. Archive Mark slightly degrades job performance. Check the check box to enable Archive Mark for the selected profile.
When the Archive Mark is active, the Category field forthe archived item is labled as 'This item has been archived by Retain' along with the timestamp of when the item was archived. It will also be tagged and displayed as such in OWA.
Messaging System Deletion
For systems where the administrator wishes to have archived messages removed from the system automatically, the Messaging System Deletion option may be used. Messaging System Deletion will remove messages from a mailbox after they are archived, according to the time frame specified in the settings. The amount of time to keep messages is specified in days. The recommended setting depends on the archiving scheme in the system. For example, if messages are to persist in the system for 30 days, then the system deletion setting should be set to 30 and enabled. A setting of 0 will remove messages from the system as soon as they are archived. Be sure to configure the system before enabling the setting in the profile.
However, it is recommended that the messaging system do the deletion rather than Retain.
Message Settings Tab
Retain can archive and select specific types of mail and Office 365 system items to be archived. The Manage Settings tab provides access to manage those settings.

The Mailbox type specifies whether to include or exclude the available types of mailboxes. Because there can be multiple profiles and jobs, it may be advantageous to archive the Users and Room / Equipment mailboxes separately as needed and appropriate for the system.
The Item Type option specifies the different types of messages found in Online 365 that can be archived, and allows the exclusion of or inclusion of the different individual types.
The Item Source option allows administrators to exclude or include messages that have not yet been sent or received, or posted.
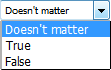
The Message Status allows messages which have or have not been read or opened, or marked private or confidential to be archived. The different options in the drop-down menu are as shown.
Scope Tab
The Scope tab dictates the date range Retain will scan in the attached archiving jobs.
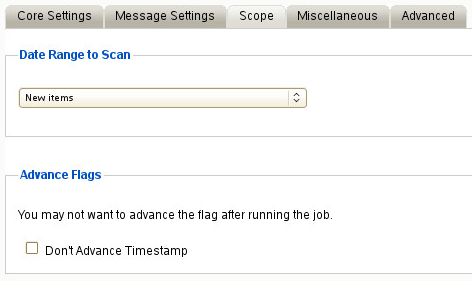
Date Range to Scan
The Date Range to Scan instructs Retain to scan for, and archive, messages after, or before, a certain date. This is useful if only specific chunks or areas of mail are to be archived.
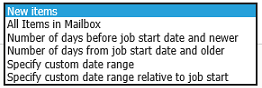
New Items: All items that have not been archived by Retain since the last time the job ran.
All Items in Mailbox: All items in the mailbox starting from 1/1/1970, duplicates will be processed but not stored if they already exist in Retain's archive.
Number of days before job start date and newer: Only items from the relative number of days from the time the job began will be archived. E.g. messages that came into the email system less than 7 days ago.
Number of days from job start date and older: Only items previous to the relative number of days from the time the job began will be archived. E.g. messages that came into the email system more than 7 days ago.
Specify custom date range: Only items between two absolute dates will be dredged.
Specify custom date range relative to job start: Only items between two relative dates will be dredged. E.g. messages that came into the email system between 7 and 5 days ago.
It is recommended to archive all New items.
Advance Flags
Enabling "Don't Advance Timestamp" will not update the timestamp flag. Items that are dredged will still be considered new by Retain the next time the job runs.
This is useful when troubleshooting, but is generally not used for normal jobs.
NOTE:Unlike GroupWise, Exchange does not ensure any compliance when scanning end user mailboxes; users may freely delete their email. The Item store flag does not prevent mail deletion. Only setting a rolling hold on all mailboxes guarantees all items have been archived.
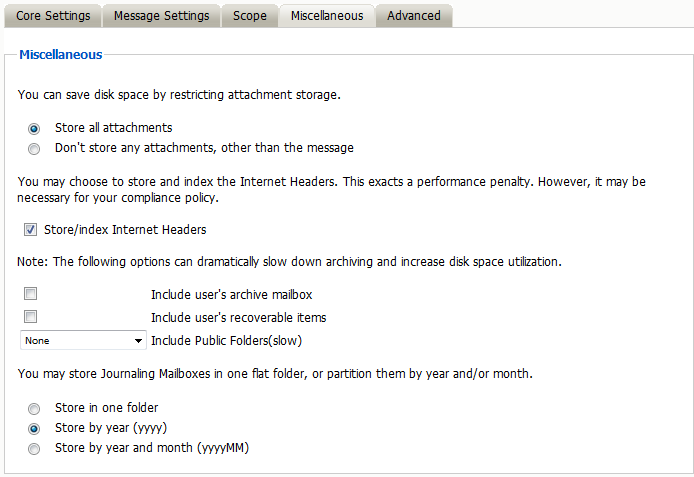
Miscellaneous Tab
The Miscellaneous tab allows access to settings detailing how messages are stored and what is archived. Attachments, message information such as the Internet headers, and how the data is stored and named, (by folders, year, or year and month), dictate not only the message store structure, but affect the storage size.
Miscellaneous options also allow for the archiving of the ‘recoverable items’. To enable checking and archiving of the ‘Recoverable Items’ for compliance reasons, select the checkbox next to the option.
Advanced Tab
Generally, since storage space is inexpensive, OpenText recommends that you archive all message content.
However, if you need to limit what is archived, you can use the Advanced tab to do it.
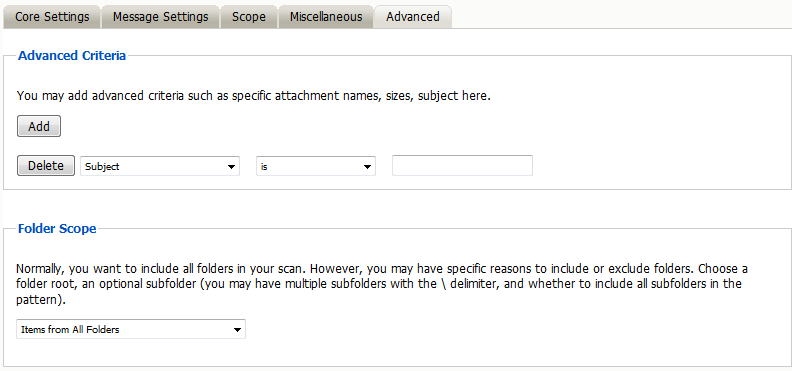
Table 1-21 Configuring Exchange Profile Advanced Settings
|
Option, Field, or Sub-panel |
Information and/or Action |
|
|---|---|---|
|
Use this dialog to define the conditions Retain uses to determine what to archive. |
||
|
|
Each line sets a specific parameter and the lines are all added together (AND-ed). To check how Retain will interpret your settings, read through the lines in turn, inserting AND between each one.
|
|
|
|
By default, Retain archives the items from all folders. Using this panel, you can restrict which folders are archived, by either:
To specify the folders to include or exclude, do the following:
|
|
1.8.6 Creating an Office 356 Job
A job is made up of:
-
Schedule Schedules
-
Profile Specifying an Office 365 Profile
-
Worker Workers Overview
Core Settings Tab
The Core Settings of a job contains configuration which must be set for the job to be saved and become active. A job must be enabled before it will run. Jobs must also have a specified schedule, profile, and worker. These are all selected from drop-down menus, and will not be populated unless those items are already configured in the system.
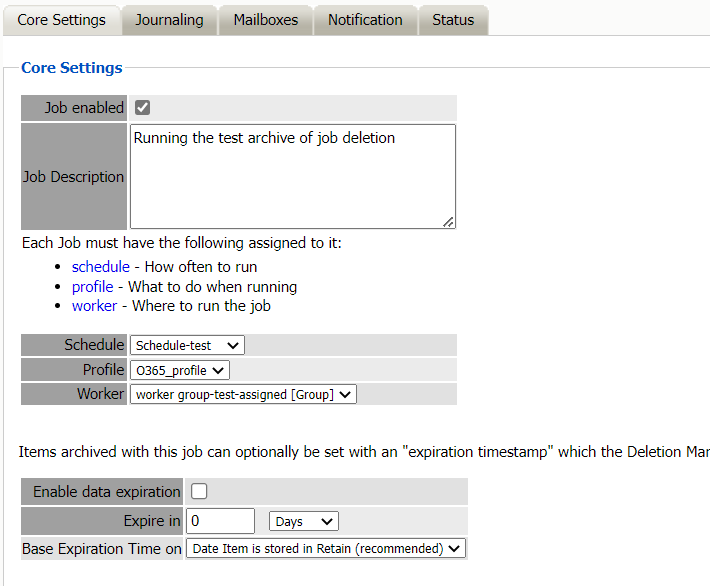
The Data Expiration setting is an option to place a time stamp on data in the Retain database, which allows for ease of automation for the deletion manager. In addition, devices such as NetApp and Hitachi HCAP may use this number to enforce hardware level protection of the stored item so that no one (including Retain) may delete the item before its expiration date. Job Expiration is not retroactive for mail in the database, and only applies to mail archived by the job that it is active for. In order to have messages with custom job or folder expiration dates properly expire, the deletion management date scope must be set to delete messages with an Expiration Date older than 1 day.
Mailboxes Tab
The mailboxes tab is where the administrator specifies which entities (mail servers and/or Distribution Lists) are to be scanned. This tab is not displayed for the mobile module.
Expand the Post Office and/or Distribution List trees, and check off the items you want to be dredged.
NOTE:If you desire to have a job backup a single user, or selected group of users, select the Users menu and assign the users desired

The Distribution List selection allows you to include or exclude a group of users from an archive job. If you want to use Office 365 Distribution Lists, the visibility needs to be set to “system wide”.
The users section allows you to select individual users to include, or exclude them from an archive job. For example: you can select an entire Mail Server to be archived, and then expand the users section to include or exclude users to the job.
This can also be used to select only certain users in the system for an archive job.
To add a user to the Include or Exclude list, select the respective ‘Add user’ button and search for the user. It can be helpful to unselect the ‘only show recently cached items’ option. Add the selected users to the list in the search window, then select ‘Ok’ to add them to the include or exclude list.
Notification Tab
When a job is run, the Notification option allows the administrator to be emailed a summary and report of any errors, for each running job.
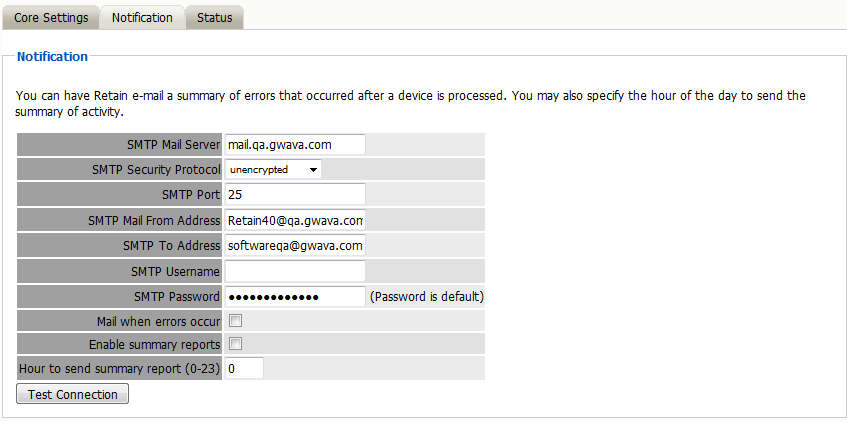
For notification to function correctly, the SMTP information for the desired SMTP server must be fully filled-out. How much information is required varies depending on the mail system used.
Status Tab
The Status tab displays the status of any currently running jobs, as well as the stats of the last completed job.
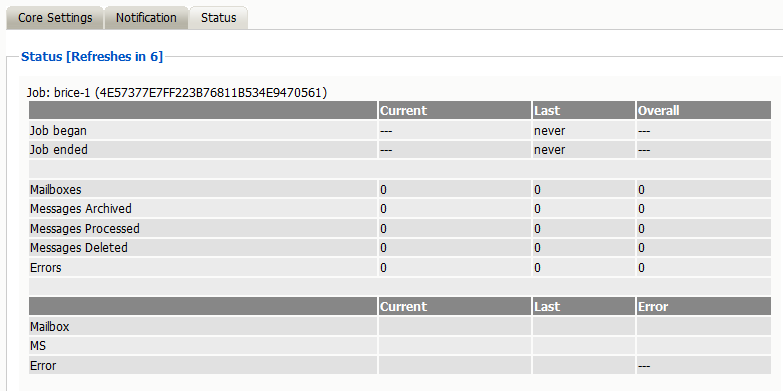
On some modules, currently running jobs may be terminated here. For the rest, this tab is informational only.
Next Step
Once a job has completed you can confirm the items are in the archive by checking the Search Message interface. See Using Retain’s Archives
in the OpenText Retain CE 24.2: User Guide. .