Creating a Signing Key Pair
There are three general ways to generate or import a key pair into an eDirectory system. You can:
- Use Novell Certificate Server to generate the key pair and certificate, signed by your Tree CA.
- Use Novell Certificate Server to generate the key pair and Certificate Signing Request to be signed by an external CA.
- Use Novell Certificate Server to import an external key pair stored in PKCS#12 format.
The following instructions show how to generate a key pair using Novell Certificate Server and the Novell Certificate Server snap-ins. For more detailed information on key and certificate management, Novell Certificate Server 2.7.x Administration Guide.
-
Create a NDSPKI:Key Material object.
This is what Novell Certificate Server calls a public - private key pair object. Novell Certificate Server stores and associates key pair objects with Servers, so you must create the Key Material object in the same container as the server where you want to host the Key. For SAML extension purposes, the server you choose is immaterial. Figure 67 shows the Key Material selection:
Figure 67
NDSPKI:Key Material Object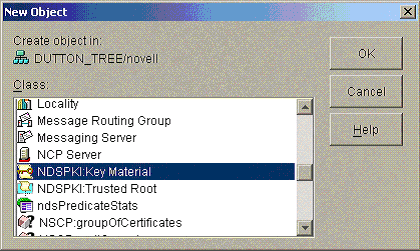
-
Click NDSPKI:Key Material Object, then click OK. A wizard guides you through the certificate generation process.
Figure 68
Certificate Generation Wizard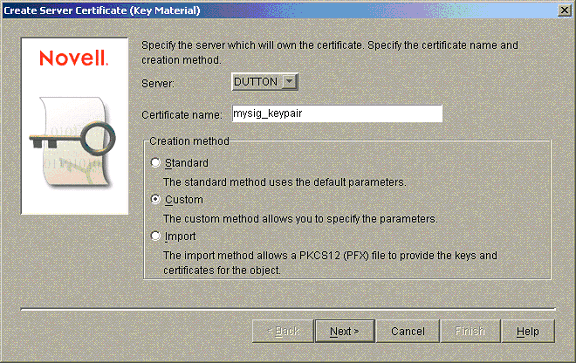
-
Select the server you want to create the private key on.
The Creation method selector determines what type of operation you are going to perform. If you already have a certificate you want to use, select the Import option. Otherwise, select Custom. If you choose the Import option, you are prompted to enter the filename and password associated with the PKCS#12 file you want to import. See the Novell Certificate Server 2.7.x Administration Guide for details on importing external certificates.
-
Click Next.
-
Decide whether to create a public key certificate signed by your Tree's Certificate Authority (CA) or an external CA.
Figure 69
Create Server Certificate: Key Material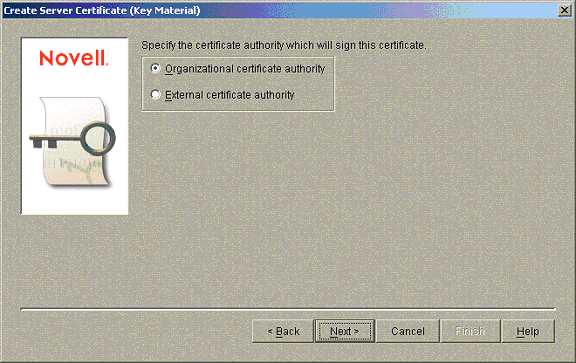
Generally, if you are creating a certificate for testing, you can use your built-in Organizational Certificate Authority. For production, you will probably want a certificate signed by a well-known CA such as Verisign* or Entrust*. Select External Certificate Authority if this is what you want to do.
-
Click Next.
Figure 70
Key Pair Properties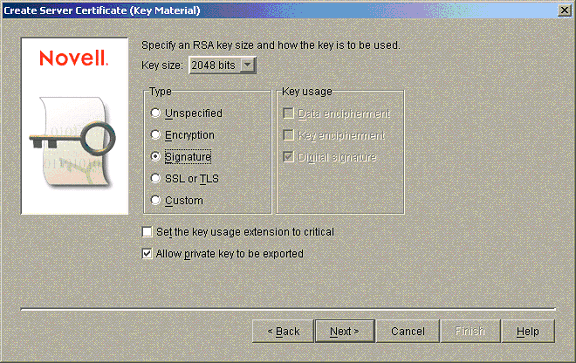
-
Define the key pair properties. Because this certificate is to be used to sign SAML data, verify that the Signature Type value is selected. Generally, a key size of 2048 bits is sufficient.
-
Click Next.
-
Define additional key and certificate properties.
Make sure you create a subject name that allows your partner sites to identify the certificate as yours. A general rule is to make sure the subject name is the same as your Site ID. For example, if you are generating a certificate for the ichainsite sample site, the Subject name is .CN=www.ichainsite.com. Subject names in the Novell Certificate Server must begin with a period (.), as shown in Figure 71:
Figure 71
Certificate Parameters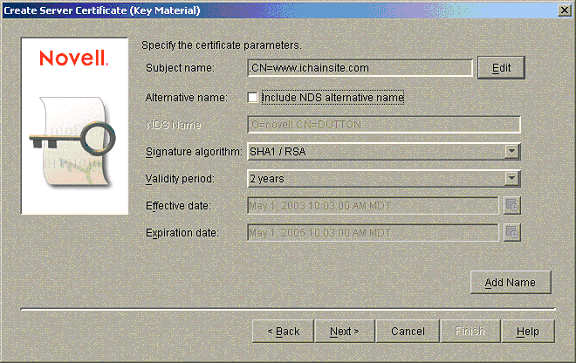
-
Click Finish to complete the operation.
If you are signing the certificate with your Tree CA (Organizational), you are prompted to select which certificate will sign your certificate. Either selection will work for testing purposes. For information about the differences between the two, refer to the Novell Certificate Server 2.7.x Administration Guide.
Figure 72
Specify the Trusted Root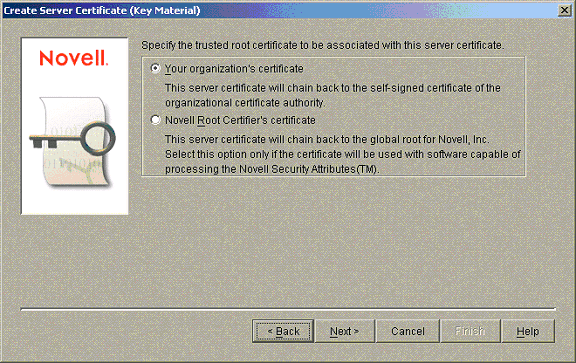
-
You are presented with a summary page outlining all of the selections that you made in the wizard. If you are satisfied with all of your selections, click Finish. The key pair is generated.
Figure 73
Summary Page
You should have a new NDSPKI: Key Material Object in the directory. The name of this new object is the name you specified in the Wizard, followed by the hosting server name. Figure 74 shows the key pair generated. In this example, the certificate name is mysig_keypair - DUTTON.
Figure 74
NDSPKI: Key Material Object Shown in Directory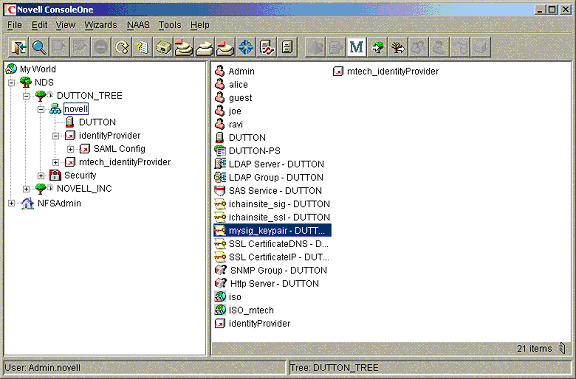
-
(Optional) Associate your SAML Configuration object with this key pair object.
This step is not mandatory, but it is recommended because it keeps the association between the key pair you generated and the SAML configuration. Create this link by selecting the SAML Configuration object > Properties. See Figure 75:
Figure 75
SAML Configuration Object: Properties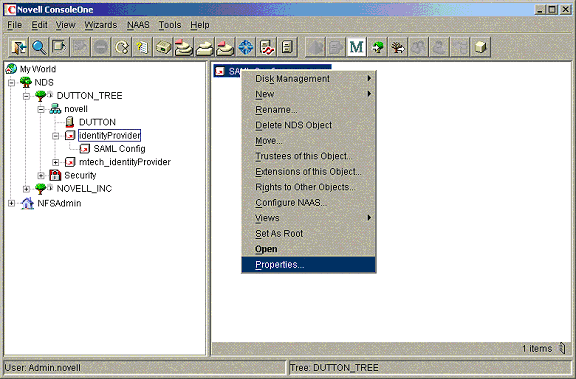
-
Click the General tab.
In the key pair Information section of the page, you can specify the key pair object that you are using to sign SAML data. Figure 76 shows this selection:
Figure 76
General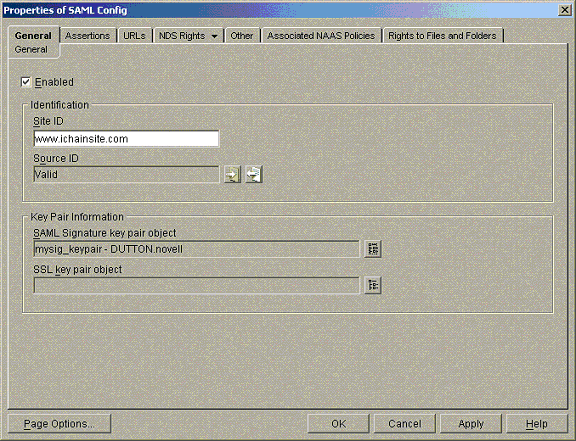
Now when you are working with the configuration of the SAML system, you have a link back to the key pair you are using to sign SAML data.