Exporting the SSL Key
The steps for exporting the SSL key are identical to those used to export the signing key pair. (See Exporting a Signing Key Pair). You must select the Public Key Certificate tab and remember the export password, because you will need it when the key pair is imported.
Importing the SSL Key Into iChain
To import the SSL key into iChain:
-
If you already have a good certificate in use on the iChain accelerator, you can use the iChain GUI to export it to a PKCS#12 file, and then import it into eDirectory.
Alternately, you can import a PKCS#12 key pair exported from eDirectory into iChain.
NOTE: In order to import a PKCS#12 file into iChain, the file must be in 8.3 format. That is, the file must not have more than eight characters in the name, and it must have a three-character extension. Copy the PKCS#12 file you exported onto a floppy and rename it to fit the 8.3 format, if necessary.
-
Open the iChain GUI on the iChain server.
-
Select the Certificate Maintenance option and click the Restore button. You should see a screen similar to Figure 99:
Figure 99
Restore Certificate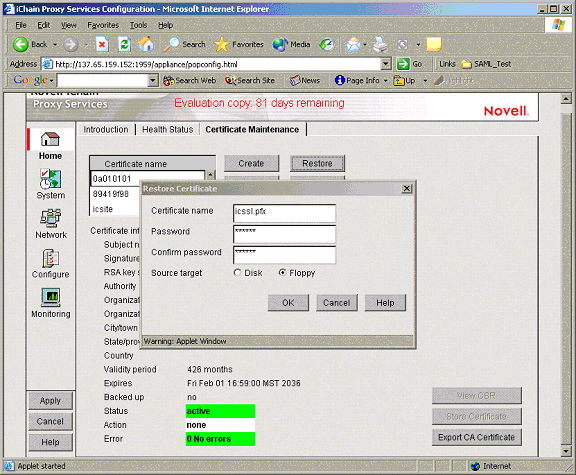
-
Enter the PKCS#12 filename, enter the appropriate password, and select the Floppy option.
After selecting OK, click the Apply button on the left side of the GUI. The status and action indicators on the Certificate Maintenance page show whether the operation was successful.
-
Next, you need to configure the appropriate iChain accelerator to use this certificate for SSL. Select Configure > Web Server Accelerator. Select the appropriate accelerator, then click Modify. You should see a page similar to Figure 100:
Figure 100
Web Server Accelerator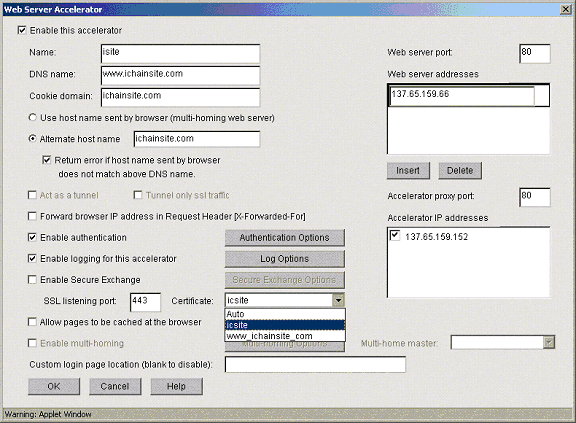
-
Use the Certificate drop-down menu to select the certificate you want imported or generated, then apply the changes you made.
Importing and Configuring the SAML Extension Server To Use the SSL Certificate
As you did in the signing key case, you must get the PKCS#12 file exported from eDirectory onto the local file system of the SAML extension server, then modify the SAML extension server's configuration file to use it.
To import the Signature Key file into the SAML extension server for use:
-
Copy the PKCS#12 file exported in the previous process to the local drive of the SAML extension server.
-
Modify the SAML extension server configuration file to point to this file.
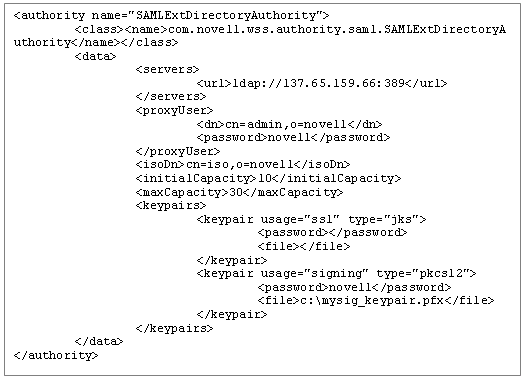
When you installed the SAML extension, a configuration file was automatically generated. This file is located at samlext_home/config/samlextConfig.xml. After modifying this file to handle the signing key, it should look like the Figure 101:
Figure 101File Modification for the Signing Key
Modify the signature keypair element with usage SSL to include the filename and password of the SSL key pair PKCS#12. In this example, you would modify the file to read as shown in Figure 102:
Figure 102Modifying the Signature Keypair Element
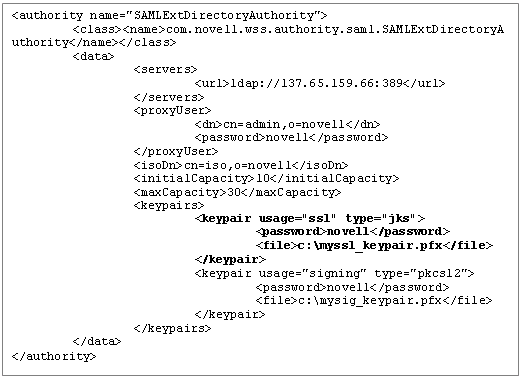
This assumes that you copied the exported PKCS#12 file to the SAML extension server as c:\myssl_keypair.pfx using a password of novell.
Exporting the SSL Public Key Certificate
In order for your partners to accept SSL connections from you, they must have and trust the public key associated with your SSL key pairs. You must export the public key certificates associated with the SSL Server and SSL Client certificates and send them to your Trusted Affiliate sites. SSL public key certificates are exported in the same way you exported the public key for your signing key pair.
Importing the Partner SSL Public Key Certificate
In order to create SSL connections with your Trusted Affiliate partner sites, you must import your SSL Server and SSL Client public key certificates into the iChain and Trusted Affiliate objects.
In order to import these certificates, you must first determine the name of the Trusted Roots container that iChain is using to hold its trusted roots certificate in. This value is determined by opening the Properties page of the iChainServiceObject. The Trusted Roots Container value on the General page shows the location of the appropriate Trusted Roots Container, as shown in Figure 103:
Figure 103Properties of the iChainServiceObject
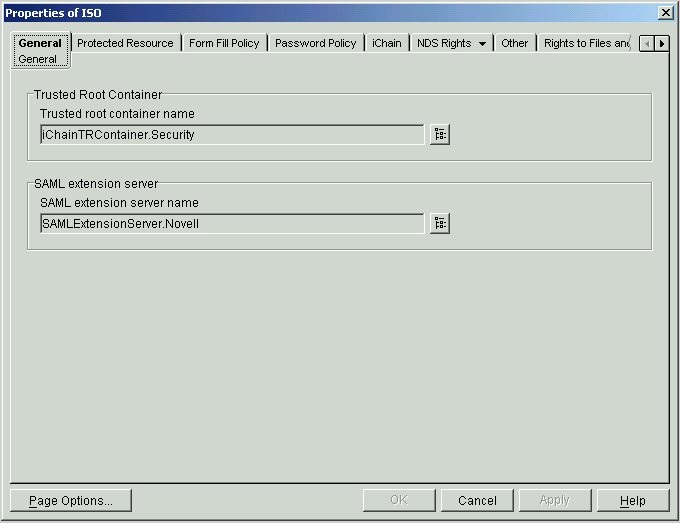
If the value has not yet been set; you can set it by selecting the Browse button on the right. If no Trusted Roots Container has been created, follow the steps outlined in Generating SAML Digital Signatures to create one.
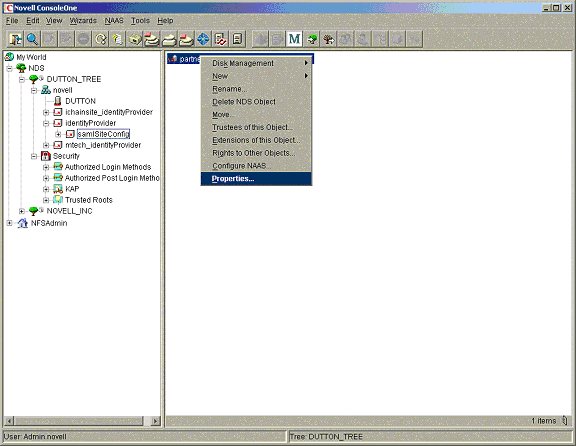
After you set the Trusted Roots Container name attribute in the iChainServiceObject, browse to the container and import the certificate, as outlined in the Generating SAML Digital Signatures.After importing the certificates into the appropriate Trusted Roots Container, you must configure the SAML extension server to use them. Access the appropriate Trusted Affiliate object (this is the Trusted Affiliate object associated with the certificates) and open its Properties page.
Figure 104Trusted Affiliate Object Properties
Select the General tab. Click the plus sign (+) button in the Secure SAML Communication group. Browse to the appropriate Trusted Roots Container and select the SSL certificates associated with this Trusted Affiliate.
Figure 105SSL Certificates Associated With the Trusted Affiliate
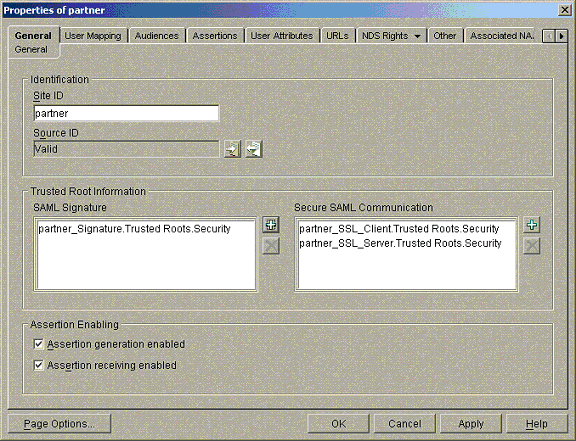
This example shows that two certificates have been associated with the Trusted Affiliate named partner. They are partner_SSL_Client.Trusted Roots.Security and partner_SSL_Server.Trusted Roots.Security. These two certificates are trusted by both the iChain server and SAML extension server for creating SSL connections.