4.2 Installing
Installing or upgrading the Novell SecureLogin in an LDAP directory environment requires you to extend the directory with Novell SecureLogin attributes.
You can access the executable ldapschema.exe file that is available in the Tools directory of the Novell SecureLogin installer package.
As an administrator, you must manually assign read and write access to the new Novell SecureLogin attributes. Because of a wide variety of LDAP-compliant directories, Novell SecureLogin does not provide a specific tool for assigning permissions to directory attributes.
4.2.1 Extending the eDirectory Schema
If you are installing a workstation that uses Novell eDirectory, do the following:
-
From your workstation, use Novell Client to log in to a tree as a admin from your workstation.
-
Extend the eDirectory schema by running ndsschema.exe.
This utility assigns rights, but ldapschema.exe does not.
The ndsschema.exe file is found in the \securelogin\tools directory of your Novell SecureLogin installer package.
4.2.2 Extending The LDAP Directory Schema
Do the following to extend the LDAP directory schemas from the server or the administration workstation.
If you have Novell SecureLogin versions 3.5 installed, you do not need to extend the Directory schemas, because the attributes are the same. However, for any new Directory objects, such as organizational units, you still need to assign rights.
In addition, if you copy the ldapschema.exe from the Novell SecureLogin installer package and run it from another location rather than running from the installer package, you need to copy the entire directory containing the LDAP schema files to the new location.
IMPORTANT:If you are using iManager to administer Novell SecureLogin, you must also extend the LDAP schema.
In the following example, the schema is extended on the server.
-
Log in to the server as administrator.
-
Run ldapschema.exe, which is found in the \securelogin\tools directory of the Novell SecureLogin installer package. The Novell SecureLogin - Active Directory Schema dialog box is displayed.
-
In the field, provide the IP address or the name of the LDAP server.
-
In the field, provide the distinguished name (DN) for the server administrator. For example,
CN=admin
-
Provide the password and select the relevant directory mode (in this example, ), then click .
The certificate information is displayed.
-
Click .
-
When the dialog box displayed, click .
The schema is now extended and rights are assigned to the server and replicated to all other servers.
Extending the directory schema adds the following six Novell SecureLogin attributes:
IMPORTANT:These mappings are case-sensitive. Extend the LDAP schema on all servers if you want them to act as failover servers.
4.2.3 Assigning Rights to Schema Attributes
You must assign permissions to objects in the directory to store data against the new Novell SecureLogin attributes. Assign permissions to all objects that access Novell SecureLogin Assigned User Rights.
The application does not start if you have not set permission to access Novell SecureLogin schema attributes.
NOTE:LDAP implementations are varied. Therefore, Novell SecureLogin does not provide a specific tool for each variation for assigning permissions.
The following permissions are recommended for successful implementation:
-
Novell SecureLogin administrators are assigned read and write access to all Novell SecureLogin attributes on all objects.
-
Users are assigned read and write access to all Novell SecureLogin attributes on their user objects.
-
Users are assigned read access to the Novell SecureLogin attributes on organizational units from which they need to read organizational policies or corporate settings.
4.2.4 Installing Novell SecureLogin in LDAP Mode With eDirectory
The LDAP option installs Novell SecureLogin into LDAP v3 directory environments (for example, Novell eDirectory 8.5 or later).
You can specify more than one LDAP server for the Novell SecureLogin installation. Although the dialog box in the installation program only allows you to specify one LDAP server, you can specify additional servers by modifying the automate.ini file.
The LDAP option does not require the Novell Client for Windows. However, if Novell Client32™ is installed on the workstation, Client32 is the initial authentication or GINA. If you want LDAP authentication to be the initial authenticator, you must uninstall Novell Client32.
Using the Complete Option for LDAP on eDirectory
The option uses default values and installs Novell SecureLogin in c:\program files\novell\securelogin. Refer to Using the Custom Option for LDAP on eDirectory or options available through the option.
-
Run Novell SecureLogin.msi found in the securelogin/client directory of the installer package.
-
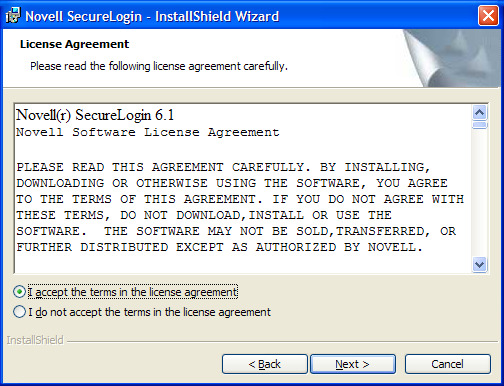
Accept the license agreement. Click .
-
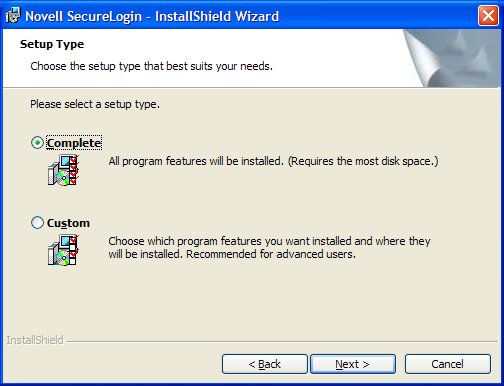
Select , then click .
-
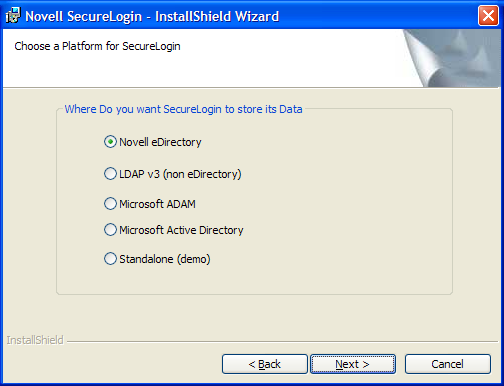
Select as the platform where SecureLogin stores its data, then click .
-
Select as the protocol.
LDAP is recommended if the Novell Client is not installed or if LDAP was previously installed but you are overwriting that installation (even if the Novell Client is already installed).
NOTE:The above graphic is displayed only if you have Novell Client for Windows installed on your machine. Otherwise, LDAP is auto-selected as the protocol.

-
Select when to log in to LDAP, then click .
NOTE:If the workstation is running Novell Client software, the option is not provided and the primary authentication is always done through the Novell Client.
In the complete mode of installation, the install takes the default values and proceeds with the installation. If the Novell Client is installed, the default Account association is Novell Client association. If you do not have not Novell Client installed, the default Account association is Windows association.
However, if you want to associate the Account association to Novell Client, change the registry setting in hklm/software/novell/login/ldap as follows:
DoNTAssoc REG_SZ 1
DoClient32Assoc REG_SZ 0

-
Specify the LDAP server address.

-
(Conditional) If you do not want to use smart card, select click then continue with Step 10.
-
(Conditional) If you want to use smart card and if ActiveClient is detected in your system, select Click click then continue with Step 10.
-
(Conditional) If you want to use smart card and if ActiveClient is not detected in your system:

-
Select then click
-
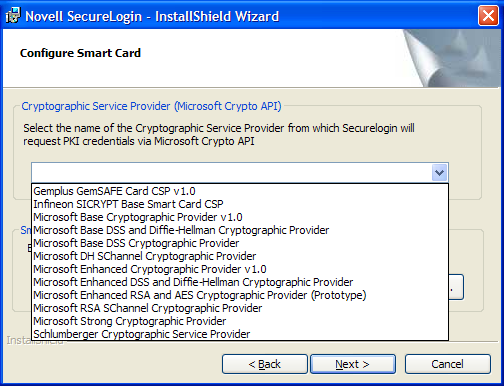
Select a cryptographic service provider from which SecureLogin will request PKI credentials via the Microsoft Crypto API.
-
Select a PKCS#11 compatible library required for accessing the smart card, then click .
This specifies the location of the Cryptographic Token Interface installed as part of the smart card vendor’s software. These API files are used by SecureLogin to communicate with the smart card.
Manually configuring the third-party smart card PKCS library assumes a high level of understanding of the Cryptographic Service Provider’s product.
For more information and instructions on smart card settings and cryptographic tokens, see the Novell SecureLogin 6.1 SP1 Administration Guide.
-
-
Select whether SecureLogin is to install the SecretStore client, the NMAS™ client, or both, then click .
NOTE:Select Novell SecretStore only if SecretStore is installed on a server. For information on SecretStore, see the SecretStore Administration Guide
The Novell SecretStore option installs the SecretStore client, which provides additional security. If you deselect this option and want to install it later, you must uninstall SecureLogin, then run the SecureLogin installation again.
However, if you install the SecretStore client and then later run the install program and deselect the SecretStore client, you will cause problems with the directory cache. All the credential sets that are stored in SecretStore will be unavailable to the eDirectory client. Nevertheless, as long as the local cache is enabled, you can still run SecureLogin. The local cache populates the eDirectory cache.
The uninstall program does not delete user credentials.
The Novell NMAS Client option installs the NMAS client. SecureLogin uses this option with the AAVerify command, to enable advanced authentication access to an application and also for NMAS authentication using LDAP.
-
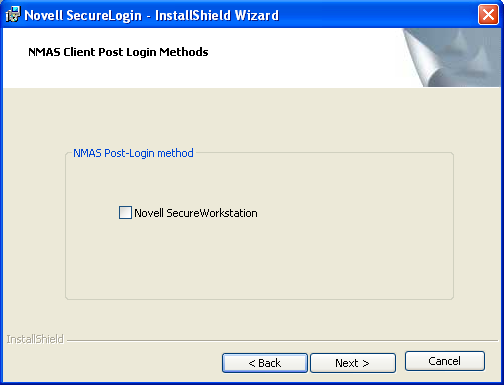
(Conditional) If you selected the NMAS client, select one or more NMAS login methods, then click .
Here, selecting the option is mandatory if Universal Password is not created or configured in eDirectory.
-
Select post-login methods, then click .
-
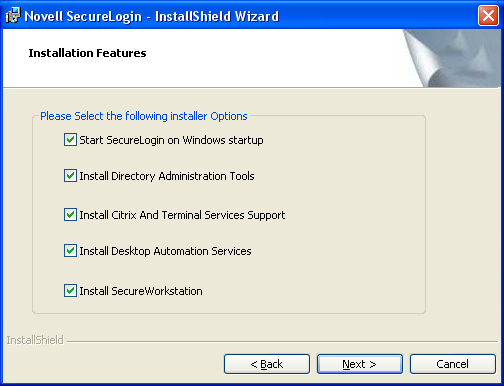
Select the installation features. Click .
-
Click . The Ready to Install the Program dialog box is displayed.
-
Click .
-
Click . By default, theoption is selected.
-
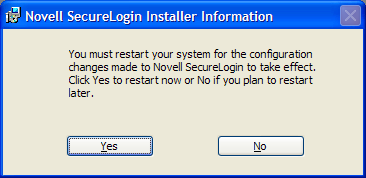
Specify when you want to restart the computer, then click .
Using the Custom Option for LDAP on eDirectory
The option provides the same defaults as does the option, but enables you to do the following:
-
Specify LDAP server information.
-
Specify a path for SecureLogin’s local cache.
The user profile directory is the default path.
User profiles for Windows 2000 and Windows XP are in located in Documents and Settings\Username.
User profiles for Windows Vista are in c:\users username.
-
Select the SecureLogin components.
The Description panel provides information about a component that you select.
4.2.5 Installing Novell SecureLogin in LDAP Mode Without eDirectory
The LDAP option installs SecureLogin into LDAP v3 directory environments.
You can specify more than one LDAP server for the SecureLogin installation. Although the dialog box in the installation program only allows you to specify one LDAP server, you can specify additional servers by modifying the automate.ini file.
Using the Complete Option for LDAP without eDirectory
The option uses default values and installs Novell SecureLogin in c:\program files\novell\securelogin. Refer to Using the Custom Option for LDAP Without eDirectory for options available through the option.
-
Run Novell SecureLogin.msi, found in the Securelogin\Client directory of the installer package. The Welcome page is displayed.
-
Click . The license agreement page is displayed.
-
Accept the license agreement, then click .
-
Select , then click .
-
Select as the platform where SecureLogin stores its data, then click .
-
Select when to log in to LDAP, then click .
The option is called the credential manager mode.
-
Configure a workstation to use the LDAP GINA as the primary authentication:
-
If the Novell Client is installed on the workstation, remove it.
-
During the SecureLogin installation, select the option and the option.
-
-
In the Ready to Install SecureLogin dialog box, click .
-
Click , click , then restart the computer by clicking .
-
After the computer restarts, log in to LDAP before SecureLogin starts, then provide necessary information.
The first time that you log in to LDAP, you need to provide the server’s IP address and the port number.
New users must also provide a passphrase question and answer.
Using the Custom Option for LDAP Without eDirectory
The option provides the same defaults as does the option, but enables you to do the following:
-
Specify a folder where SecureLogin will be installed.
-
Specify whether to associate your Windows username with your LDAP distinguished name, if LDAP is installed in the Credential Manager mode.
-
Specify an LDAP server address and port.
As an Internet standard, LDAP does not require more than a TCP/IP protocol installation on a client workstation. When using the LDAP connectivity option, the user must provide LDAP server information during the first login. For subsequent logins, this information is automatically saved and entered into the login dialog box.
You must provide users with the following:
-
The registered DNS name or IP address
-
The TCP port for Secure LDAP
By default, this is port 636. When entered, it is saved in the workstation's registry for subsequent logins.
NOTE:When you select the option, the administrator or the user can provide this information during installation.
-
-
The name (ldapauthserver) that appears in the field is a placeholder name. Specify a server name or IP address.
-
Specify a path for Novell SecureLogin’s local cache.
-
The user profile directory is the default path.
User profiles for Windows 2000 and Windows XP are located in Documents and Settings\Username.
User profiles for Windows Vista are in c:\users username.
-
Select Novell SecureLogin components.
The Description panel provides information about a component that you select.
-
Click .
-
Select options for starting Novell SecureLogin.
If you select , make sure to reboot your computer before you start SecureLogin. If you select , your computer is automatically restarted.